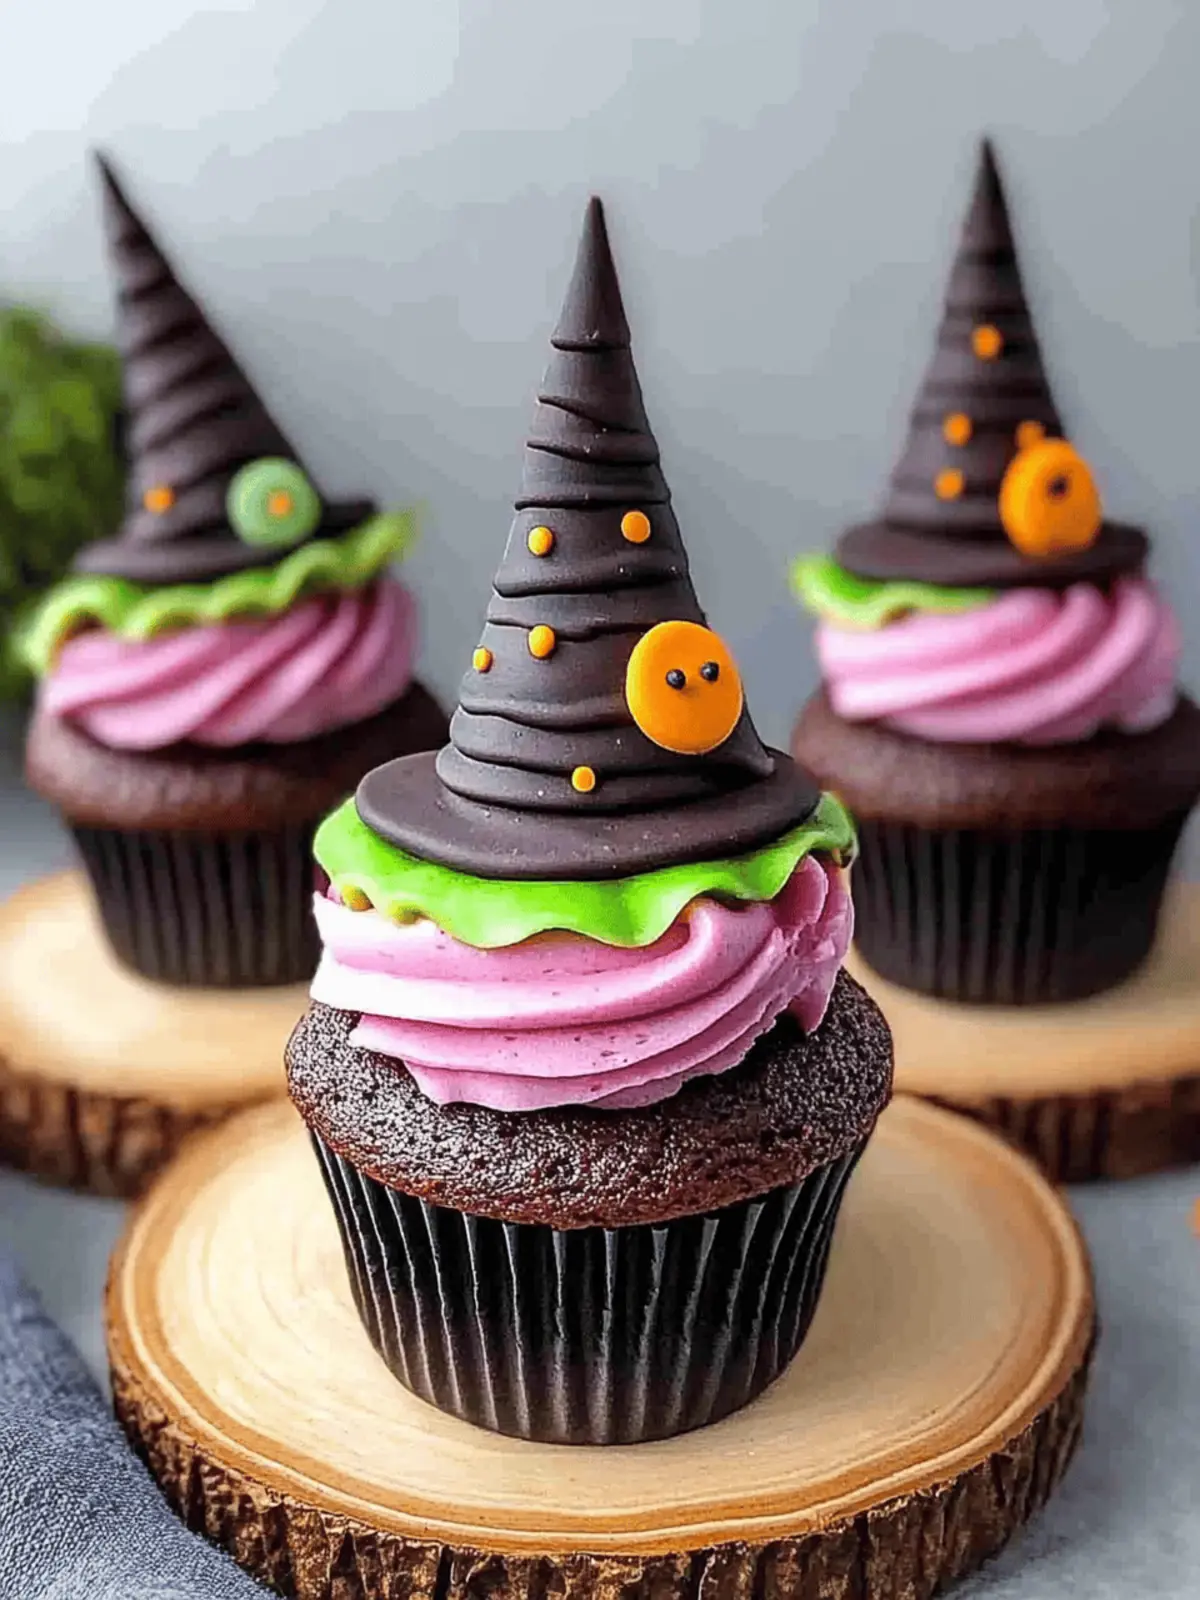
As the leaves turn vibrant shades of orange and the air gets crisp, Halloween whispers sweet delights and spooky surprises. Imagine a scene where kids giggle and adults smile at a table adorned with treats that capture the essence of the season. That’s where my Witch Hat Cupcakes come in! These whimsical cupcakes are not only a feast for the eyes but a delicious treat that’s bound to become the star of any Halloween gathering.
With a fluffy cupcake base and creamy, colorful frosting topped with adorable chocolate-coated sugar cones, they’re deceptively simple to make and perfect for both seasoned bakers and those looking to craft something special. The combination of flavors and festive presentation makes these cupcakes a crowd-pleaser, whether at a party, a cozy family gathering, or even just a fun weekend baking adventure at home. So, roll up your sleeves and join me in creating these enchanting treats that will surely ignite the spirit of the season!

Why Love These Witch Hat Cupcakes?
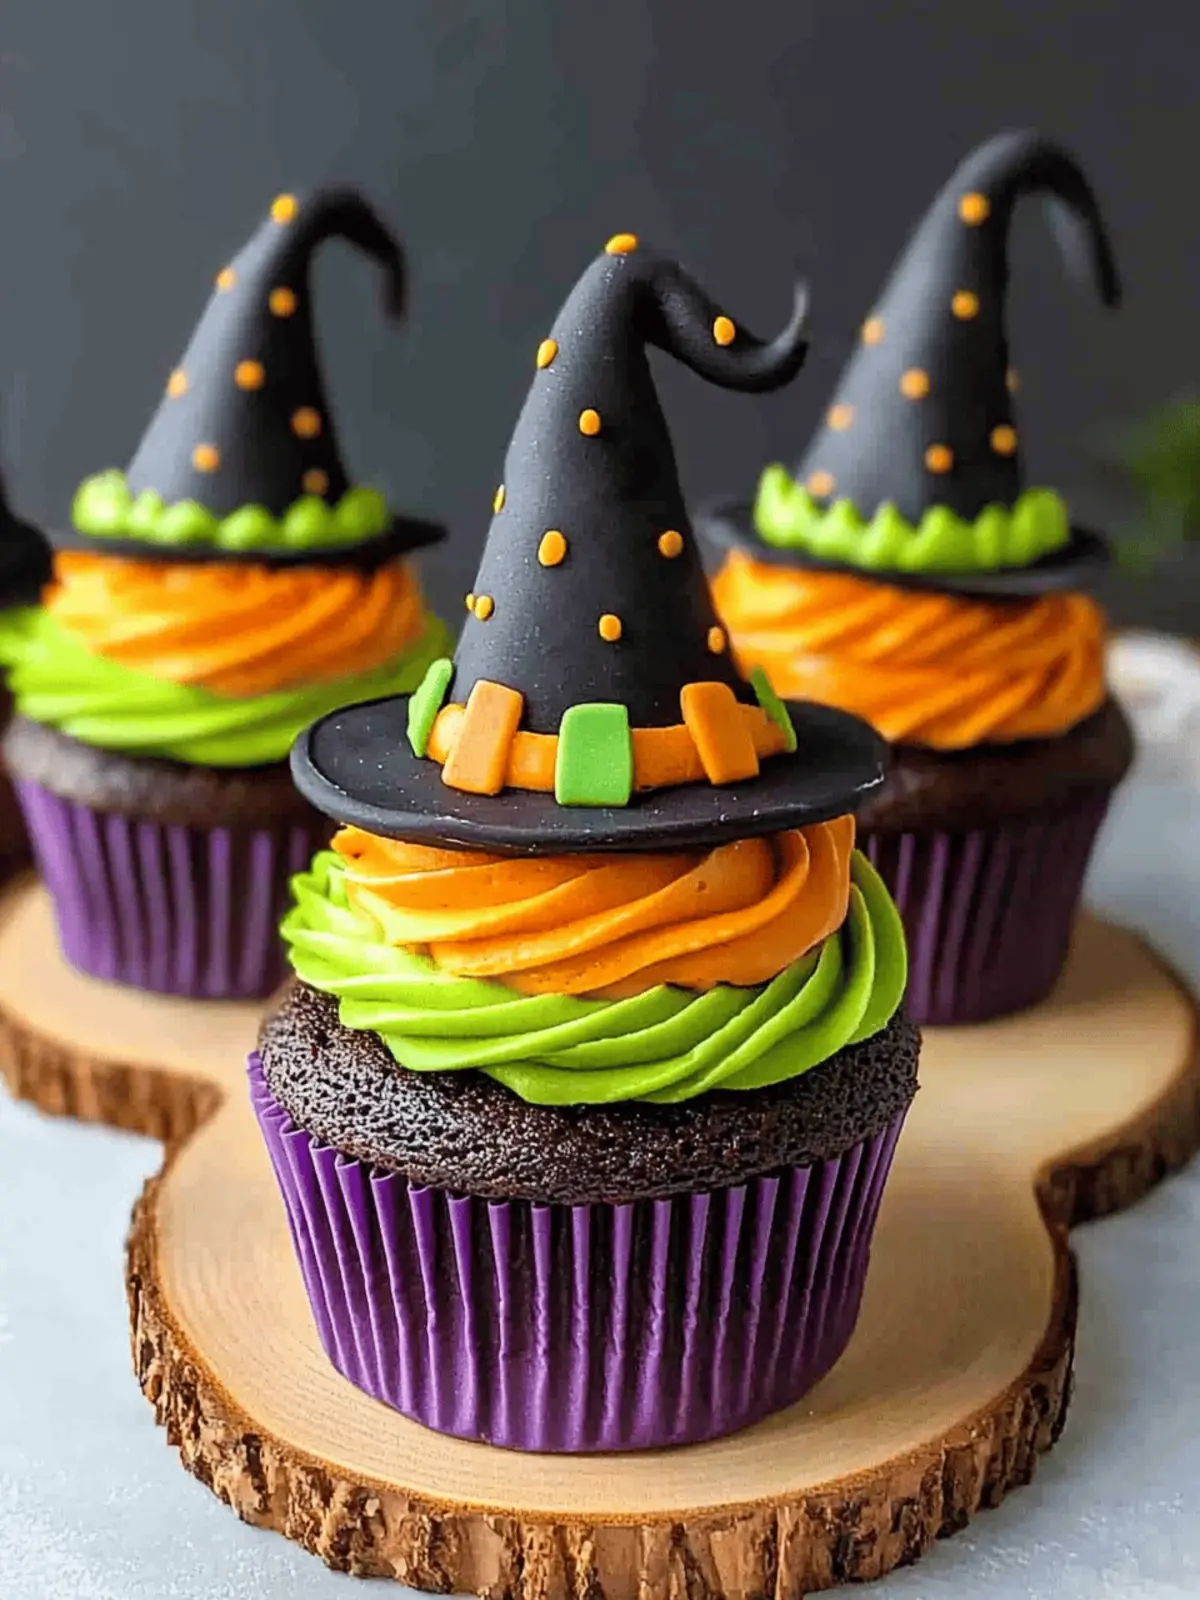
Whimsical charm abounds with each bite of these delightfully spooky cupcakes, perfect for Halloween festivities. Simple to make, you can whip them up with minimal fuss, making this recipe ideal for bakers of all skill levels. Festive flair arises from the cute chocolate hats, ensuring they steal the spotlight at any gathering. Creative customization allows for gluten-free options or mixing flavors to suit your taste. Plus, time-saving assembly means you can prepare the hats ahead of time, so you’re ready to impress friends and family. Make your Halloween celebrations unforgettable with these charming treats that everyone will adore!
Witch Hat Cupcake Ingredients
For the Cupcakes
• Cupcake Mix – A ready-to-use base that saves you time; opt for a gluten-free option if needed.
• Eggs – Large eggs add moisture and structure for a fluffy texture.
• Butter – Richness is key; feel free to substitute with oil for a lighter feel.
For the Frosting
• Frosting (Buttercream) – Creates that sweet, creamy layer on top; whip it well for the best fluffiness.
• Gel Food Coloring – Use it to achieve a vibrant green; remember, less is more with gel.
For the Witch Hats
• Sugar Cones – These form the base of the witches’ hats; choose fresh ones to hold the chocolate coating.
• Chocolate (for coating cones) – Melting chocolate provides a tasty, smooth finish for the hats.
With these Witch Hat Cupcakes ingredients, you’re set to create some spooktacular treats that are not only beautiful but absolutely delicious!
How to Make Witch Hat Cupcakes
-
Preheat and Prepare: Begin by preheating your oven to 350°F (175°C) and lining your muffin tins with festive cupcake liners to add a touch of Halloween spirit.
-
Mix the Batter: In a large mixing bowl, combine your cupcake mix, eggs, and softened butter. Stir until just combined; it’s okay if a few lumps remain as overmixing can lead to tough cupcakes.
-
Bake: Fill each cupcake liner about two-thirds full with the batter. Bake for 18-20 minutes, or until a toothpick inserted into the center comes out clean. Let the cupcakes cool completely on a wire rack.
-
Prepare the Frosting: While the cupcakes cool, whip together your butter and gradually add in powdered sugar and a splash of milk. Mix until light and fluffy, then add in gel food coloring to reach your desired shade of green.
-
Make the Witch Hats: Melt your chocolate in a microwave-safe bowl, heating in 30-second increments until smooth. Dip each sugar cone into the melted chocolate, allowing excess to drip off, and place on a parchment-lined tray to set.
-
Frost the Cupcakes: Once the cupcakes are cool, generously pipe or spread the fluffy buttercream frosting onto each one, creating a lovely mound.
-
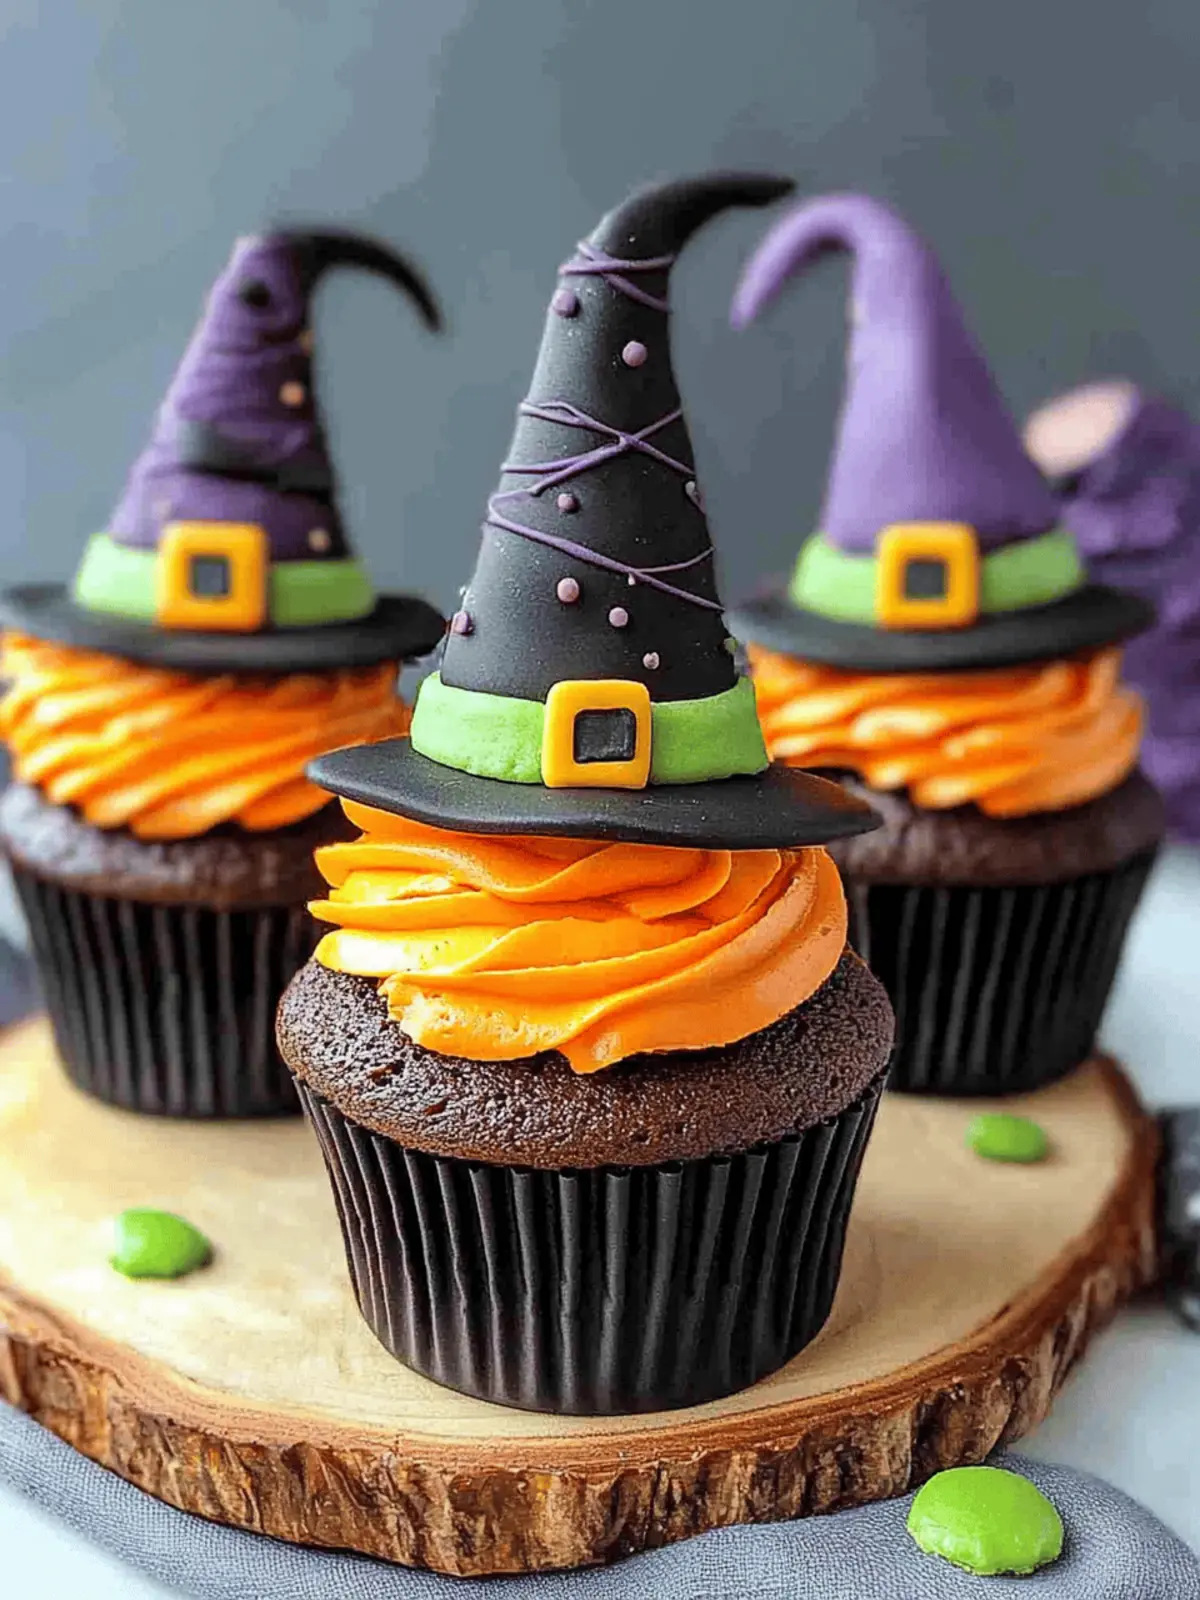
Assemble the Hats: Carefully place the chocolate-coated sugar cones atop the frosted cupcakes, pressing down gently to secure them and create your whimsical witch hats.
Optional: Sprinkle edible glitter on the frosting for an extra-special Halloween sparkle!
Exact quantities are listed in the recipe card below.
Witch Hat Cupcake Variations
Feel free to get creative with these cupcakes and make them your own with fun twists and swaps!
-
Gluten-Free: Substitute regular cupcake mix with gluten-free blend to make these treats accessible for everyone.
-
Flavorful Options: Swap out the standard vanilla cake mix for chocolate or spiced cake mixes for a delightful twist. Rich chocolate pairs perfectly with the whimsical theme!
-
Decorative Boost: Add edible glitter or Halloween-themed sprinkles on top of the frosting for an extra festive sparkle.
-
Different Frosting: Try cream cheese frosting instead of buttercream for a tangy flavor contrast that beautifully complements the sweetness of the cupcake.
-
Alternative Cones: Use round cookie wafers instead of sugar cones for a unique look, and make smaller cupcakes with a different shape of hat.
-
Fruity Touch: Mix in some fruit puree or mashed banana into the cupcake batter for a surprising burst of flavor that keeps the cupcakes moist.
-
Spicy Kick: Add a pinch of cinnamon or pumpkin spice to the batter for a warm aroma that echoes the essence of fall. It’s a comfy, familiar taste for cool Halloween nights.
-
Sugar-Free Option: Consider using sugar substitutes for the frosting to make a healthier alternative without losing the festive flavor.
Let your imagination run wild and create a spellbinding batch of Witch Hat Cupcakes perfect for your Halloween gatherings!
How to Store and Freeze Witch Hat Cupcakes
-
Room Temperature: Store cupcakes in an airtight container at room temperature for up to 3 days. They’ll stay fresh and delicious, ready for your Halloween festivities!
-
Fridge: If you prefer a longer shelf life, keep them in the fridge for up to 5 days. Just ensure they’re sealed tightly to prevent drying out.
-
Freezer: For longer storage, freeze the cupcakes (without the hats) in a single layer for up to 2 months. Wrap them tightly in plastic wrap and place in a freezer-safe container.
-
Reheating: Allow frozen cupcakes to thaw in the fridge overnight, then bring them to room temperature before frosting. Add the witch hats right before serving for a fresh, delightful treat!
What to Serve with Witch Hat Cupcakes?
As you gather around the table to celebrate Halloween, think about complementing those enchanting treats with delightful pairings that’ll elevate your festive gathering.
- Sparkling Cider: The crisp, bubbly nature of sparkling cider pairs beautifully with the sweetness of the cupcakes, making it a refreshing choice.
- Mini Quiches: These savory bites provide a lovely contrast to the sweetness of the cupcakes, ensuring a balanced spread everyone will enjoy.
- Vegetable Skewers: Fresh, colorful veggies on skewers add a crunchy texture and a healthy touch, perfect for balancing out the Halloween treats.
- Halloween-Themed Cookies: Keep the festive spirit alive with themed cookies that add whimsy and variety, delighting guests of all ages with every bite.
- Chocolate Milk: Rich and creamy, chocolate milk is a childhood favorite that pairs wonderfully with sweets, making it a nostalgic choice for all.
- Candy Corn: Nothing says Halloween like candy corn; their vibrant colors and sweetness make them an iconic treat that complements the whimsical cupcakes.
- Pumpkin Spice Latte: For adults, this seasonal favorite adds a warm, cozy flavor that blends perfectly with the Halloween theme.
- Spooky Fruit Salad: A mix of seasonal fruits can add a refreshing, sweet contrast to the cupcakes, lightening up the dessert table.
These pairings will create a festive spread that captures the essence of Halloween while ensuring your Witch Hat Cupcakes shine brightly!
Expert Tips for Witch Hat Cupcakes
-
Mix Carefully: Avoid overmixing the batter, which can lead to dense cupcakes. Stir until just combined for that light fluffy texture.
-
Check Doneness: Use a toothpick to test for doneness. Remove cupcakes from the oven when the toothpick comes out clean, ensuring they stay moist.
-
Color with Care: When adding gel food coloring to your frosting, start with a small amount. You can always add more to achieve your desired shade!
-
Cool Completely: Allow cupcakes to cool fully before frosting to prevent the frosting from melting. This is key to keeping your witch hats looking adorable.
-
Hat Assembly: Make sure the chocolate on your cones is fully set before placing them on the cupcakes. If they’re too soft, refrigerating them briefly will help maintain the perfect shape.
These Witch Hat Cupcakes are sure to be the highlight of your Halloween festivities!
Make Ahead Options
These Witch Hat Cupcakes are perfect for meal prep, saving you time on busy days! You can bake the cupcakes and prepare the frosting up to 24 hours in advance. Simply allow the cupcakes to cool completely, then store them in an airtight container at room temperature to keep them fresh. You can also make the chocolate-coated sugar cones ahead; once set, place them in a separate container and refrigerate to maintain their crunch. When you’re ready to serve, frost the cupcakes and top them with the witch hats just before your guests arrive to ensure they look as delightful as they taste. This way, you’ll have festive treats ready to impress with minimal effort!
Witch Hat Cupcakes Recipe FAQs
How do I choose the right cupcake mix for my Witch Hat Cupcakes?
Absolutely! For your Witch Hat Cupcakes, I recommend selecting a good quality cupcake mix that suits your taste. If you’re looking for a gluten-free option, many brands now offer gluten-free cake mixes that work wonderfully. Just make sure to read the instructions and follow them closely for the best results!
What is the best way to store my Witch Hat Cupcakes?
To keep your cupcakes fresh, store them in an airtight container at room temperature for up to 3 days. They can also stay in the fridge for about 5 days if you’d like a longer shelf life; just be sure they’re sealed well to avoid drying out.
Can I freeze Witch Hat Cupcakes for later?
Yes, you can! To freeze your Witch Hat Cupcakes, first remove the sugar cone hats (they don’t freeze well). Wrap the cupcakes tightly in plastic wrap, then place them in a freezer-safe container. They can be stored for up to 2 months. When you’re ready to enjoy them, thaw in the fridge overnight, bring to room temperature, and then top with fresh chocolate-coated cones!
What should I do if my frosting is too runny?
Very good question! If your frosting turns out too runny, it’s typically due to too much liquid. To fix this, gradually add more powdered sugar until you reach a thicker consistency. If you’re looking for a fluffier texture, try re-whipping the buttercream frosting for a few more minutes; it can make a delightful difference!
Are these Witch Hat Cupcakes safe for pets and allergies?
It’s always wise to check for allergies! These Witch Hat Cupcakes contain ingredients like eggs, butter, and sugar, which aren’t suitable for pets like dogs and cats. If you have guests with allergies, consider substituting common allergens (like using a dairy-free butter alternative) and ensuring your cupcake mix is nut-free. Always read ingredient labels to be sure!
How can I add a personal touch to my Witch Hat Cupcakes?
Get creative! You can customize your Witch Hat Cupcakes by adding edible glitter or colorful sprinkles on top before placing the witch hats. You could even use different flavors of cake mix or change the frosting color to match your Halloween theme. The more the merrier with decoration and flavor variation!
Witch Hat Cupcakes that Make Halloween Spooktacular and Fun
Ingredients
Equipment
Method
- Preheat your oven to 350°F (175°C) and line muffin tins with cupcake liners.
- Combine cupcake mix, eggs, and softened butter in a large mixing bowl and stir until just combined.
- Fill each cupcake liner two-thirds full with batter and bake for 18-20 minutes.
- Allow cupcakes to cool completely on a wire rack.
- While cooling, whip together butter, powdered sugar, and milk, then add food coloring.
- Melt chocolate in a bowl, dip sugar cones into chocolate, and place on a tray to set.
- Once cupcakes are cool, frost each with the buttercream frosting.
- Assemble hats by placing chocolate-coated cones on the frosted cupcakes.