As the leaves turn and the air becomes crisp, Halloween excitement begins to brew in my kitchen. There’s something delightfully whimsical about crafting snacks shaped like friendly ghosts, especially when they require only three ingredients and just 15 minutes of your time. I first tossed together these Spooky Baked Halloween Chips on a whim, hoping to whip up a quick treat for a gathering. The result was not only adorable but perfectly crispy and ready for dipping!
Whether you’re hosting a Halloween party or simply looking to ditch the fast-food routine, these gluten-free and paleo-friendly chips will have everyone reaching for more. Imagine the joy on your little ones’ faces as they munch on these fun, ghost-shaped snacks, or the delight of your friends as you present them with a festive dish that’s as easy as it is delicious. Ready to turn your kitchen into a Halloween haven? Let’s dive into this simple and scrumptious recipe!

Why are Spooky Baked Halloween Chips a must-try?
Quick and Easy: With just 3 ingredients, these chips are a snap to prepare and bake in 15 minutes!
Healthy Twist: Perfect for gluten-free and paleo diets, making them a guilt-free treat for everyone.
Kid-Friendly Fun: Shape them like ghosts to delight the little ones, ensuring your Halloween snacking is extra special.
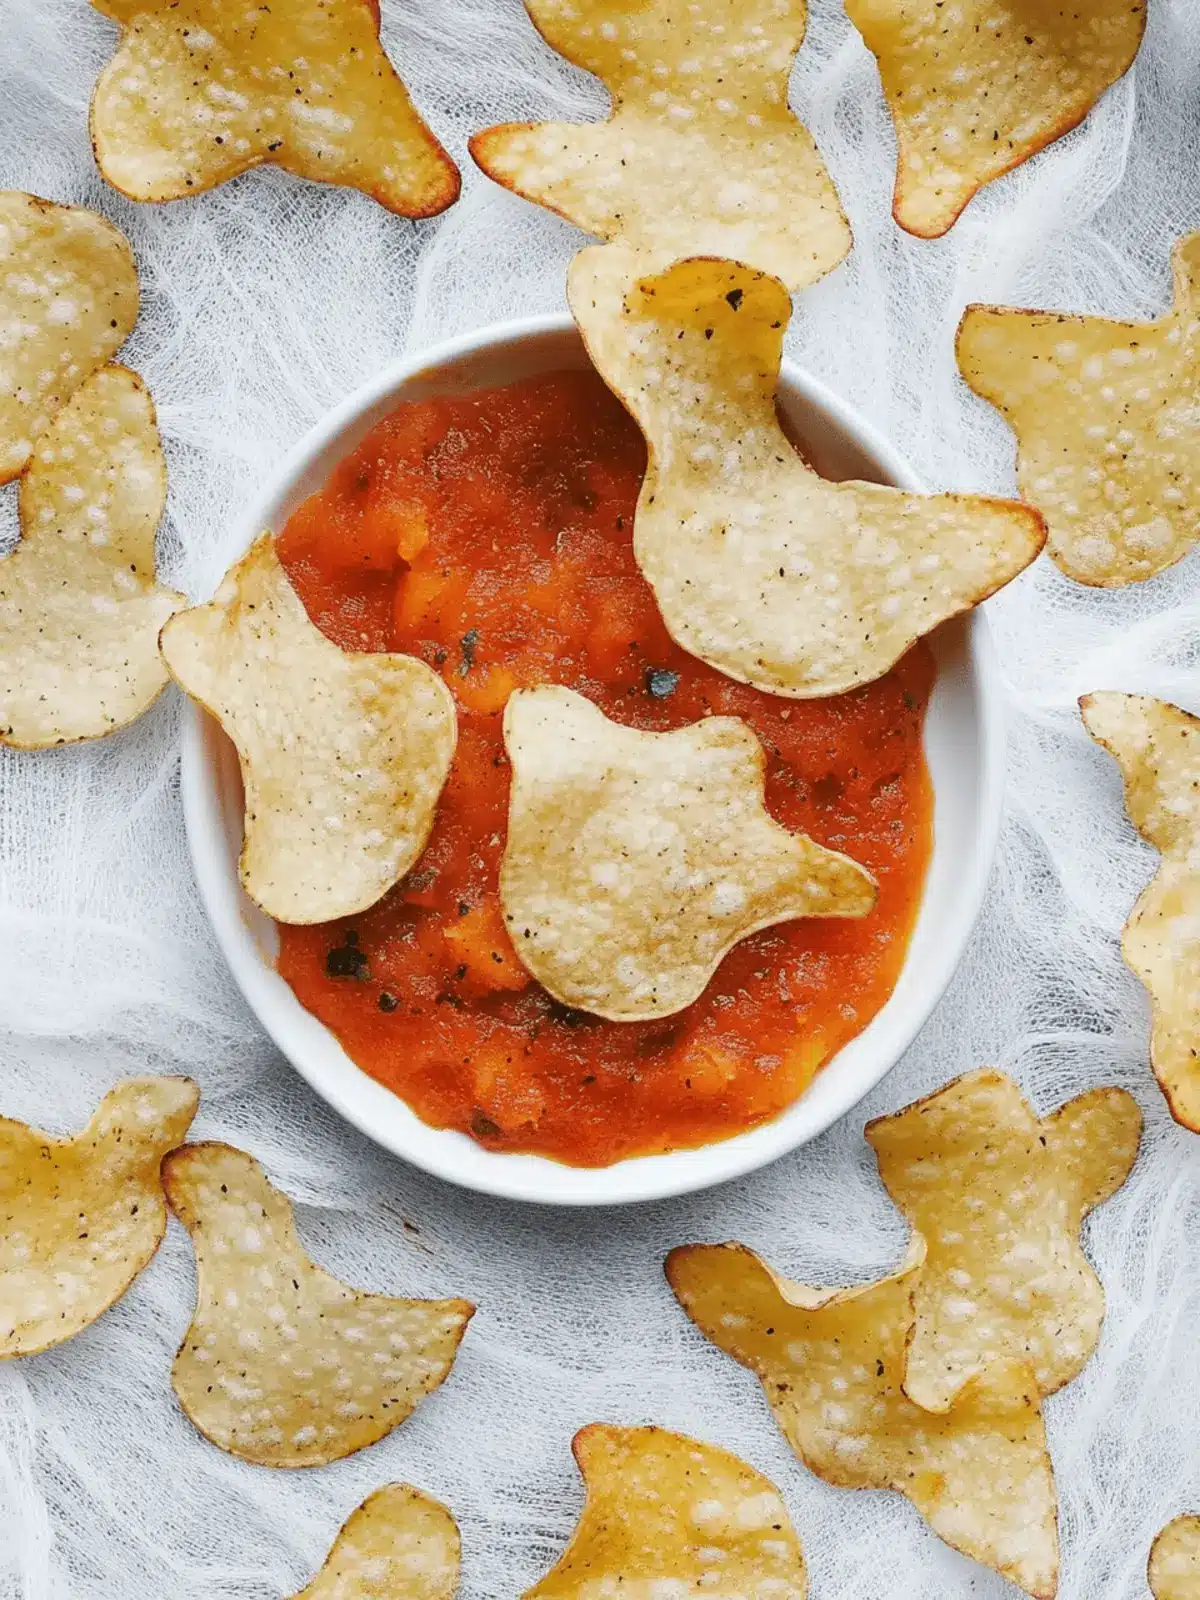
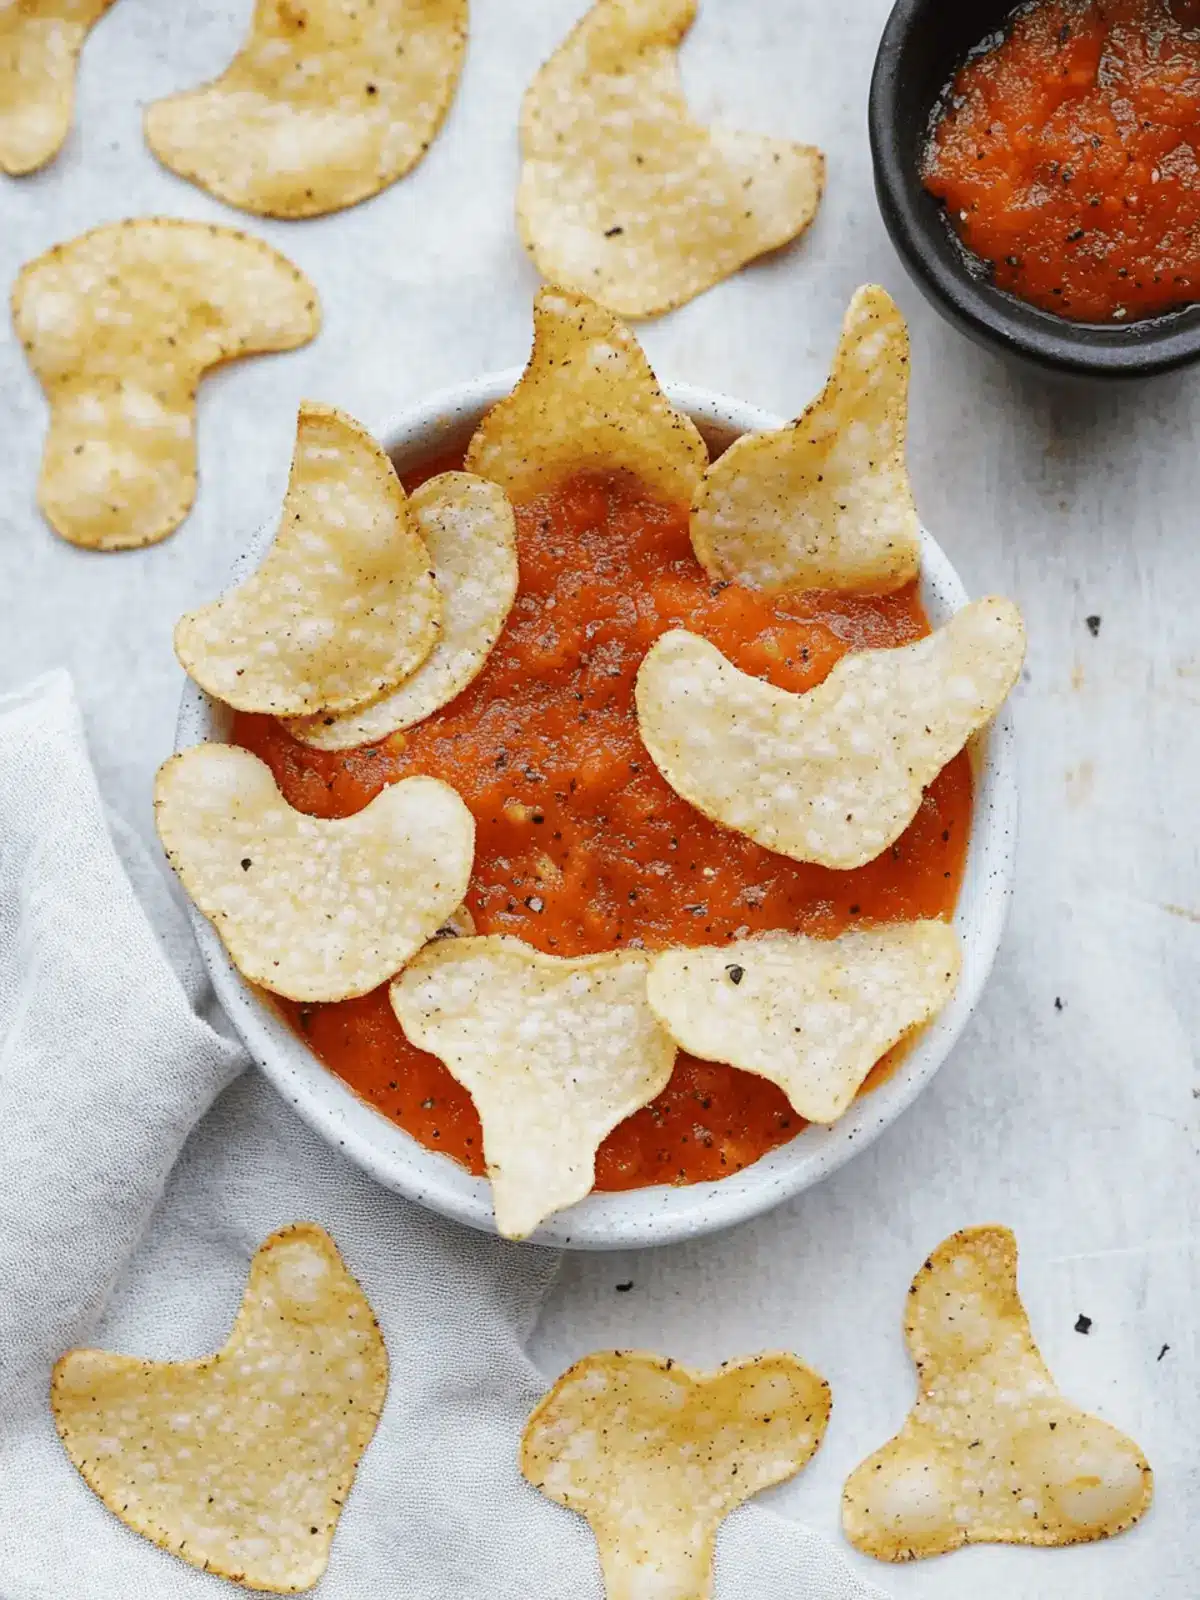
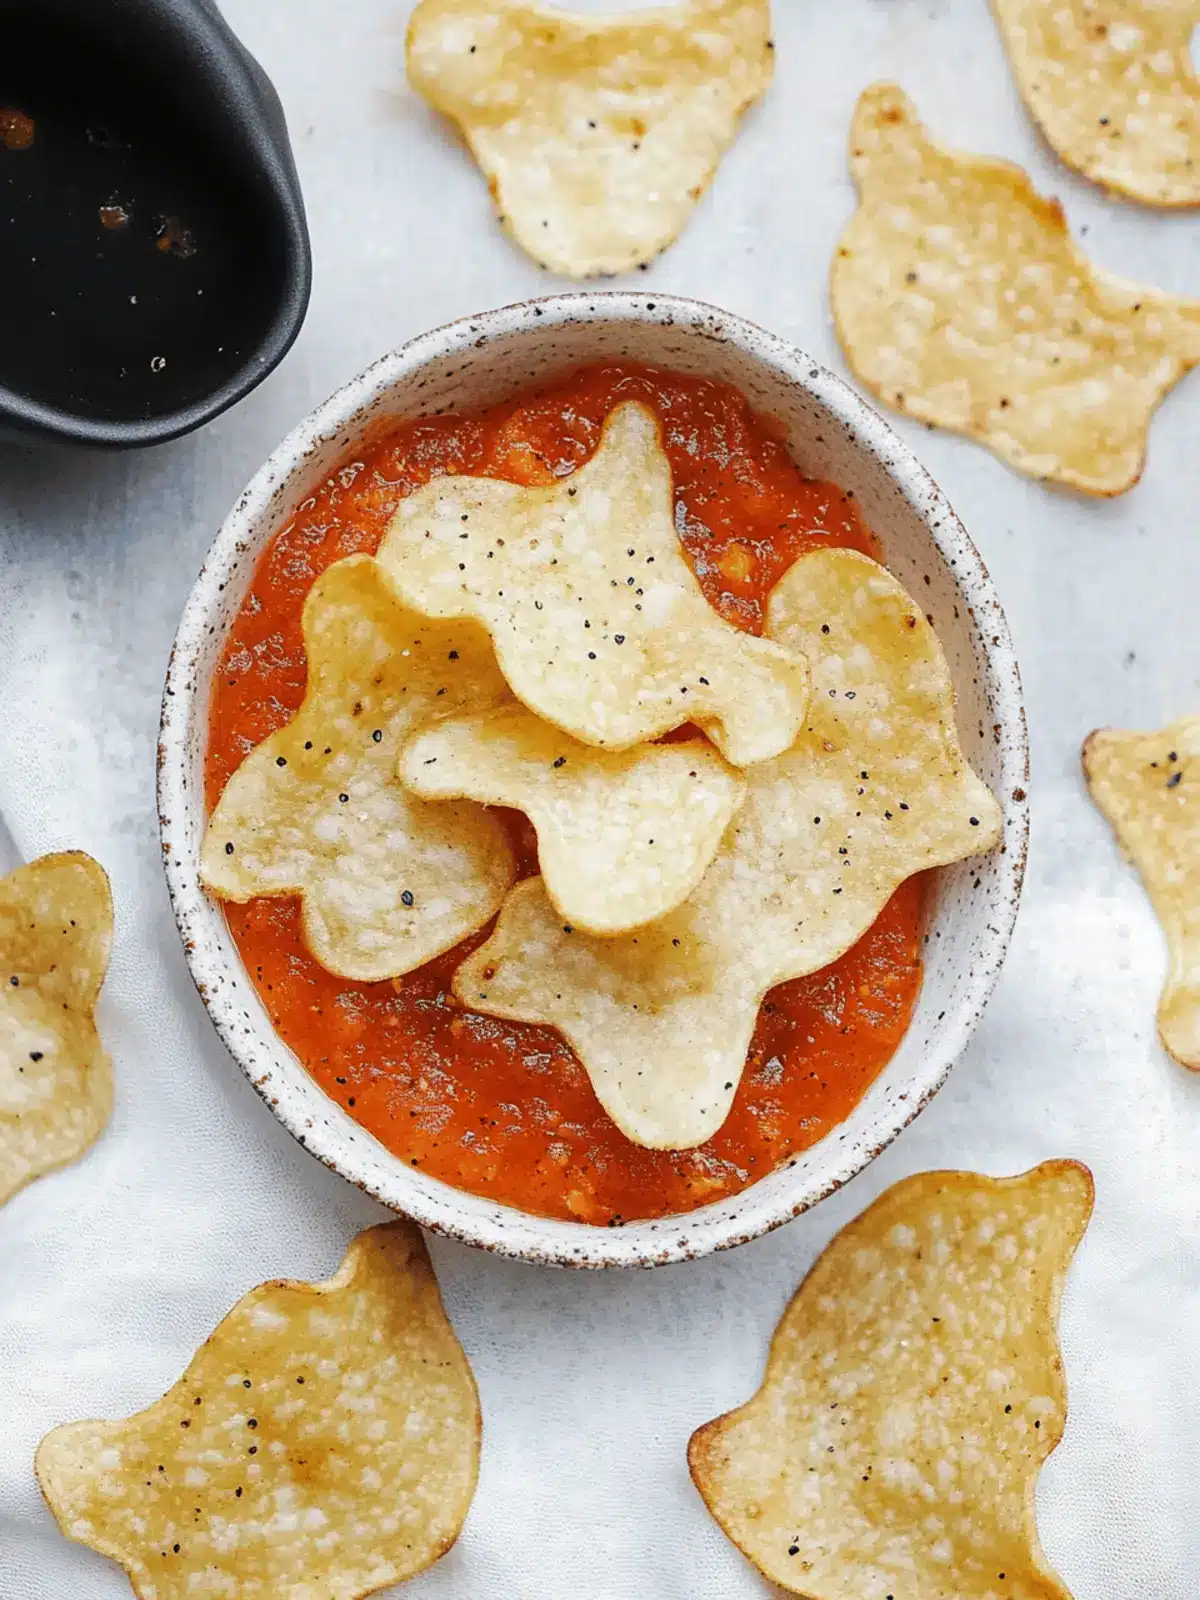
Versatile Pairing: Serve with your favorite dips like guacamole or salsa for a festive touch that’s perfect for gatherings.
Minimal Waste: Use flour tortillas for less scrap waste and bake any leftover pieces for bonus crunchy toppings!
These delicious chips bring a festive flair to your table, so grab your cutter and get ready for some spooky fun!
Spooky Baked Halloween Chips Ingredients
For the Chips
• Tortillas – Use gluten-free tortillas for a perfect base; they allow for easily formed ghost shapes with minimal waste.
• Oil – Enhances crispiness; opt for olive oil or avocado oil spray for a healthier alternative.
• Salt – Gives the chips flavor; consider using flavored salts for a fun twist, like garlic or chili salt.
Enjoy crafting your Spooky Baked Halloween Chips into a deliciously crispy ghostly treat!
How to Make Spooky Baked Halloween Chips
-
Preheat your oven to 350°F (175°C) to prepare for these delightful ghostly treats. This temperature ensures that your chips achieve the perfect crunchiness without burning.
-
Cut tortillas into ghost shapes using a cookie cutter. Have fun with this step! The more playful the shapes, the more enticing your chips will be for both kids and adults.
-
Arrange the ghost-shaped tortillas on a baking sheet, making sure to space them out a little. This allows hot air to circulate and helps them bake evenly for that satisfying crisp.
-
Spray or brush the tortillas lightly with oil and sprinkle them with salt to enhance their flavor. This step is key for achieving that irresistible golden crust!
-
Bake for 5-7 minutes, watching closely until the chips are golden and crispy. Keep an eye on them; we want perfectly baked chips, not burnt ones!
-
Cool slightly before serving to give them just the right amount of crunch. This will make them a soothing snack that’s not too hot to bite into!
Optional: Serve these chips with guacamole or a festive salsa for an extra delicious treat!
Exact quantities are listed in the recipe card below.
What to Serve with Spooky Baked Halloween Chips?
These delightful ghost-shaped chips are the perfect way to elevate your Halloween snacking experience while bringing warmth and joy to your gathering.
-
Guacamole: Creamy and rich, guacamole adds a refreshing contrast to the crispy chips, making for a delightful dip that kids and adults adore.
-
Pumpkin Chili: A hearty bowl of pumpkin chili offers warm flavors and spices that perfectly complement the light, airy crunch of your Halloween chips. It’s a festive treat that brings everyone together.
-
Salsa: Fresh, zesty salsa adds brightness and a burst of flavor, enhancing both the taste and visual appeal of your spooky snacks. Pairing them is simply a match made in Halloween heaven!
-
Creamy Hummus: Nutty and smooth, hummus introduces an earthy element that harmonizes beautifully with the crunchy chips, perfect for a nutritious and delicious choice.
-
Cheese Dip: Melted cheese dip elevates the experience, adding gooey richness and comfort that will have everyone reaching back for more.
-
Apple Slices with Caramel Sauce: For a sweet touch, serve crisp apple slices with caramel sauce, offering a contrast of fresh fruit sweetness to balance the savory flavors of your chips.
-
Festive Mocktail: A fun, sparkling drink can heighten the celebration. Combine sparkling water with cranberry juice and a splash of lime for a refreshing beverage to sip on while munching.
How to Store and Freeze Spooky Baked Halloween Chips
Airtight Container: Store leftovers in an airtight container at room temperature for up to 2 days to maintain their crispiness and prevent them from getting stale.
Freezer: For longer storage, freeze the chips in a single layer on a baking sheet, then transfer to a freezer-safe bag for up to a month.
Reheating: To restore their crunch, reheat the frozen chips in a preheated oven at 350°F (175°C) for about 5 minutes until crispy again.
These Spooky Baked Halloween Chips are best enjoyed fresh, but following these tips will help keep them tasty for your festive gatherings!
Make Ahead Options
These Spooky Baked Halloween Chips are perfect for meal prep, allowing you to enjoy festive snacking without the last-minute rush! You can cut your gluten-free tortillas into ghost shapes and store them in an airtight container for up to 24 hours before baking. When you’re ready to serve, simply arrange the ghost shapes on a baking sheet, lightly spray with oil, sprinkle with salt, and bake for 5-7 minutes until golden and crispy. This way, you’ll have delicious, freshly baked Halloween chips that taste just as delightful as if you made them on the spot, all while saving precious time for your busy nights!
Spooky Baked Halloween Chips Variations
Feel free to get creative with these delightful chips, adding your personal touch to make them even more fun and festive!
-
Gluten-Free: Use certified gluten-free tortillas to ensure your spooky chips are safe for everyone to enjoy.
-
Paleo-Friendly: Opt for cassava or coconut-based tortillas to keep your chips in line with paleo guidelines.
-
Seasoned Salt: Elevate flavor by using garlic salt or smoked paprika for an extra kick that compliments the crunchiness.
-
Cheesy Bliss: Sprinkle nutritional yeast over the chips after brushing with oil for a savory, cheesy flavor without dairy.
-
Spice It Up: Add chili powder or cayenne pepper to your oil before brushing for a spicy twist that will excite the taste buds.
-
Shape Variety: Use Halloween-themed cookie cutters to create bats or pumpkins and surprise everyone with a delightful display.
-
Herb Infusion: Mix dried herbs like oregano or rosemary into the oil for a herby flavor that enhances the chips.
-
Sweet Treat: Dust with cinnamon and a touch of sugar before baking for a sweet version that pairs perfectly with nacho cheese or chocolate dip.
These creative variations will not only keep things exciting in your kitchen but also ensure that your Spooky Baked Halloween Chips are a hit at every gathering!
Expert Tips for Spooky Baked Halloween Chips
• Watch the Time: Keep an eye on your chips while baking. They can go from golden to burnt in a flash, so set a timer for precise monitoring.
• Cookie Cutter Fun: Use a diverse range of cookie cutters for various shapes beyond ghosts. Think pumpkins or bats to mix up the fun!
• Oil Options: Experiment with different oils for unique flavors. Avocado oil adds a buttery taste, while olive oil enhances the Mediterranean essence of your spooky chips.
• Spice It Up: For a flavor twist, sprinkle in some spices like smoked paprika or chili powder before baking. This will elevate your spooky baked Halloween chips into a culinary treat!
• Layer and Bake: Don’t overcrowd your baking sheet. If too many chips are packed together, they might not achieve that perfect crispiness you desire.
Elevate your spooky snack game with these handy tips, and enjoy every crunchy bite of your delightful Spooky Baked Halloween Chips!
Spooky Baked Halloween Chips Recipe FAQs
How do I choose the right tortillas for gluten-free Halloween chips?
Absolutely! For gluten-free Spooky Baked Halloween Chips, I recommend using brands like Mission or Siete. Look for tortillas that are specifically labeled gluten-free, as they will hold their shape better when cut into ghost shapes. Flour tortillas tend to yield more usable shapes with less scrap, while corn tortillas can be a bit crumbly.
How should I store leftover chips to keep them fresh?
To keep your chips crispy, store any leftovers in an airtight container at room temperature for up to 2 days. Make sure the container is completely sealed to prevent any moisture that could lead to sogginess. If you want to prolong their freshness, consider refrigerating them, but you may lose some crispiness.
Can I freeze Spooky Baked Halloween Chips for later use?
Yes, you can freeze these delightful treats! After your chips have cooled, place them in a single layer on a baking sheet and freeze until solid. Then, transfer them to a freezer-safe bag. They can last for up to a month in the freezer. To reheat, pop them back in a preheated oven at 350°F (175°C) for about 5 minutes to regain their crunch.
What should I do if my chips don’t turn out crispy?
If your chips aren’t crispy, it could be due to overcrowding on the baking sheet. Make sure to give each chip some space, allowing air to circulate. Additionally, if they were baked too quickly at a high temperature, they might burn while remaining soft inside. Try adjusting the bake time; keep a close eye on them and aim for a light golden color.
Are there any allergy considerations when making these chips?
Definitely! Always check labels when selecting your tortillas, especially if you or your guests have allergies. Besides gluten, these chips are generally safe for various dietary needs, but be cautious with oils and any added seasonings. If serving to pets, keep in mind that some ingredients, like salt, may not be suitable for them.
What can I serve with these spooky chips?
Very! These chips pair wonderfully with dips such as guacamole, salsa, or even pumpkin chili for a festive touch. You can create a fun snack platter with colorful dips to add visual appeal. The more the merrier when it comes to dip options!
Delicious Spooky Baked Halloween Chips Ready in 15 Minutes
Ingredients
Equipment
Method
- Preheat your oven to 350°F (175°C).
- Cut tortillas into ghost shapes using a cookie cutter.
- Arrange the ghost-shaped tortillas on a baking sheet, ensuring space between them.
- Spray or brush the tortillas lightly with oil and sprinkle salt on top.
- Bake for 5-7 minutes, watching closely until they are golden and crispy.
- Cool slightly before serving.