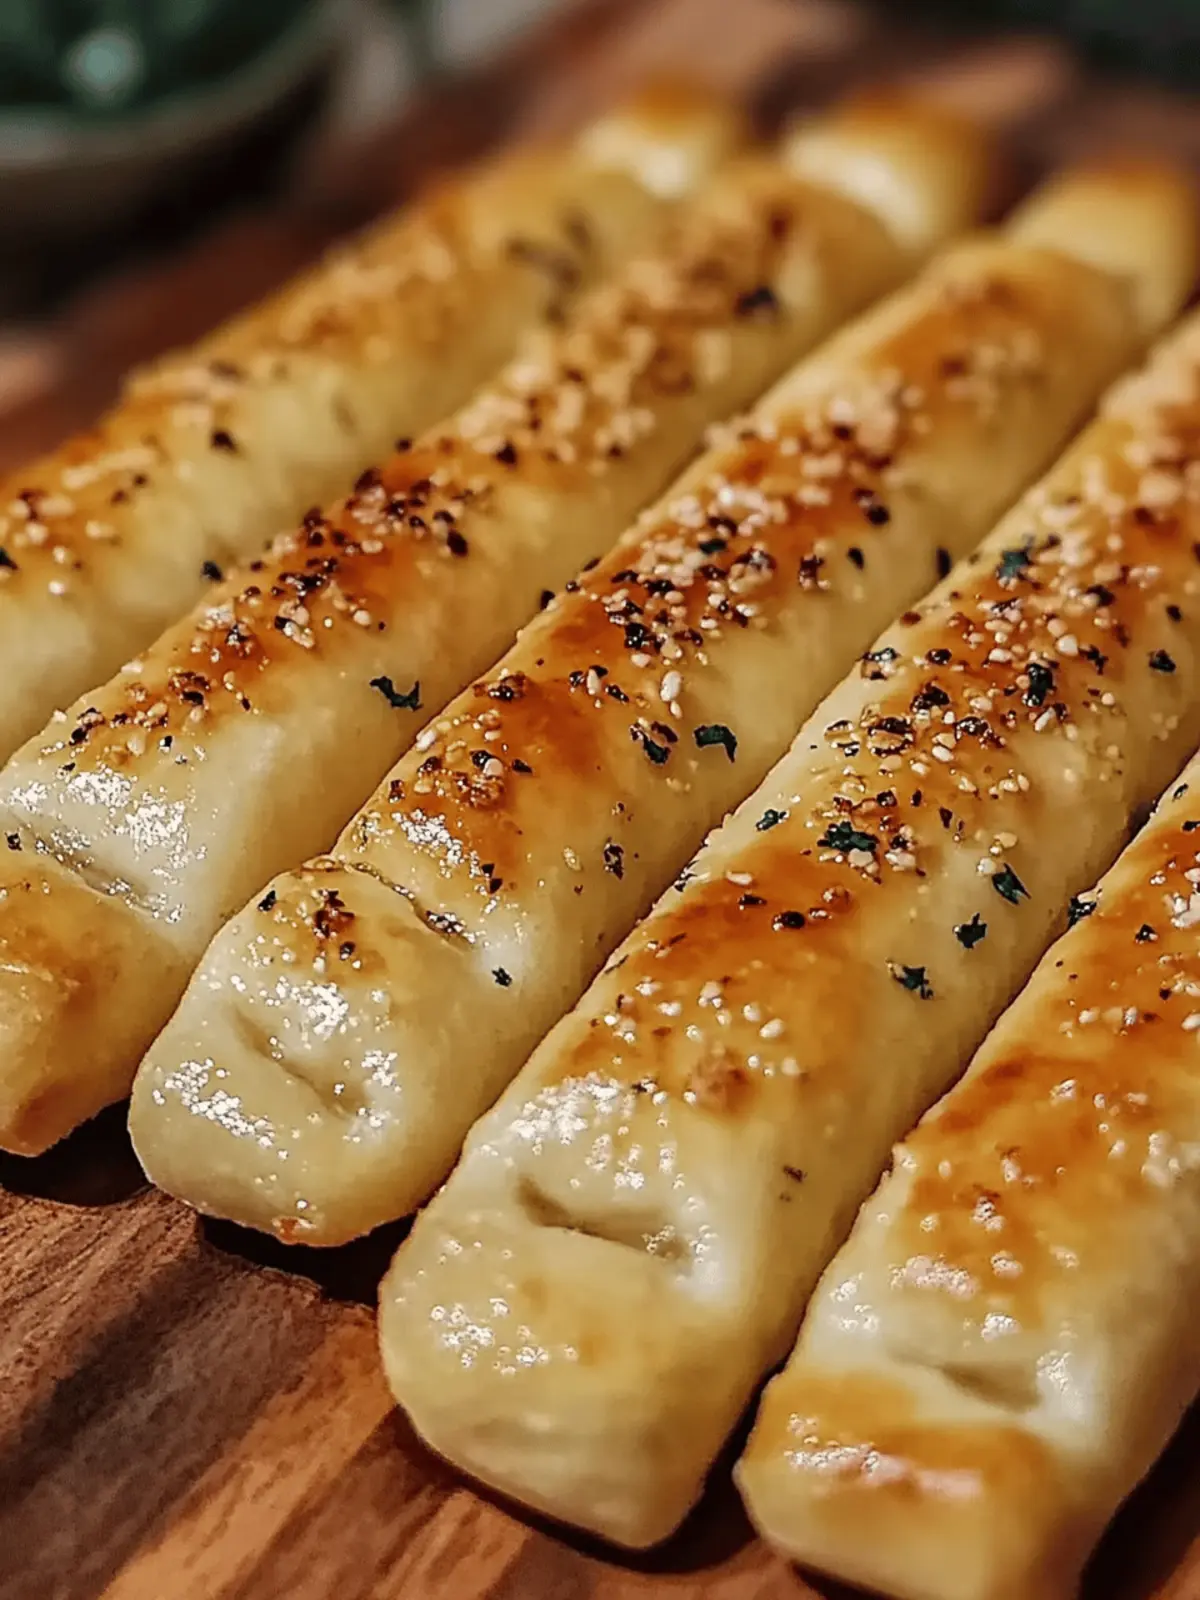
There’s nothing quite like the comforting aroma of freshly baked breadsticks wafting through the kitchen, each one soft, buttery, and inviting. I first attempted to recreate the beloved Olive Garden breadsticks on a chilly evening when takeout just wouldn’t do. As I rolled and shaped the dough, I was captivated by the transformation happening in my bowl—from simple ingredients to something that promised warmth and joy.
These Homemade Olive Garden Breadsticks are incredibly easy to make, perfectly customizable, and elevate any meal into a special occasion. Whether you’re dipping into marinara sauce or enjoying them alongside a hearty soup, each bite offers a delightful blend of flavors and textures. Plus, with options to add garlic, herbs, or even a dash of cheese, you can tailor them to your family’s tastes. Join me in the kitchen as we whip up these irresistible delights that are sure to become a staple in your home!

Why will you love these Homemade Olive Garden Breadsticks?
Homemade magic: With just a few simple ingredients and minimal equipment, you can create restaurant-style breadsticks that impress.
Irresistible aroma: As they bake, your kitchen will fill with a buttery, garlic fragrance that’s hard to resist.
Customizable bliss: Add your favorite herbs or cheeses to make these breadsticks uniquely yours!
Perfect pairing: They complement a variety of dishes—think marinara sauce, soups, or even salads.
Wow your guests: Serve warm at dinner and watch them disappear—they’ll be the star of your meal!
Homemade Olive Garden Breadstick Ingredients
For the Dough
• Warm Water – Activates yeast for rising; use water around 110°F for optimal results.
• Active Dry Yeast – This vital leavening agent ensures your breadsticks are soft; instant yeast can substitute without needing to dissolve.
• Granulated Sugar – Sweetens the dough while helping yeast activation; don’t swap it out directly for best results.
• All-Purpose Flour – Provides structure for your dough; using whole wheat flour increases fiber and gives a nutty flavor.
• Unsalted Butter – Contributes rich flavor and texture; you can reduce the amount for a lighter option.
• Salt – Essential for enhancing flavor; fine salt works best for an even distribution.
• Garlic Powder – Delivers that signature savory taste; you can use fresh garlic, but it may change the dough’s texture.
• Italian Seasoning – Adds extra flavor complexity; feel free to adjust according to your taste preferences.
For the Garlic Butter Glaze
• Unsalted Butter – A key component of the glaze to brush on warm breadsticks; melted for perfect application.
• Garlic Powder – Enhances the garlic flavor; fresh garlic can be used but be cautious with quantity.
• Parsley – Optional garnishing addition for a pop of color and freshness; chopped finely for even spread.
These Homemade Olive Garden Breadsticks are not only easy to whip up but also a delightful treat that can be enjoyed in many ways!
How to Make Homemade Olive Garden Breadsticks
-
Combine ingredients: In a mixing bowl, blend warm water, yeast, and sugar. Let it sit for about 5 minutes until it becomes frothy, indicating the yeast is activated.
-
Add dry ingredients: Incorporate the flour, salt, and melted butter into the yeast mixture. Stir until a soft dough forms, being careful not to overmix.
-
Knead the dough: Turn the dough onto a floured surface and knead for 8-10 minutes. You want it to be smooth and elastic, reflecting its readiness.
-
Let it rise: Place the dough in a greased bowl, cover it, and let it rise in a warm spot until it doubles in size (about 1-1.5 hours).
-
Shape the breadsticks: Once risen, punch down the dough gently. Divide it into 12 equal pieces and roll each piece into a 7-inch log.
-
Second rise: Arrange the logs on a parchment-lined baking sheet. Cover and let them rise for an additional 30 minutes, allowing them to puff up.
-
Preheat and bake: Preheat your oven to 400°F (200°C). Bake the breadsticks for 12-15 minutes until they turn golden brown and look irresistible.
-
Make the garlic butter: While the breadsticks are baking, prepare the garlic butter by melting butter and mixing in garlic powder. Once the breadsticks are out of the oven, brush this mixture generously over them.
-
Serve warm: Your delightful Homemade Olive Garden Breadsticks are ready! Serve them warm and enjoy the comforting aroma and taste.
Optional: For an extra touch, sprinkle some finely chopped parsley over them before serving.
Exact quantities are listed in the recipe card below.
What to Serve with Homemade Olive Garden Breadsticks?
The joy of freshly baked breadsticks is truly complete when paired with delectable sides and sauces that elevate your meal to new heights.
- Marinara Sauce: This classic dipping sauce enhances the breadsticks with a tangy and savory flavor that complements their buttery goodness.
- Creamy Alfredo Sauce: Rich and velvety, Alfredo sauce creates a luxurious pairing, perfect for drenching those warm breadsticks.
- Italian Salad: Crisp greens tossed with olives, tomatoes, and a zesty vinaigrette balances the breadsticks’ richness, adding freshness to your plate.
- Hearty Minestrone Soup: A warm bowl of minestrone offers nourishing ingredients and a comforting experience, making the breadsticks an ideal accompaniment.
- Garlic Mashed Potatoes: Fluffy and creamy, these mashed potatoes echo the garlic flavor in the breadsticks, creating a harmonious meal.
- Roasted Vegetables: Colorful roasted veggies provide a delightful crunch and sweetness, rounding out your dinner with vibrant textures.
- Wine Pairing: A chilled white wine, like Pinot Grigio, complements the flavors beautifully, making your dining experience even more special.
- Chocolate Cake: For dessert, a decadent chocolate cake brings a touch of indulgence to the meal, closing it on a sweet note that contrasts with the savory breadsticks.
Homemade Olive Garden Breadsticks Variations
Feel free to personalize your breadsticks with these delicious twists that will surely delight your taste buds.
-
Cheesy Addition: Melt some grated Parmesan into the dough or sprinkle on top before baking for a rich, cheesy flavor.
This delicious twist enhances the savory profile and makes every bite even more indulgent. -
Herb Infusion: Mix in fresh herbs like rosemary, thyme, or basil right into the dough for an aromatic delight.
The fragrant herbs will elevate the taste and give your breadsticks a garden-fresh appeal that is irresistible. -
Spicy Kick: Spice things up by adding a pinch of cayenne or crushed red pepper flakes to the garlic butter.
This simple addition provides a delightful and unexpected heat that balances beautifully with the buttery richness. -
Garlic Lovers’ Version: Boost the garlic flavor by increasing the amount of garlic powder in both the dough and the butter glaze.
For those who adore garlicky goodness, this method takes the flavor to another level, ensuring every bite is packed with savory zest. -
Sweet Cinnamon Twist: For a unique dessert-like treat, add cinnamon and a touch of sugar to the dough before baking.
Serve these sweet breadsticks with a light glaze for a delightful treat that can be enjoyed any time of day. -
Gluten-Free Switch: Replace all-purpose flour with a gluten-free baking blend to accommodate gluten sensitivities.
This swap allows everyone at the table to enjoy the warmth and comfort of homemade breadsticks without compromise. -
Stuffed Surprise: Roll each piece of dough around small cubes of mozzarella or your favorite cheese before shaping into logs.
This variation creates a gooey, cheesy center that will surprise and delight anyone who takes a bite. -
Zesty Citrus: Add a touch of lemon zest to the dough for a refreshing and bright flavor.
The zesty notes will bring a new layer of brightness that complements the buttery richness harmoniously.
Experiment with these variations to create your ultimate version of Homemade Olive Garden Breadsticks! Enjoy the process and savor the mouthwatering results.
Storage Tips for Homemade Olive Garden Breadsticks
Room Temperature: Store any leftover breadsticks in an airtight container at room temperature for up to 2 days to maintain their soft texture and flavor.
Fridge: If you prefer to keep them longer, you can refrigerate the breadsticks for up to 4 days in an airtight container, but note they may lose some freshness.
Freezer: For extended storage, wrap the breadsticks individually in plastic wrap and place them in a resealable freezer bag. They can be frozen for up to one month.
Reheating: To enjoy them again, reheat frozen breadsticks in the oven at 350°F (175°C) for about 10-15 minutes, brushing with a little garlic butter to bring back their original flavor.
Expert Tips for Homemade Olive Garden Breadsticks
-
Perfect Temperature: Ensure your warm water is around 110°F; this optimal temperature activates the yeast effectively for fluffy, soft breadsticks.
-
Kneading Matters: Don’t skip the kneading step! It’s crucial for gluten development, ensuring your breadsticks are chewy and elastic, just like the original.
-
Uniform Size: Make sure all breadstick pieces are equal in size to ensure even baking; this helps achieve that delightful golden-brown crust.
-
Flavor Variations: Don’t be afraid to experiment! Add grated Parmesan or fresh herbs directly into your dough for a customized flavor in your Homemade Olive Garden Breadsticks.
-
Proper Cooling: Let the breadsticks cool for a couple of minutes after baking before brushing with garlic butter to keep them from becoming soggy.
-
Storage Tips: To maintain freshness, store leftover breadsticks in an airtight container at room temperature for up to 2 days; they also freeze well for longer enjoyment!
Make Ahead Options
These Homemade Olive Garden Breadsticks are a fantastic choice for meal prep! You can prepare the dough up to 24 hours in advance by following steps 1 through 4, then cover the bowl with plastic wrap and refrigerate it overnight. This not only saves time but also enhances flavor as the dough develops overnight. When you’re ready to bake, simply let the dough come to room temperature for about 30 minutes before shaping and proceeding with steps 5 through 9. If you prefer, you can even shape the breadsticks and let them rise for their second time in the fridge, covered, for up to 3 days. Just remember to bring them back to room temperature before baking to ensure they puff up beautifully! By prepping ahead, you’ll enjoy freshly baked breadsticks with minimal fuss, perfect for busy weeknights!

Homemade Olive Garden Breadsticks Recipe FAQs
What type of warm water should I use for the dough?
Absolutely! Use warm water around 110°F (43°C) to activate the yeast properly. This temperature helps the yeast thrive, ensuring your breadsticks rise beautifully and achieve that perfect soft texture.
How should I store leftover Homemade Olive Garden Breadsticks?
For sure! You can store your leftover breadsticks in an airtight container at room temperature for up to 2 days. This will keep them soft and tasty. If they last longer than that, consider refrigerating them for up to 4 days, but expect a slight decline in texture.
Can I freeze Homemade Olive Garden Breadsticks?
Yes, you can! To freeze, wrap each breadstick individually in plastic wrap and place them in a resealable freezer bag. They’ll stay fresh for up to one month. To reheat, just pop them in a preheated oven at 350°F (175°C) for about 10-15 minutes, brushing them with garlic butter for added flavor.
What if my dough doesn’t rise?
Very good question! If your dough doesn’t rise, it may be due to inactive yeast. Make sure your yeast hasn’t expired and that you used water at the right temperature (110°F). If you’re still having issues, try letting the dough rise in a warmer area, as yeast needs warmth to work its magic. You might also want to check if the yeast is properly activated by mixing it with a little sugar and warm water first; it should become frothy after about 5 minutes.
Can I use other types of flour instead of all-purpose flour?
Certainly! While I recommend all-purpose flour for the best results, you can use whole wheat flour to add a nuttier flavor and increase the fiber content. Just remember that the texture may differ slightly—whole wheat flour can create a denser breadstick.
Are these breadsticks safe for those with certain allergies?
Great concern! These Homemade Olive Garden Breadsticks contain gluten, dairy, and yeast. If you or your guests have allergies, consider using gluten-free flour and a dairy-free substitute for butter. There are many great options available on the market today, which can help keep this recipe safe for everyone!
Homemade Olive Garden Breadsticks: Soft, Buttery Perfection
Ingredients
Equipment
Method
- In a mixing bowl, blend warm water, yeast, and sugar. Let it sit for about 5 minutes until frothy.
- Incorporate the flour, salt, and melted butter into the yeast mixture. Stir until a soft dough forms.
- Turn the dough onto a floured surface and knead for 8-10 minutes until smooth and elastic.
- Place the dough in a greased bowl, cover, and let it rise in a warm spot for 1-1.5 hours until doubles in size.
- Punch down the dough gently. Divide into 12 equal pieces and roll each into a 7-inch log.
- Arrange the logs on a parchment-lined baking sheet. Cover and let them rise for an additional 30 minutes.
- Preheat oven to 400°F (200°C). Bake breadsticks for 12-15 minutes until golden brown.
- Prepare garlic butter while baking by melting butter and mixing in garlic powder. Brush over warm breadsticks.
- Serve warm and enjoy the aroma and taste!