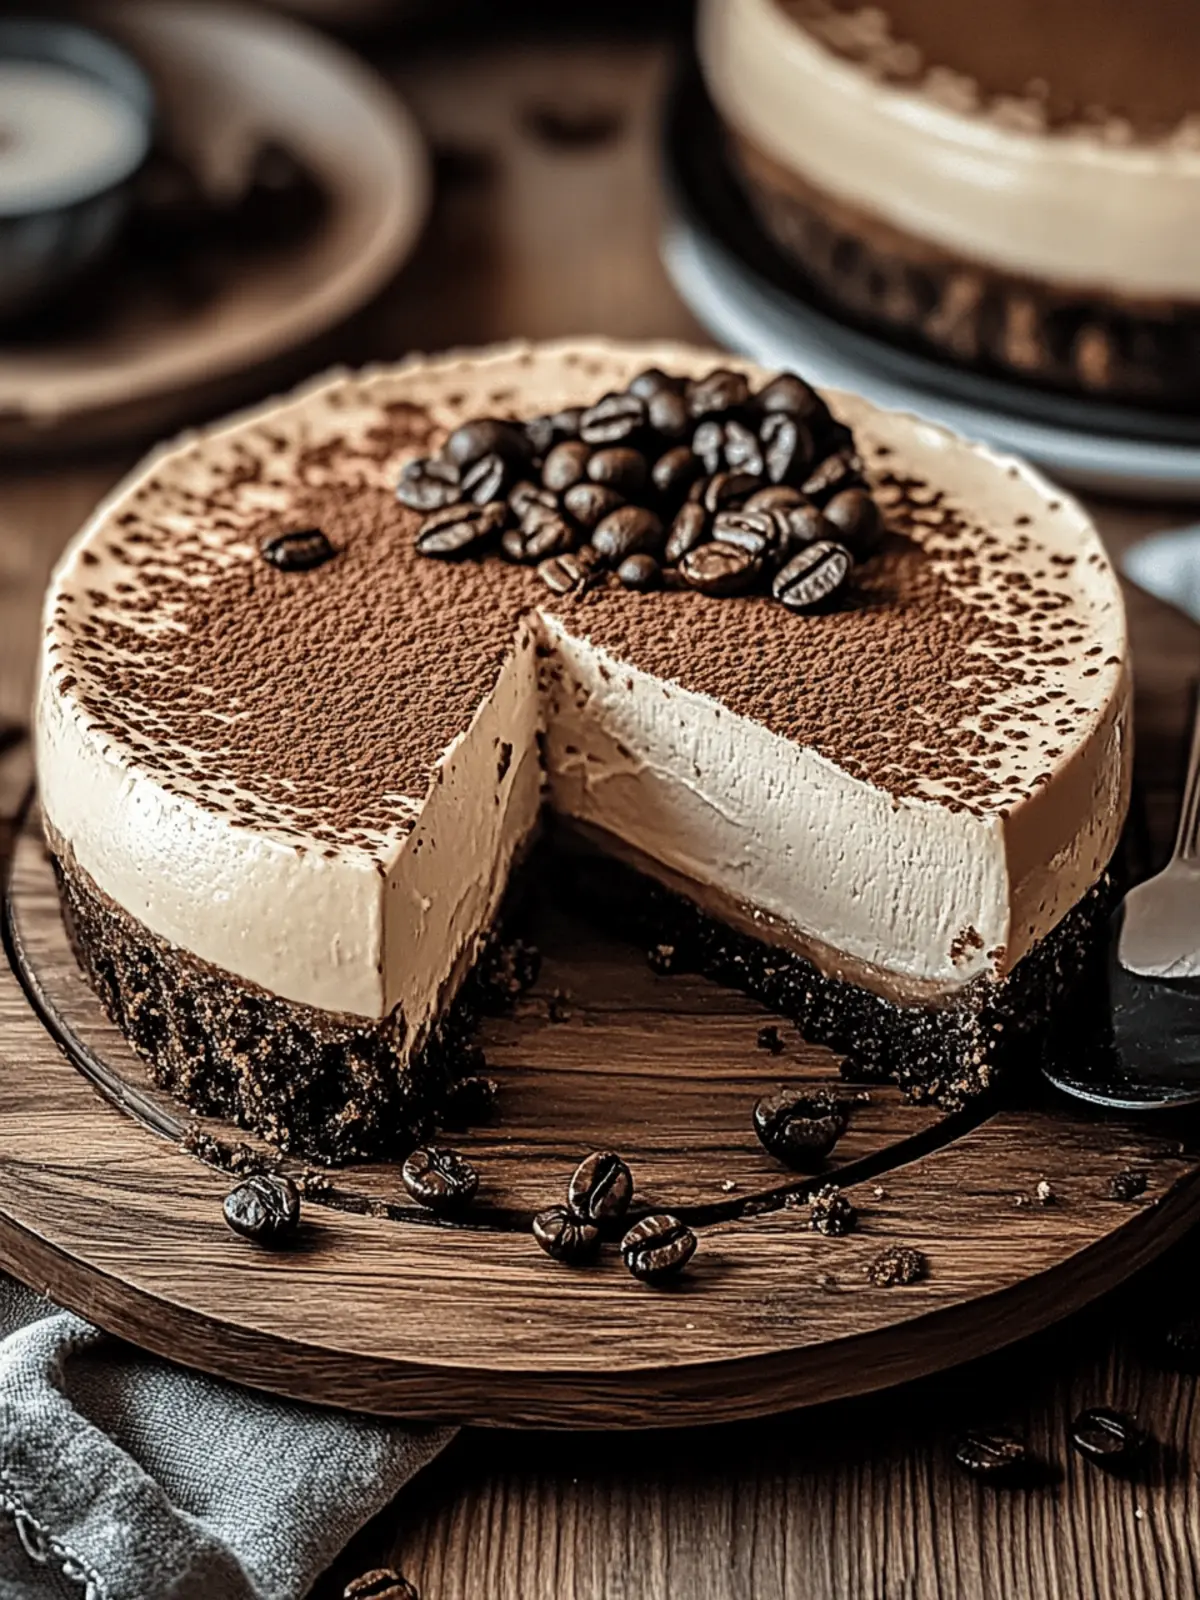
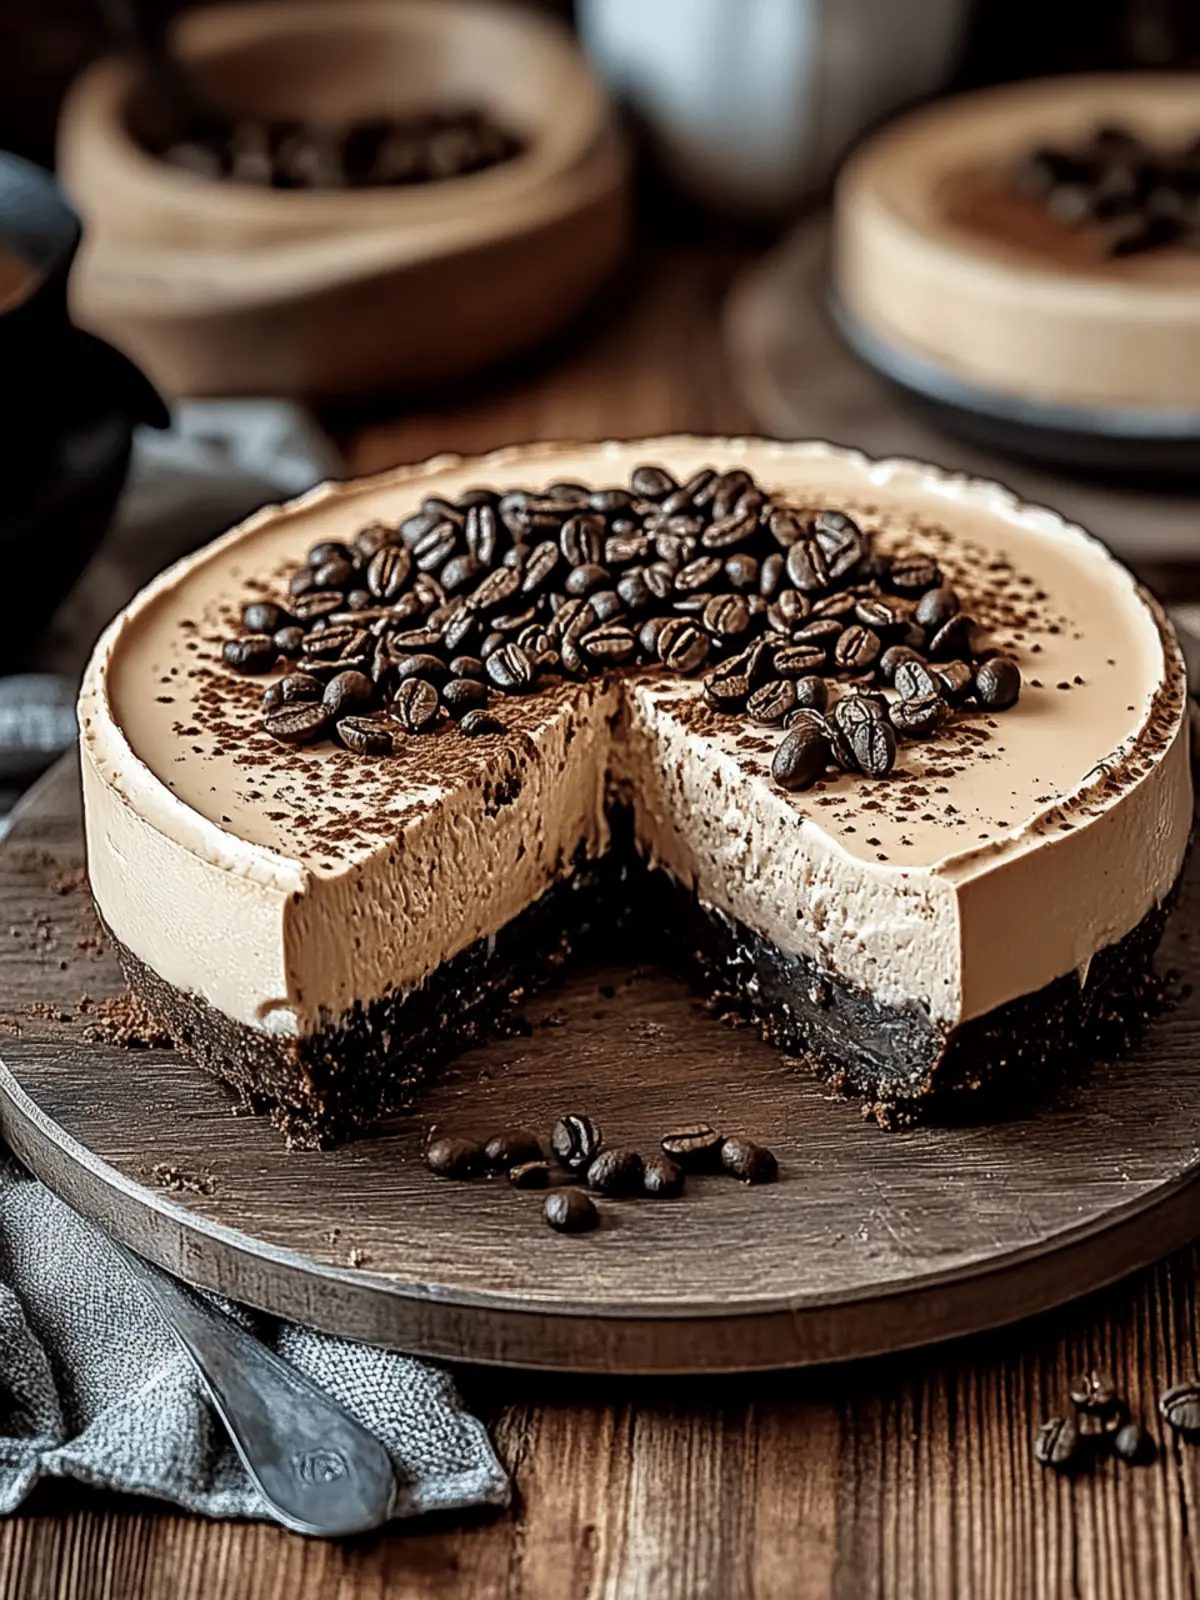
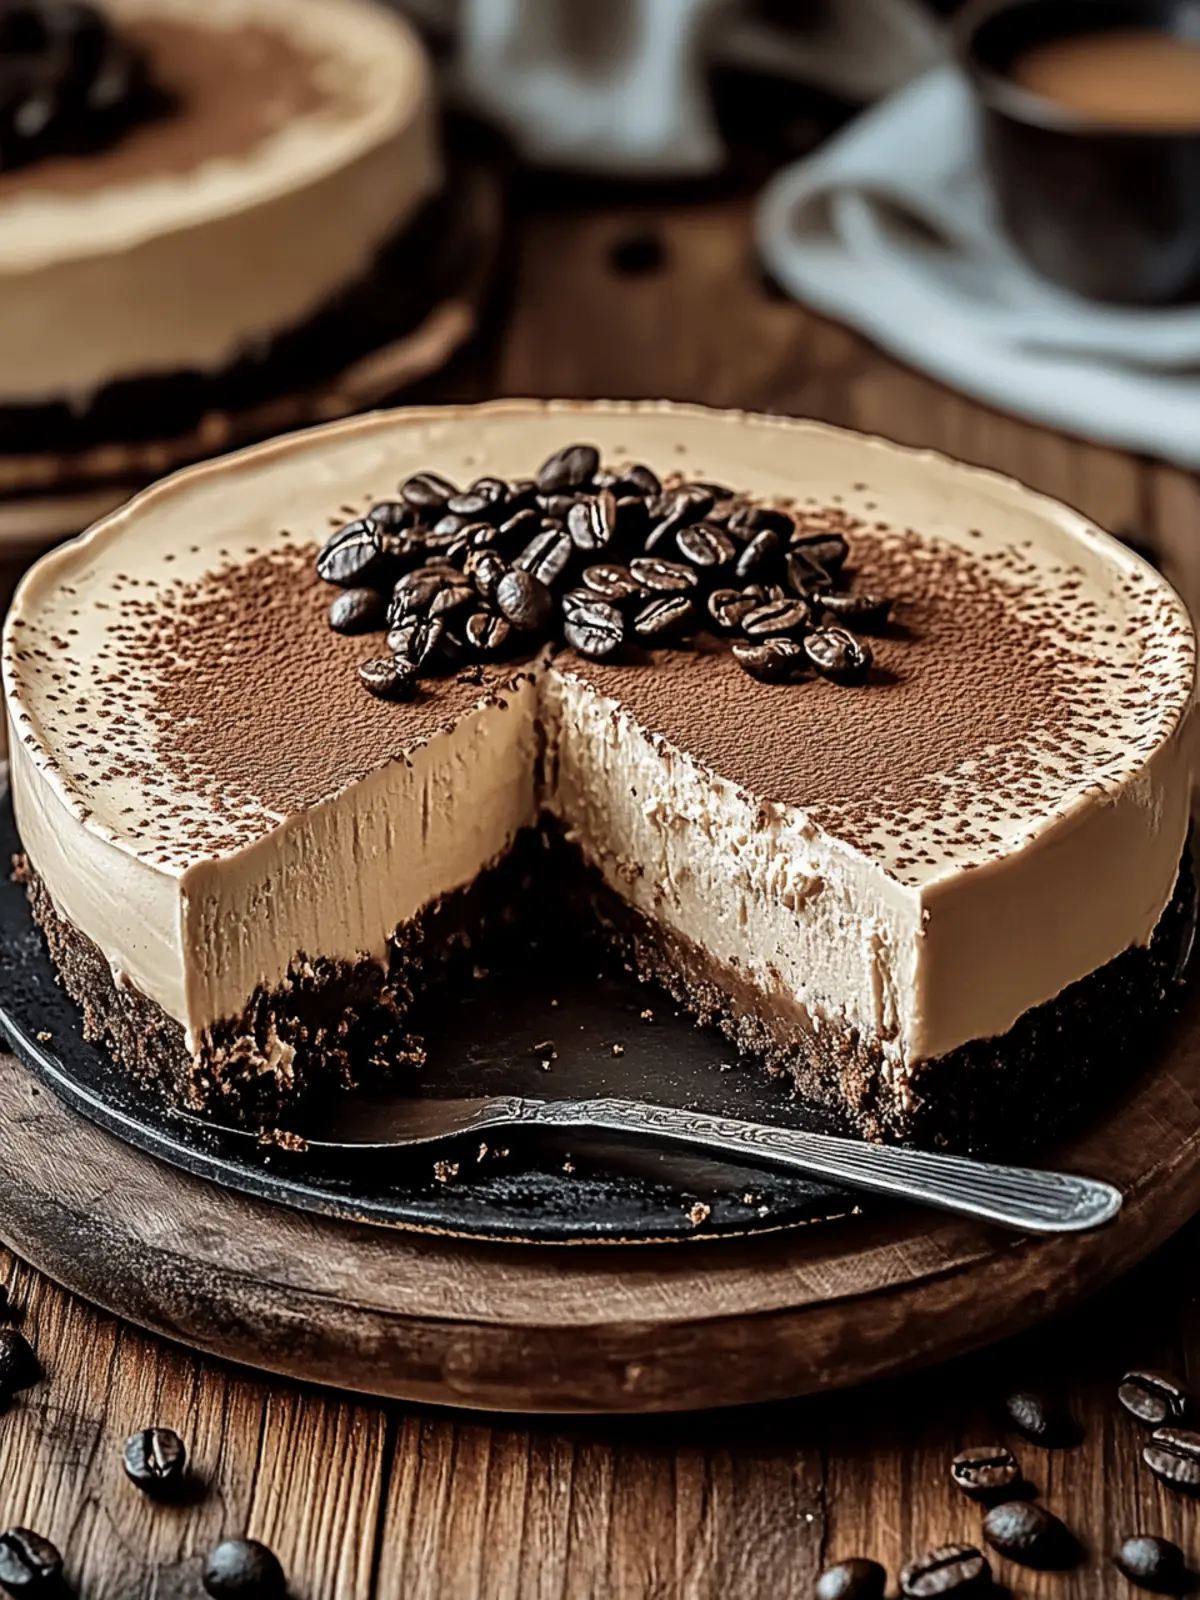
There’s nothing quite like the enchanting aroma of fresh coffee mingling with the sweetness of creamy cheesecake. As the day winds down and I find myself craving a little indulgence, this Coffee Cheesecake undeniably calls my name. It effortlessly combines the rich, robust flavors of espresso with the smooth, velvety texture of cheesecake, all resting on a buttery chocolate cookie crust that practically melts in your mouth.
Whether you’re looking to impress at a dinner party or simply satisfy a nagging sweet tooth, this delightful dessert is both versatile and easy to prepare. Don’t have time to bake? No problem! You can whip up a no-bake version or even create adorable mini cheesecakes perfect for sharing (or keeping all to yourself!). The best part? Each slice of this delightful treat is customizable with your favorite toppings, ensuring every bite is a little piece of heaven. So grab your ingredients and let’s dive into the world of creamy coffee bliss that will leave you dreaming of your next slice!

Why is Coffee Cheesecake a Must-Try?
Indulgence at its finest: This Coffee Cheesecake pairs luscious creaminess with an espresso kick, making every bite pure bliss.
Customizable variations: No time to bake? Enjoy a no-bake version or whip up mini cheesecakes for a fun twist.
Universal appeal: Perfect for coffee lovers and dessert aficionados alike, this cheesecake is bound to impress friends and family.
Effortless preparation: Easy to follow, you’ll enjoy the process without any stress—a win-win in the kitchen!
Endless garnishing options: Elevate your dessert with chocolate shavings or coffee beans, making it as beautiful as it is delicious.
Perfect for any occasion: Serve this delightful treat at gatherings or savor it solo for a bit of everyday luxury!
Coffee Cheesecake Ingredients
For the Crust
• Crushed Chocolate Sandwich Cookies (1 1/2 cups) – A delicious base for the crust; use gluten-free cookies if needed.
• Unsalted Butter (1/4 cup, melted) – Binds the crust ingredients together; can be substituted with coconut oil for a dairy-free option.
For the Filling
• Cream Cheese (24 oz) – Provides the luscious, creamy texture of the cheesecake; opt for full-fat for the best results.
• Granulated Sugar (3/4 cup) – Adds sweetness to the filling; consider reducing for a lower-sugar variant.
• Cornstarch (2 tbsp) – Stabilizes the filling and prevents cracks; use an equal amount of flour as an alternative.
• Eggs (3 large) – Essential for structure; egg replacers work for a vegan version.
• Sour Cream (1/2 cup) – Enhances creaminess and tang; substitute with Greek yogurt for a lighter twist.
• Heavy Cream (1/2 cup) – Contributes richness; coconut cream can replace it for a dairy-free alternative.
• Instant Espresso Powder (2 tbsp) – Infuses the cheesecake with delightful coffee flavor; strong brewed coffee is a substitute, but adjust other liquids.
• Vanilla Extract (1 tsp) – Enhances overall flavor profile.
For Whipped Cream Topping (Optional)
• Heavy Whipping Cream (1 cup) – Lightens the dessert beautifully as a topping.
• Powdered Sugar (2 tbsp) – Sweetens the whipped cream.
• Instant Espresso Powder (1 tsp) – Intensifies the coffee flavor in the topping, making it even more delectable.
For Garnishes (Optional)
• Chocolate Shavings – Adds elegance and an extra layer of flavor.
• Cocoa Powder – Dusting elevates the richness of the dessert.
• Coffee Beans – Make for a charming and decorative touch.
This Coffee Cheesecake is sure to become a treasured recipe for any occasion!
How to Make Coffee Cheesecake
-
Preheat the Oven: Begin by preheating your oven to 325°F (163°C). This ensures it’s hot enough to bake the cheesecake evenly.
-
Prepare the Crust: In a mixing bowl, combine the crushed chocolate sandwich cookies with melted unsalted butter. Press this mixture into the bottom of a springform pan. Bake for 10 minutes until set, then let it cool.
-
Make the Filling: In a large bowl, beat the cream cheese, granulated sugar, and cornstarch together until smooth. Add eggs one at a time, mixing well. In another bowl, whisk together the heavy cream, sour cream, instant espresso powder, and vanilla. Combine this mixture with the cheesecake batter.
-
Bake: Pour the filling over the cooled crust. To prevent cracks, wrap the springform pan with aluminum foil and place it inside a larger dish filled with hot water. Bake for 50-55 minutes, until the edges are set but the center jiggles slightly.
-
Cool and Chill: Allow the cheesecake to cool at room temperature for 30 minutes. Then, refrigerate it for at least 6 hours or overnight to set fully.
-
Make Whipped Cream (Optional): In a mixing bowl, beat the heavy whipping cream, powdered sugar, and instant espresso powder until stiff peaks form. This creates a light topping for your cheesecake.
-
Serve: Once chilled, garnish the cheesecake with cocoa powder, chocolate shavings, or coffee beans for an elegant finish. Enjoy every creamy, coffee-infused slice!
Optional: Top with a drizzle of chocolate sauce for an extra indulgent treat.
Exact quantities are listed in the recipe card below.
Make Ahead Options
These Coffee Cheesecakes are perfect for meal prep! You can prepare the crust and filling up to 24 hours in advance. Simply make the crust by pressing the crushed chocolate sandwich cookies and melted butter into a springform pan, and then prepare the filling as directed, before chilling them separately in the refrigerator. To ensure quality, cover both the crust and filling with plastic wrap to prevent drying. When you’re ready to serve, just pour the filling over the pre-baked crust and bake as instructed. Allow the cheesecake to chill for at least 6 hours, and you’ll have a delectable dessert ready for any occasion with minimal last-minute effort!
What to Serve with Coffee Cheesecake?
As you prepare to treat yourself to the rich, creamy indulgence of coffee cheesecake, consider these delightful pairings that will elevate your dessert experience.
-
Fresh Berries: Juicy strawberries or raspberries add a vibrant contrast, cutting through the richness with their tartness.
-
Espresso: A shot of espresso amplifies the coffee flavors of the cheesecake, creating a café-inspired moment that’s truly decadent.
-
Chocolate Ganache: Drizzling warm chocolate ganache over your slice adds an extra layer of indulgence, enhancing the dessert’s chocolate dimensions.
This pairing not only satisfies your sweet tooth but also enlivens the senses.
-
Whipped Cream: A dollop of lightly sweetened whipped cream provides a fluffy texture that beautifully complements the cheesecake’s creaminess.
-
Nutty Biscotti: Serving with crunchy almond biscotti adds a delightful crunch and nutty flavor, perfect for dipping into a warm beverage.
-
Hazelnut Liqueur: A glass of hazelnut liqueur brings out the coffee notes in your cheesecake, making it a perfect after-dinner treat to impress guests.
Every option here harmonizes beautifully with the luscious coffee cheesecake, making your dessert experience all the more delightful.
How to Store and Freeze Coffee Cheesecake
Fridge: Store leftover Coffee Cheesecake in the fridge for up to 5 days. Cover it with plastic wrap or place it in an airtight container to preserve freshness.
Freezer: To freeze, wrap the cheesecake tightly in plastic wrap and then aluminum foil. It can be stored in the freezer for up to 3 months.
Thawing: To thaw, move the Coffee Cheesecake from the freezer to the fridge 24 hours before serving. This gentle thawing helps maintain its creamy texture.
Reheating: If desired, serve slices at room temperature for the best flavor and creaminess, removing from the fridge about 30 minutes prior to serving.
Coffee Cheesecake Variations & Substitutions
Feel free to get creative and make this Coffee Cheesecake your own with these delightful twists and substitutions!
-
No-Bake Option: Skip the oven! Use whipped cream and gelatin instead of eggs to create a creamy no-bake cheesecake.
Who can resist a dessert that requires no baking? You’ll still enjoy that silky richness without the wait! -
Mini Cheesecakes: Use a muffin tin to bake individual portions; adjust baking time to 20-25 minutes.
Perfect for parties, these bite-sized treats can be just as impressive and allow for easy sharing (or not!). -
Dairy-Free: Substitute cream cheese and heavy cream with coconut cream or a vegan cream cheese alternative for a dairy-free delight.
Your coffee lovers won’t even miss the dairy with this silky-smooth version! -
Lower Sugar: Reduce the granulated sugar to meet your dietary needs, or use a sugar substitute to cut calories.
It’s a simple change that doesn’t compromise on flavor while making dessert a bit more guilt-free. -
Add a Layer: Include a layer of espresso-soaked ladyfingers in between the crust and filling for a delicious tiramisu-inspired dessert.
This twist brings an exciting texture and enhances the coffee flavor, making each bite an adventure. -
Experiment with Flours: Use almond flour for the crust instead of chocolate cookies for a gluten-free twist.
It’ll add a nutty flavor that complements the coffee beautifully, perfect for those on a gluten-free diet! -
Flavor Boost: Add a splash of coffee liqueur to the filling for an adult-only touch that enhances the coffee notes.
Just imagine indulging in a slice with a little extra flair—it’s a dessert that sings! -
Fruit Infusion: Blend in some chocolate-covered espresso beans or finely chopped nuts for added crunch and flavor.
These small additions will create bursts of flavor in every bite, making each slice a delightful surprise!
Expert Tips for Coffee Cheesecake
- Room Temperature Ingredients: Ensure all dairy products are at room temperature for a smoother filling, which helps achieve that creamy texture in your Coffee Cheesecake.
- Avoid Overmixing: Mix the filling just until combined to prevent unwanted cracks in the final product. Overmixing can incorporate too much air.
- Perfectly Cut Slices: For clean cuts, dip your knife in hot water and wipe it clean between slices—this will give you beautiful, even portions!
- No-Bake Option: If you’re short on time, try a no-bake version by using whipped cream and gelatin, allowing for a quicker, yet still scrumptious, cheesecake experience.
- Freezing for Later: You can freeze your Coffee Cheesecake! Wrap it tightly in plastic wrap and foil for up to 3 months of future indulgence.
- Experiment with Toppings: Make it your own! Use varying garnishes like chocolate shavings or crushed coffee beans to elevate every slice of your Coffee Cheesecake.
Coffee Cheesecake Recipe FAQs
What type of coffee is best for the Coffee Cheesecake?
Absolutely! Instant espresso powder works wonderfully in this recipe as it dissolves easily and provides a concentrated coffee flavor. If you prefer to use brewed coffee, opt for a strong blend and reduce the other liquid ingredients slightly to maintain the proper consistency.
How should I store leftover Coffee Cheesecake?
You can store your leftover Coffee Cheesecake in the fridge for up to 5 days. Just cover it tightly with plastic wrap or transfer it to an airtight container to keep it fresh. This allows the flavors to develop even more, making it taste delightful with each bite!
Can I freeze Coffee Cheesecake?
Certainly! To freeze your Coffee Cheesecake, wrap it tightly in plastic wrap and then in aluminum foil to protect it from freezer burn. It can be frozen for up to 3 months. When you’re ready to enjoy it, simply move it to the fridge 24 hours before serving to allow it to thaw gently, preserving the creamy texture.
What should I do if my cheesecake cracks while baking?
Very! Cracking usually occurs due to overmixing or baking at too high a temperature. To avoid this, mix the batter just until combined and bake in a water bath—a technique which helps regulate the temperature. If cracks do appear, you can always cover them with whipped cream or chocolate shavings when serving!
Are there any dietary considerations for this Coffee Cheesecake?
Definitely! If you have certain dietary needs, you can customize the recipe. For a gluten-free version, substitute the sandwich cookies with gluten-free ones. Use egg replacers for a vegan version and coconut cream for a dairy-free alternative. Always check ingredient labels to ensure they meet your specific dietary requirements.
What are some garnishing ideas for the Coffee Cheesecake?
In addition to whipped cream, you can elevate your Coffee Cheesecake with chocolate shavings, a dusting of cocoa powder, or even whole coffee beans for a decorative touch. The more the merrier when it comes to toppings, so feel free to get creative and add your favorite flavors!
Ultimate Coffee Cheesecake: Irresistibly Creamy Delight
Ingredients
Equipment
Method
- Preheat the Oven: Begin by preheating your oven to 325°F (163°C). This ensures it's hot enough to bake the cheesecake evenly.
- Prepare the Crust: In a mixing bowl, combine the crushed chocolate sandwich cookies with melted unsalted butter. Press this mixture into the bottom of a springform pan. Bake for 10 minutes until set, then let it cool.
- Make the Filling: In a large bowl, beat the cream cheese, granulated sugar, and cornstarch together until smooth. Add eggs one at a time, mixing well. In another bowl, whisk together the heavy cream, sour cream, instant espresso powder, and vanilla. Combine this mixture with the cheesecake batter.
- Bake: Pour the filling over the cooled crust. To prevent cracks, wrap the springform pan with aluminum foil and place it inside a larger dish filled with hot water. Bake for 50-55 minutes, until the edges are set but the center jiggles slightly.
- Cool and Chill: Allow the cheesecake to cool at room temperature for 30 minutes. Then, refrigerate it for at least 6 hours or overnight to set fully.
- Make Whipped Cream (Optional): In a mixing bowl, beat the heavy whipping cream, powdered sugar, and instant espresso powder until stiff peaks form.
- Serve: Once chilled, garnish the cheesecake with cocoa powder, chocolate shavings, or coffee beans for an elegant finish. Enjoy every creamy, coffee-infused slice!