As the sun starts to set and the air cools down, I often find myself searching for the perfect treat to unwind with. This decadent No-Bake Brownie Refrigerator Cake is my secret weapon for those lazy evenings or impromptu gatherings. Picture this: luscious layers of fudgy brownie, silky chocolate pudding, and airy whipped topping – all coming together to create a dessert that feels as indulgent as it looks. The best part? You can whip it up ahead of time and let the flavors meld in the fridge while you relax and enjoy the company. Whether you’re hosting friends, celebrating a special occasion, or simply craving something sweet, this recipe is a guaranteed crowd-pleaser that invites everyone to take a slice. Trust me, once you experience the delightful contrast of textures and rich flavors, you’ll be hooked. Let’s dive into this easy, no-bake treat that promises to impress without any fuss!

Why is Brownie Refrigerator Cake a must-try?
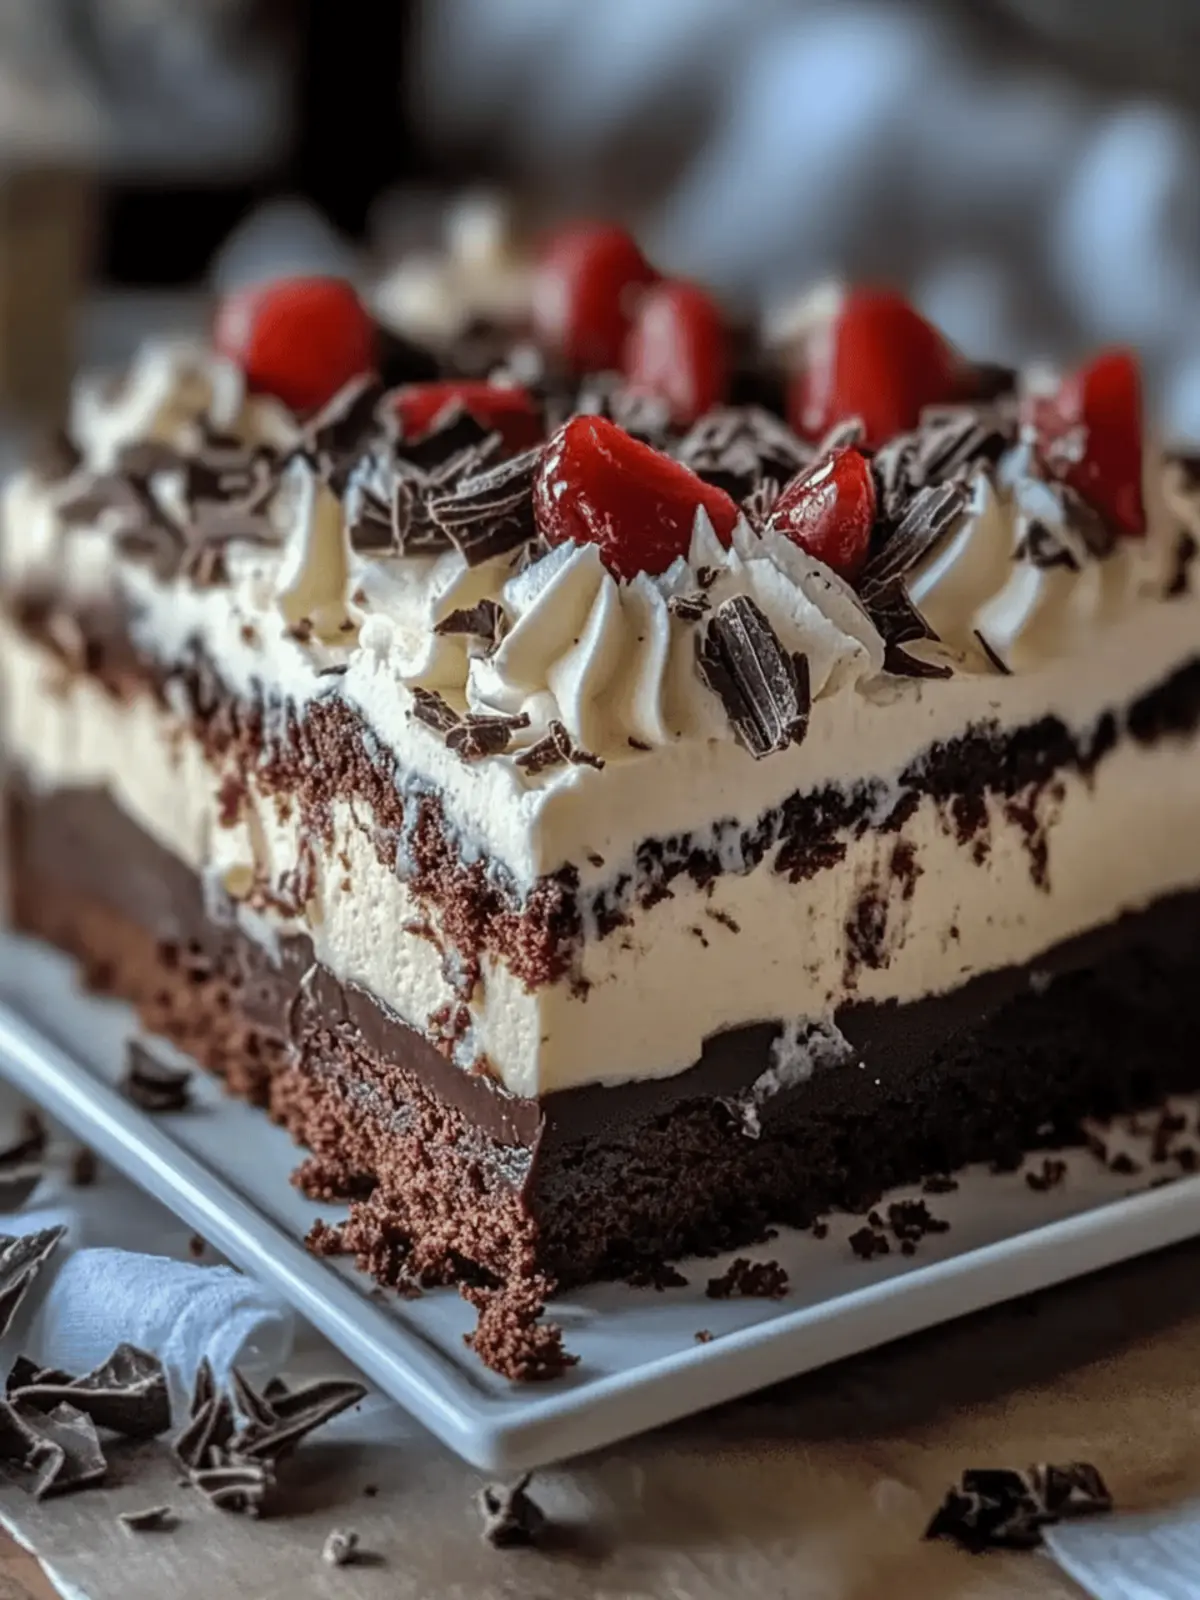
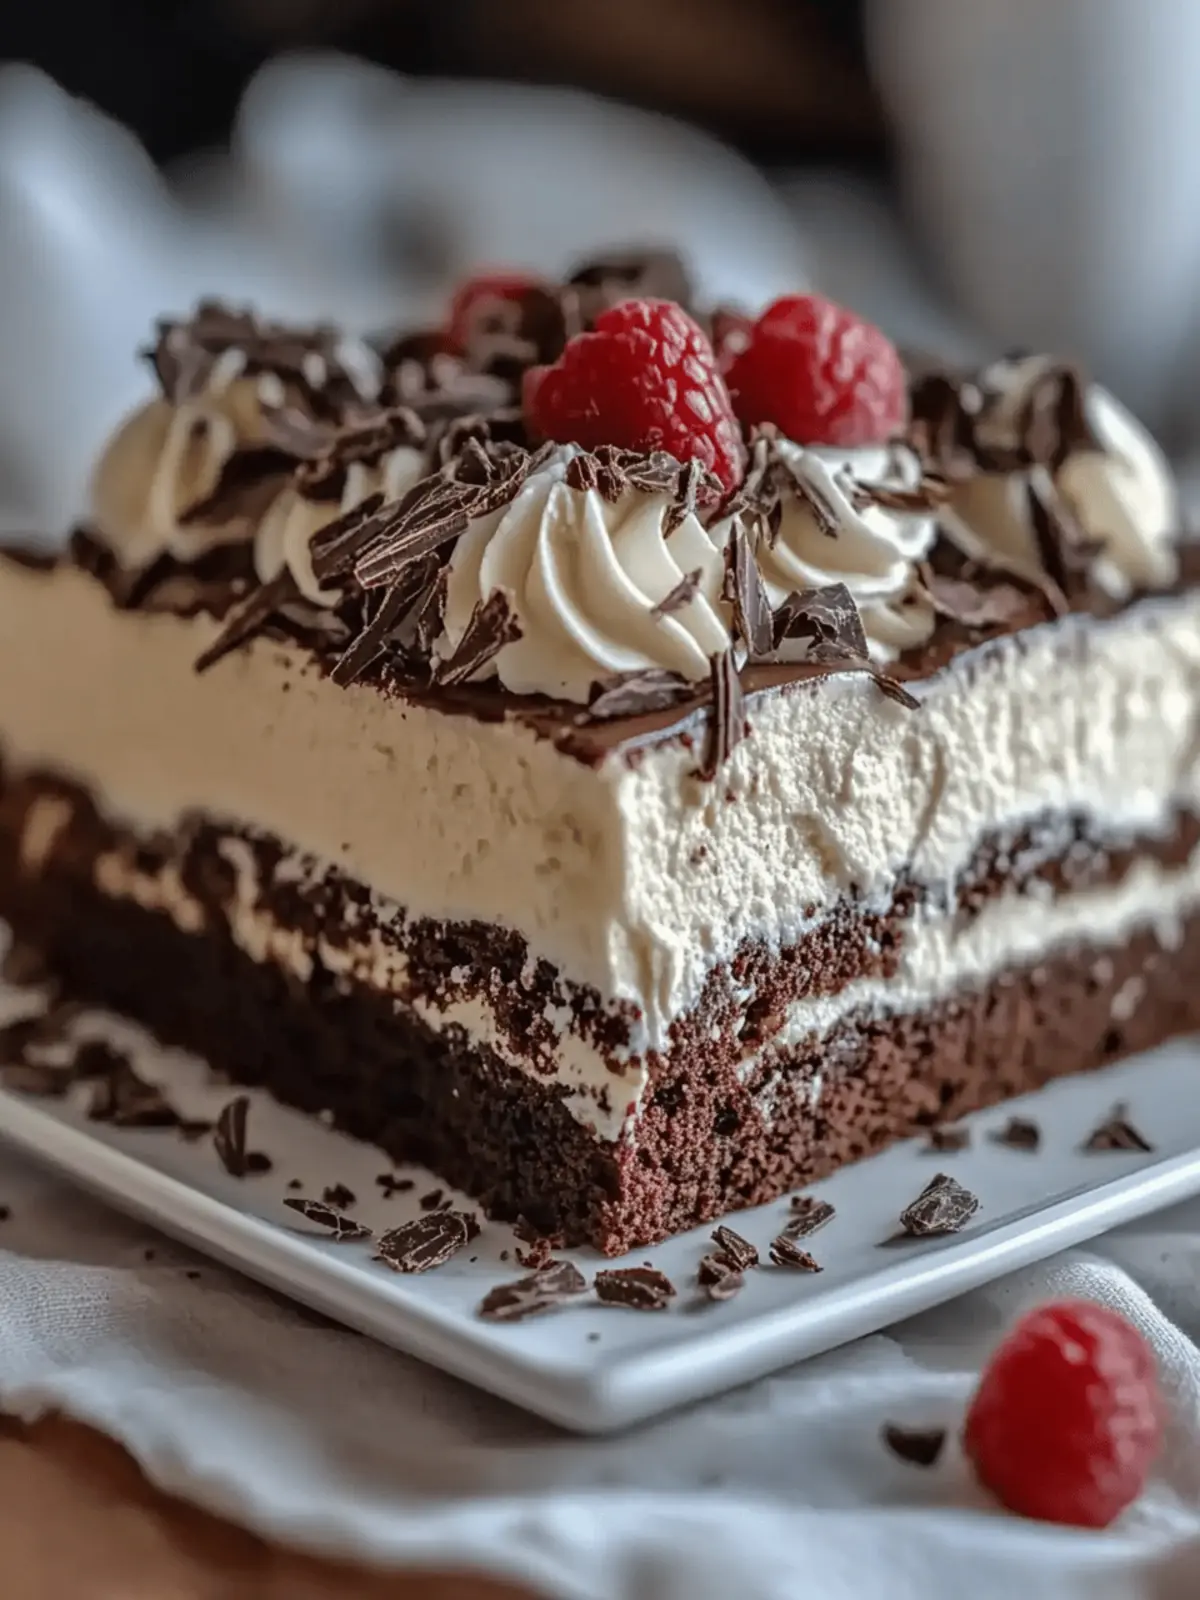
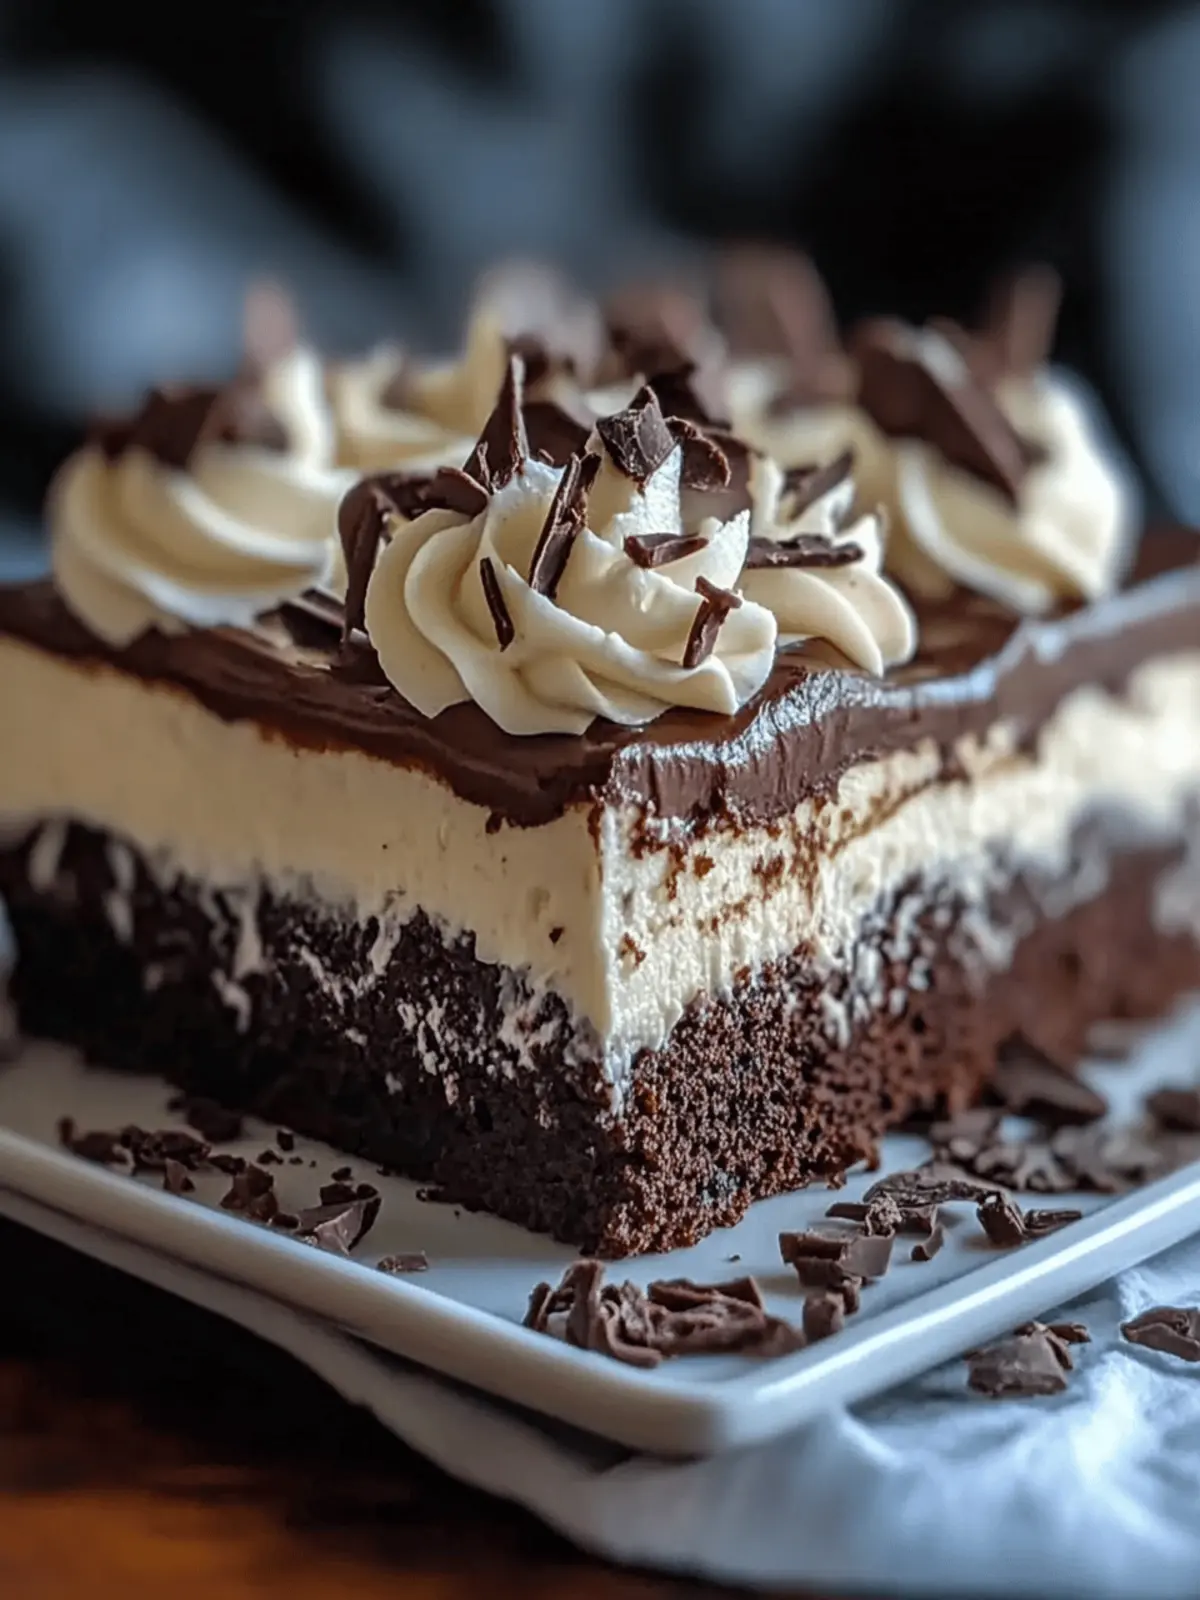
Indulgent Layers: This cake is a showstopper with velvety layers of brownie, pudding, and whipped topping that create an unforgettable taste experience.
No-Bake Convenience: With no baking required, it’s perfect for hot days when the oven is a no-go.
Make-Ahead Magic: Prepare it in advance and let it chill overnight; the flavors only get better!
Customizable Delight: Switch things up with different pudding flavors or toppings to suit your mood and preferences.
Crowd Appeal: Serve it at parties or family gatherings, and watch as it disappears faster than you can say “delicious!”
Brownie Refrigerator Cake Ingredients
For the Brownie Base
- Brownie Mix – Use a gluten-free brownie mix if you need a gluten-free version.
For the Creamy Layer
- Cream Cheese – This gives a deliciously creamy, cheesecake-like texture; opt for dairy-free cream cheese for a vegan option.
- Whipped Topping – Adds an airy lightness; substitute with a coconut-based option for a dairy-free treat.
For the Pudding Layer
- Chocolate Pudding – This rich layer is essential; feel free to experiment with butterscotch or caramel pudding for a fun twist!
- Milk – Necessary for preparing the pudding; almond or oat milk works perfectly for those who are lactose intolerant.
Optional Toppings
- Crushed Nuts – Add a crunchy texture and nutty flavor to your dessert.
- Berry Sauce – Enhances the overall taste and gives a fruity contrast; choose your favorite fruit sauce for customization!
How to Make Brownie Refrigerator Cake
-
Prepare Brownies: Start by baking the brownie mix according to the package instructions. Allow the brownies to cool completely, as this is crucial for layering without melting the cream cheese.
-
Mix Cream Cheese Layer: In a mixing bowl, combine softened cream cheese with half of the whipped topping. Mix until smooth and creamy, ensuring it’s well blended and fluffy.
-
Prepare Pudding: Follow the package instructions to prepare the chocolate pudding. Allow it to set until it has thickened properly, achieving that rich and velvety texture.
-
Layer the Cake: Once the brownie base is cooled, gently spread the cream cheese mixture over the top. Then, add a generous layer of chocolate pudding over the cream cheese, smoothing it out evenly.
-
Top with Whipped Topping: Add the remaining whipped topping on top of the pudding layer. Smooth it out beautifully for an eye-catching finish.
-
Chill and Set: Refrigerate the layered cake for at least 2 hours, but overnight is preferred. This ensures that the layers meld together and makes slicing easier.
Optional: Garnish with crushed nuts or a drizzle of berry sauce before serving for an extra touch!
Exact quantities are listed in the recipe card below.
Storage Tips for Brownie Refrigerator Cake
-
Fridge: Store the Brownie Refrigerator Cake covered in the refrigerator for up to 3 days to keep it fresh and prevent drying out.
-
Freezer: You can freeze the cake for up to 2 months; just make sure to wrap it tightly in plastic wrap and then aluminum foil to prevent freezer burn.
-
Thawing: To enjoy frozen cake, thaw it in the fridge overnight before serving. This helps maintain the creamy texture.
-
Reheating: There’s no need to reheat; this delightful no-bake cake is best served cold, so simply slice and serve straight from the fridge!
Make Ahead Options
These Brownie Refrigerator Cakes are perfect for meal prep enthusiasts looking to save time during busy days! You can prepare the brownie base up to 24 hours in advance; simply bake and let it cool completely before layering. The cream cheese mixture and chocolate pudding can be prepared a day before serving as well—just store them separately in airtight containers in the refrigerator. Assemble the cake by layering the cream cheese and pudding over the chilled brownie base, topped with whipped topping. Allow it to chill for at least 2 hours or preferably overnight, ensuring the flavors meld beautifully. This way, your dessert will be just as delicious and satisfying when it’s time to serve!
Brownie Refrigerator Cake Variations
Customize this irresistible dessert with delicious twists that will delight your taste buds and impress your guests!
-
Gluten-Free: Substitute the brownie mix with a certified gluten-free option to cater to dietary needs while maintaining rich flavors.
-
Dairy-Free: Use dairy-free cream cheese and whipped topping made from coconut for an equally indulgent vegan treat without compromising texture.
-
Pudding Flavors: Swap chocolate pudding for vanilla, butterscotch, or even caramel to introduce new flavors and keep things exciting.
-
Nutty Crunch: Add crushed walnuts or pecans to the layers for a satisfying crunch that perfectly contrasts the creamy texture.
-
Fruit Infusion: Layer sliced strawberries, raspberries, or bananas in between the layers for a refreshing burst of natural sweetness.
-
Cookie Crust: Replace the brownie base with a cookie crust made from crushed Oreos or graham crackers for a delightful twist and different texture.
-
Spicy Kick: For those who like a bit of heat, add a pinch of cayenne pepper or some spicy chocolate to take the flavor to new, exciting levels.
-
Minty Freshness: Incorporate mint extract into the cream cheese layer for a refreshing mint chocolate combo that’s perfect for warm weather.
What to Serve with Brownie Refrigerator Cake?
As you prepare to indulge in a slice of this decadent dessert, consider some delightful accompaniments to elevate your experience.
-
Vanilla Ice Cream: The creamy, cool scoop complements the rich flavors of the cake beautifully, creating a harmonious balance.
-
Fresh Berries: A colorful mix of strawberries, blueberries, or raspberries adds a refreshing contrast that brightens each bite.
-
Chocolate Sauce: Drizzling a bit of warm chocolate sauce on top enhances the indulgence and can take your dessert to another level.
-
Mint Leaves: A sprig of fresh mint adds a pop of color and a hint of freshness that cuts through the cake’s richness.
-
Coffee or Espresso: A robust cup of coffee or a shot of espresso pairs perfectly, bringing out the chocolate notes in the dessert.
-
Whipped Cream: A dollop of extra whipped cream on top adds a touch of fluffiness that complements the cake’s layered texture.
-
Nuts: Sprinkle some crushed nuts for added crunch; the nutty flavor is a delightful addition that enhances the overall experience.
-
Milkshakes: A chocolate or vanilla milkshake is fun and nostalgic, enriching the indulgent experience and making it a perfect treat for gatherings.
Whatever your choice, these pairings will make your Brownie Refrigerator Cake experience unforgettable!
Expert Tips for Brownie Refrigerator Cake
- Cool Completely: Always let brownies cool completely before layering; warm brownies can melt the cream cheese layer, ruining the texture.
- Gentle Mixing: Be gentle when mixing the pudding to prevent it from becoming runny; using the right technique helps maintain the desired consistency.
- Slicing Made Easy: Allow ample chilling time—overnight if possible—to stabilize the Brownie Refrigerator Cake, making it easier to slice cleanly.
- Use a Sharp Knife: For the neatest slices, use a sharp knife and clean it between cuts; this helps maintain the beautiful layering.
- Customize Flavors: Don’t hesitate to experiment with different pudding flavors or add toppings; this allows everyone to enjoy their preferred twist on this tasty dessert!
Brownie Refrigerator Cake Recipe FAQs
What type of brownie mix should I use?
Absolutely! For the Brownie Refrigerator Cake, a standard brownie mix will work perfectly. If you’re looking for a gluten-free option, simply swap it out for a gluten-free brownie mix. This ensures everyone can enjoy a slice of this delightful dessert without compromising on taste!
How should I store the Brownie Refrigerator Cake?
To keep your Brownie Refrigerator Cake fresh, cover it tightly with plastic wrap or foil and store it in the refrigerator. It will stay delicious for up to 3 days. If you’re making it for a gathering, it’s perfect as it allows for make-ahead convenience without losing quality.
Can I freeze the Brownie Refrigerator Cake?
Yes, you can freeze it! To do so, first ensure the cake is fully assembled, then wrap it tightly in plastic wrap followed by aluminum foil to prevent freezer burn. It can be stored in the freezer for up to 2 months. When you’re ready to serve, just move it to the fridge for overnight thawing; this will help maintain its creamy texture.
What if my pudding mixture turns out runny?
Very! If your pudding ends up runny, it often means it hasn’t thickened enough. Always follow the package instructions carefully, and allow the pudding to sit for the recommended time. If it’s too late and it’s already runny, you can add a little cornstarch (cooked beforehand) to help thicken it. Just mix gently to avoid lumps.
Can I use dairy-free substitutes in this recipe?
Certainly! For a dairy-free version, you can use dairy-free cream cheese and coconut-based whipped topping. Opt for almond or oat milk when preparing the pudding to keep it lactose-free. This way, everyone can dive into your Brownie Refrigerator Cake, irrespective of dietary preferences!
How do I make my cake layers stand out visually?
For a stunning presentation, use a sharp knife to slice your Brownie Refrigerator Cake, wiping it clean between cuts. You can also sprinkle crushed nuts or drizzle some berry sauce on top just before serving. These small touches not only enhance your cake’s visual appeal but also add delightful flavors to each slice!
Irresistible Brownie Refrigerator Cake: No-Bake Delight Awaits
Ingredients
Equipment
Method
- Start by baking the brownie mix according to the package instructions. Allow the brownies to cool completely.
- In a mixing bowl, combine softened cream cheese with half of the whipped topping. Mix until smooth and creamy.
- Follow the package instructions to prepare the chocolate pudding and allow it to set until thickened.
- Once the brownie base is cooled, spread the cream cheese mixture over the top and then add a layer of chocolate pudding.
- Add the remaining whipped topping on top of the pudding layer and smooth it out.
- Refrigerate the layered cake for at least 2 hours, preferably overnight, to set.