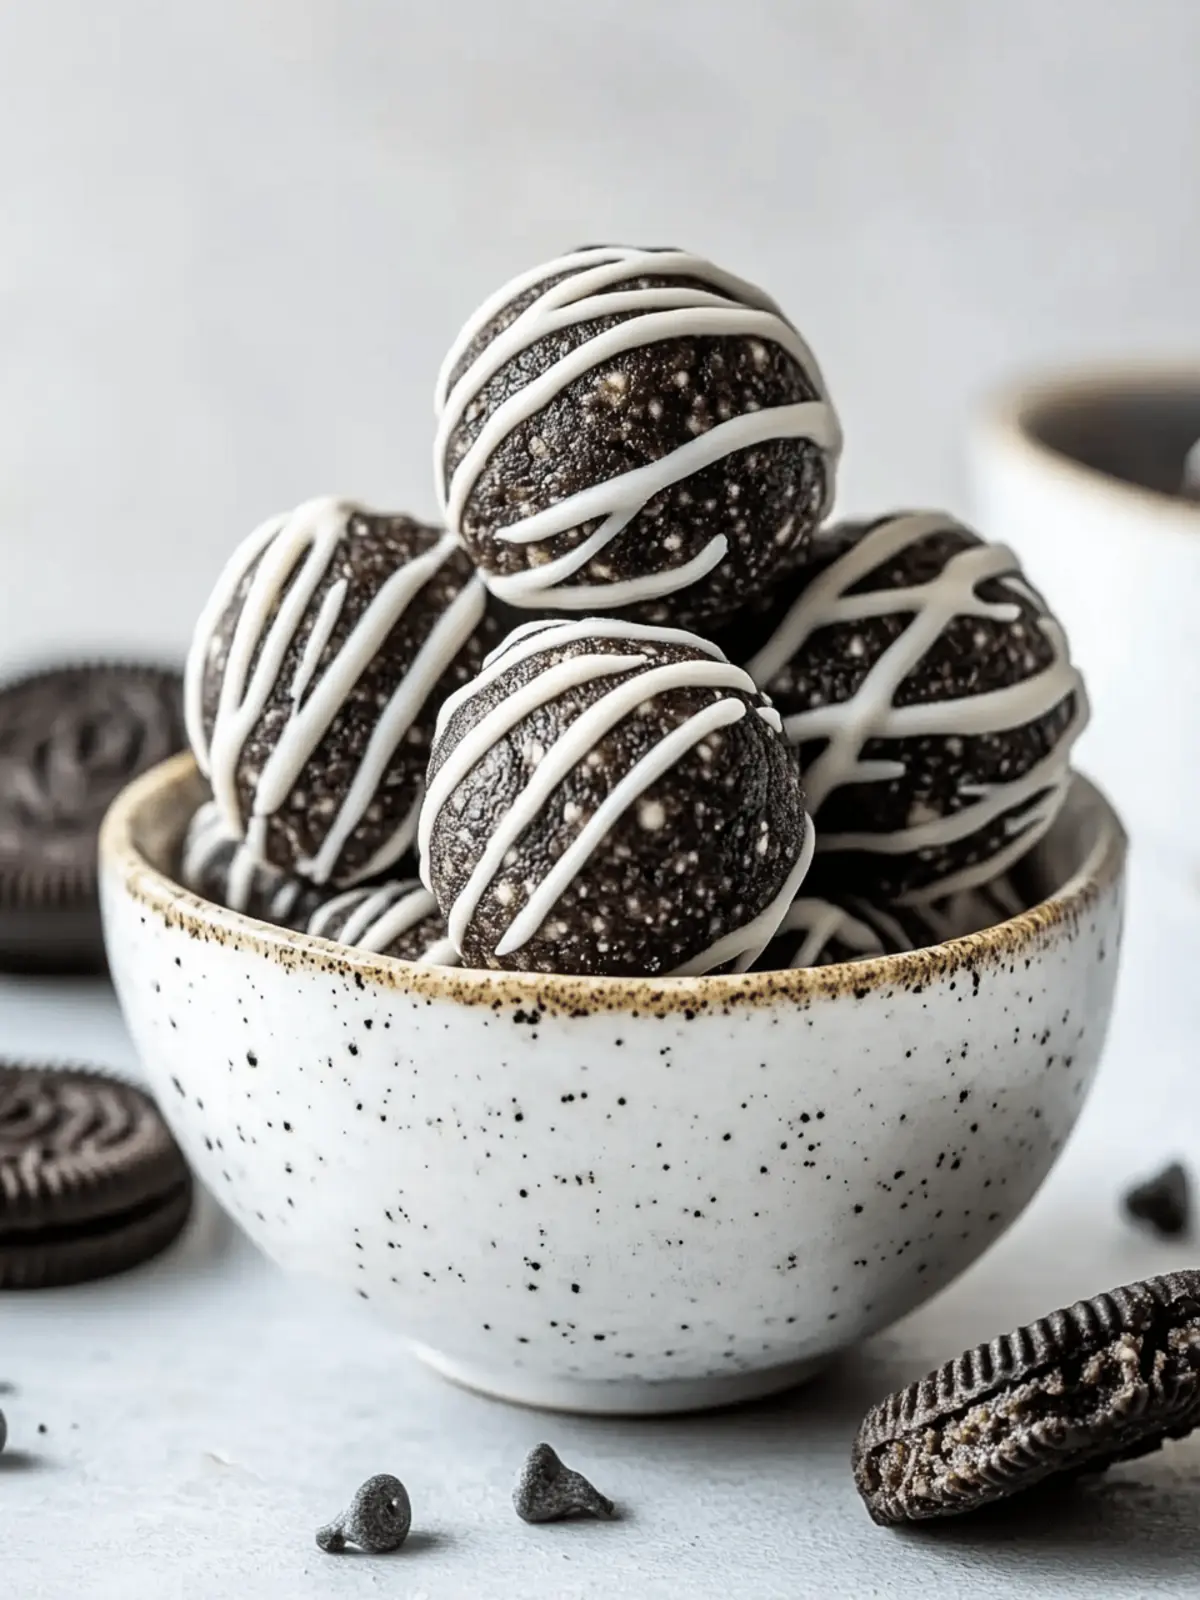
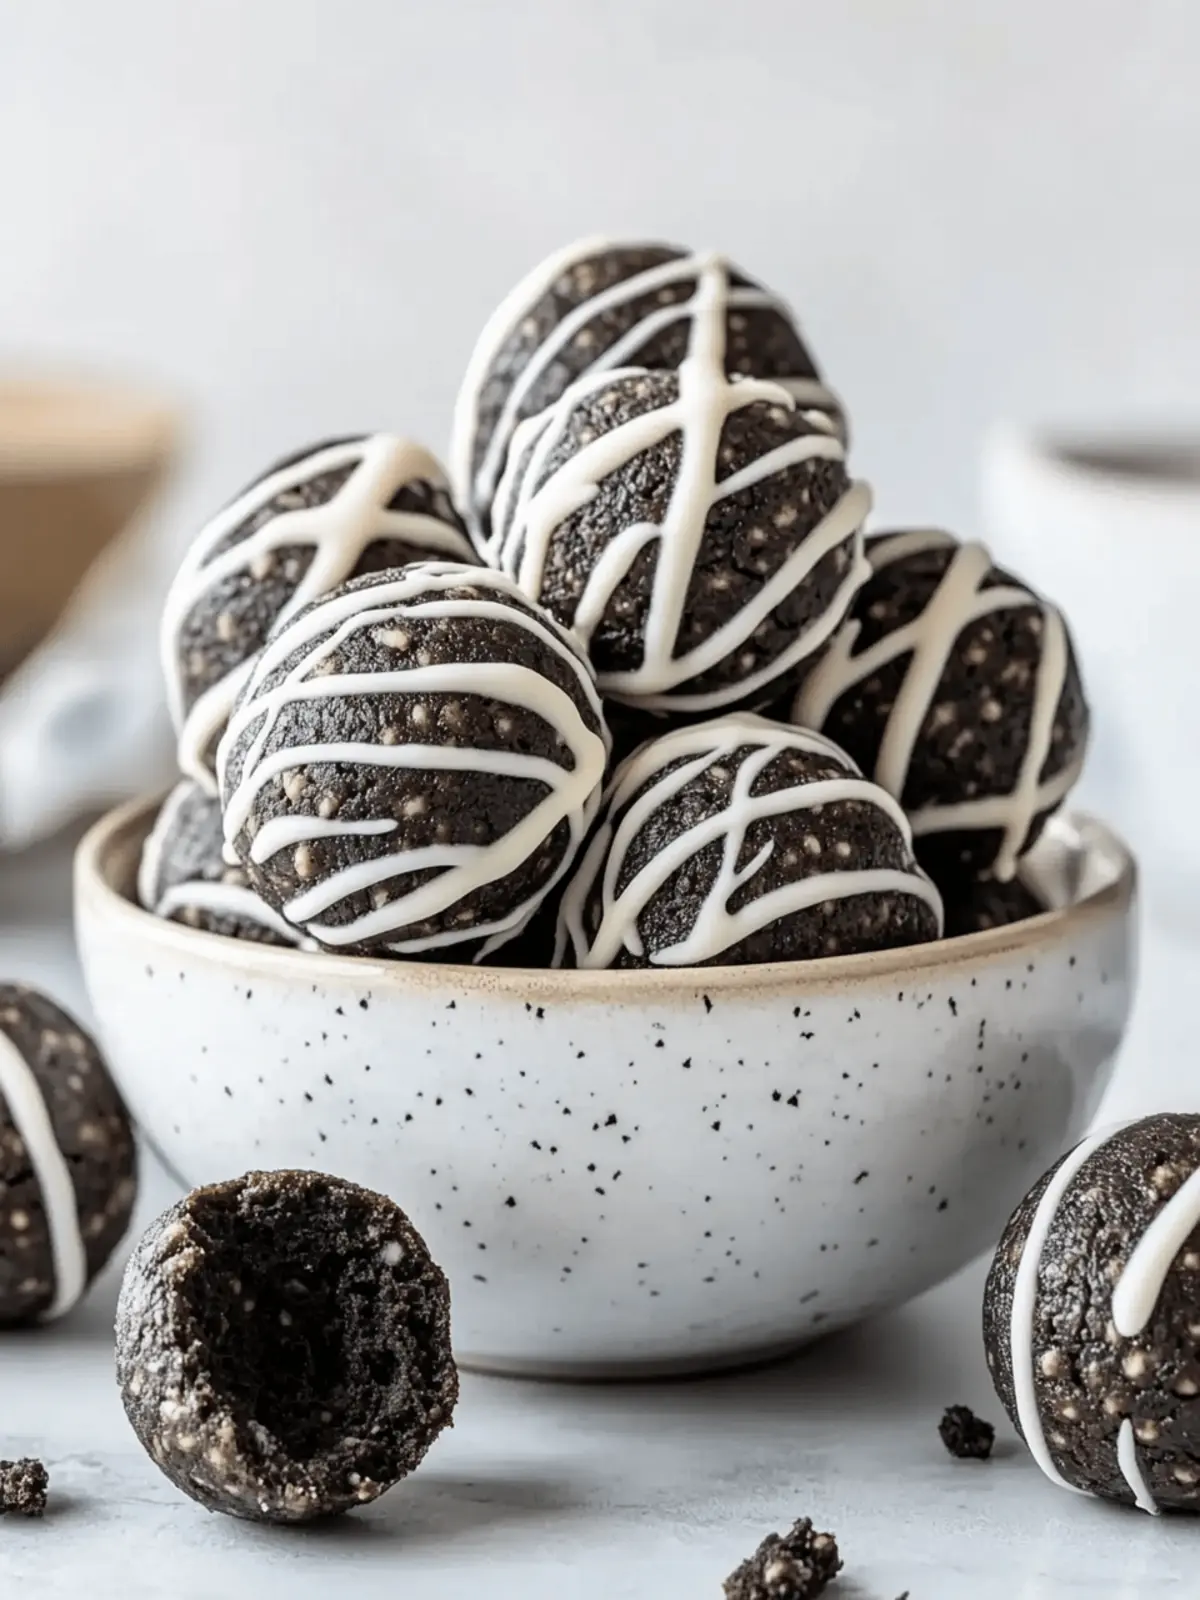
There’s nothing quite like the joy of creating a delicious snack at home, especially one as tempting as these Oreo Protein Balls. The first time I combined those crunchy Oreo bits with creamy textures and a protein boost, I was instantly hooked. Imagine the bliss of indulging in a sweet treat that fuels your day without the guilt!
Perfect for busy schedules, these no-bake delights come together in under 20 minutes. Whether you’re coming off a workout or seeking a quick pick-me-up in the afternoon, these protein-packed balls are a game-changer. Best of all, you can easily customize them with your favorite protein powder flavors or add in extra goodies like nuts or dried fruits for added texture and nutrition.
Join me as we whip up this delightful treat that promises to satisfy your cravings while keeping things healthy and convenient. Trust me, once you make these, you’ll be begging for more!

Why Are Oreo Protein Balls a Must-Try?
Quick and Easy: The no-bake recipe takes just 20 minutes to prepare, making it an ideal choice for busy days.
Protein-Packed Delight: Each bite offers a satisfying protein boost that’s perfect for active lifestyles or as an after-workout snack.
Customizable Flavors: Choose from chocolate or vanilla protein powder and mix in your favorite add-ins like nuts or dried fruits for a personalized treat!
Irresistible Taste: Indulge in the rich, creamy Oreo flavor combined with a smooth texture that’s hard to resist.
Healthier Treat Option: Enjoy the sweets you love without the guilt, satisfying your cravings while keeping your wellness goals in check.
Explore more delicious snacks with our easy no-bake recipes that fit perfectly into your busy lifestyle!
Oreo Protein Balls Ingredients
For the Base
- Crushed Oreos – Adds the classic Oreo flavor; you can swap with any chocolate wafer cookies if preferred.
- Cream Cheese – Provides creaminess and binds the ingredients; vegan cream cheese is a great dairy-free alternative.
- Protein Powder – Boosts protein content; choose chocolate for an indulgent taste or vanilla for a lighter cookies-and-cream vibe.
For the Moisture
- Almond Milk – Keeps the mixture moist; adjust the amount based on the absorption of your protein powder.
For the Coating
- Melted Chocolate – Makes a delicious outer layer; feel free to use dark, milk, or white chocolate to match your craving.
- Coconut Oil – Helps in melting the chocolate smoothly and prevents stickiness while rolling the balls.
Get ready to whip up these Oreo Protein Balls for a quick energy boost that’s sweet, satisfying, and oh-so-simple to make!
How to Make Oreo Protein Balls
-
Prepare Baking Sheet: Line a baking sheet with wax paper to prevent sticking and make cleanup a breeze. This will be where you place your delicious creations!
-
Mix Dry Ingredients: In a large bowl, combine the protein powder, crushed Oreos, and any dry add-ins like coconut flour. Stir until well mixed for an even flavor throughout.
-
Add Wet Ingredients: Mix in the cream cheese and almond milk. Stir until a uniform dough forms; feel free to adjust the liquid as needed to get the right consistency.
-
Roll Balls: Take heaping tablespoon-sized portions of the dough and roll them into balls. Place these glossy gems on the wax paper, making sure they have space between them.
-
Melt Chocolate: In a microwave-safe bowl, combine the chocolate and coconut oil. Melt in 30-second increments, stirring in between until smooth and silky.
-
Coat Protein Balls: Drizzle or dip the rolled balls into the melted chocolate. Ensure they’re fully coated, then freeze for 10 minutes until the chocolate sets beautifully.
-
Store: Once set, transfer the protein balls to an airtight container. They can be stored in the fridge for up to a week or frozen for a convenient snack later!
Optional: Sprinkle some crushed nuts on top for an extra crunchy texture!
Exact quantities are listed in the recipe card below.

Storage Tips for Oreo Protein Balls
-
Room Temperature: Enjoy these delightful treats fresh, but avoid leaving them out for more than 2 hours to maintain freshness and prevent spoilage.
-
Fridge: Store Oreo Protein Balls in an airtight container for up to a week. This keeps them soft and preserves their delicious flavor.
-
Freezer: For long-term storage, freeze the protein balls for up to three months. Layer between parchment paper to prevent sticking and return them to the fridge overnight before snacking.
-
Reheating: If desired, let frozen Oreo Protein Balls thaw at room temperature for a more enjoyable texture. There’s no need for extra heating—just enjoy!
Oreo Protein Balls Variations
Get ready to let your creativity take flight as you customize these delightful treats!
-
Flavor Fusion: Experiment with flavored protein powders like cookies and cream or caramel for an exciting twist.
-
Nutty Richness: Stir in chopped nuts such as almonds or walnuts for an added crunch that complements the creaminess perfectly.
-
Fruitful Addition: Toss in dried fruits like cranberries or raisins to add a chewy sweetness that balances the crunchy Oreo bits.
-
Coconut Twist: Roll the coated balls in shredded coconut for a tropical flair that enhances the overall texture.
-
Crunchy Boost: Incorporate crushed pretzels or granola for an extra layer of crunch and a touch of salty goodness.
-
Spicy Kick: A pinch of cayenne pepper can add an unexpected heat, making each bite a delightful surprise.
-
Seeds for Health: Add chia or flax seeds to amp up the nutrition by introducing healthy fats and fiber.
-
Chocolate Overload: Drizzle with extra melted chocolate or use a chocolate-covered coating for a deliciously indulgent finish.
Let these variations inspire you to craft your perfect batch of Oreo Protein Balls. The only limit is your imagination!
Make Ahead Options
These delicious Oreo Protein Balls are perfect for meal prep, saving you time on busy weeknights! You can prepare the mixture up to 24 hours in advance by rolling the balls and storing them in the refrigerator in an airtight container. To maintain their texture and flavor, keep them refrigerated until you’re ready to coat them. When you’re set to indulge, simply melt the chocolate and coat the chilled protein balls, then freeze them for about 10 minutes to let the chocolate set. This way, you can enjoy a protein-packed snack at a moment’s notice, just as delightful as when you first made them!
Expert Tips for Easy No-Bake Oreo Protein Balls
-
Choose Quality Ingredients: Use high-quality Oreos and protein powder for the best flavor. Cheaper brands may lack the rich taste that defines these Oreo Protein Balls.
-
Adjust Moisture Wisely: Start with less almond milk and add gradually. Too much liquid makes the mixture too sticky, while too little can result in dry balls.
-
Room Temperature Cream Cheese: Bring the cream cheese to room temperature for easier blending. This ensures a smoother dough and prevents lumps in your delicious protein balls.
-
Roll with Ease: Coat your hands with coconut oil while rolling to prevent sticking. This little trick saves time and mess!
-
Chill Before Serving: Freezing for the full 10 minutes is key for a perfect chocolate coating. This step allows the chocolate to set properly on your Oreo Protein Balls.
What to Serve with Oreo Protein Balls?
Craft an inviting experience with these protein-packed treasures that are perfect for snacking or dessert.
- Fresh Berries: Juicy strawberries or blueberries add a refreshing pop of flavor that balances the sweetness of the protein balls.
- Greek Yogurt: This creamy addition provides extra protein and pairs beautifully for a satisfying snack or breakfast bowl.
- Smoothies: Blend a nutrient-rich smoothie with spinach, banana, and almond milk for a complete meal that complements the protein boost.
Pair these snacks with smooth coffee or a fulfilling chai latte to round out your day. Their flavors marry beautifully, making your snack time a true delight!
Oreo Protein Balls Recipe FAQs
How do I choose ripe ingredients for Oreo Protein Balls?
Absolutely! For the best flavor and texture, use fresh ingredients. When selecting cream cheese, look for a smooth, soft texture without any lumps. Ensure your Oreos are not stale; they should snap easily and have a crispiness. If needed, opt for a dairy-free cream cheese variant that’s creamy and has no dark spots, indicating spoilage.
How should I store Oreo Protein Balls, and how long do they last?
To keep your Oreo Protein Balls fresh, store them in an airtight container in the fridge for up to a week. They should stay deliciously soft during this time. If you prefer a longer storage option, feel free to freeze them—properly sealed, they can last up to three months. Just remember to separate layers with parchment paper to prevent sticking!
Can I freeze Oreo Protein Balls? If so, how?
Very! Freezing is a fantastic way to keep your Oreo Protein Balls fresh for longer. To freeze, first, place them in a single layer on a baking sheet and pop them in the freezer until they’re firm. Once set, transfer the balls to an airtight container, layering them with parchment paper for easy access. Whenever you’re ready, grab one and let it thaw at room temperature for a perfect treat!
What if my dough is too sticky or too dry?
No worries at all! If the dough feels too sticky, gradually add a little more protein powder to absorb the excess moisture. On the flip side, if it’s too dry, mix in almond milk a teaspoon at a time until you achieve a dough that holds together well. Remember, a little adjustment can make all the difference in getting that perfect consistency!
Can pets have Oreo Protein Balls, and are there allergy considerations?
It’s best to keep these delicious Oreo Protein Balls away from pets, particularly due to their cream cheese and chocolate components, which can be harmful to animals. Additionally, if you have allergies, consider using allergen-free chocolate or protein powder. Always read labels to ensure your ingredients are safe for your dietary needs.
How can I customize my Oreo Protein Balls?
The more the merrier! For a unique twist, experiment with different flavored protein powders like cookies and cream or add-ins like chopped nuts, seeds, or dried fruits. You might also try incorporating a splash of vanilla extract or a pinch of salt for that extra flavor kick. Feel free to make these protein balls your own!
Delicious No-Bake Oreo Protein Balls for Quick Energy Boost
Ingredients
Equipment
Method
- Prepare Baking Sheet: Line a baking sheet with wax paper.
- Mix Dry Ingredients: Combine protein powder, crushed Oreos, and dry add-ins in a large bowl.
- Add Wet Ingredients: Mix in cream cheese and almond milk to form a uniform dough.
- Roll Balls: Take heaping tablespoon-sized portions and roll into balls.
- Melt Chocolate: In a microwave-safe bowl, combine chocolate and coconut oil; melt until smooth.
- Coat Protein Balls: Drizzle or dip the rolled balls into the melted chocolate.
- Store: Transfer the protein balls to an airtight container.