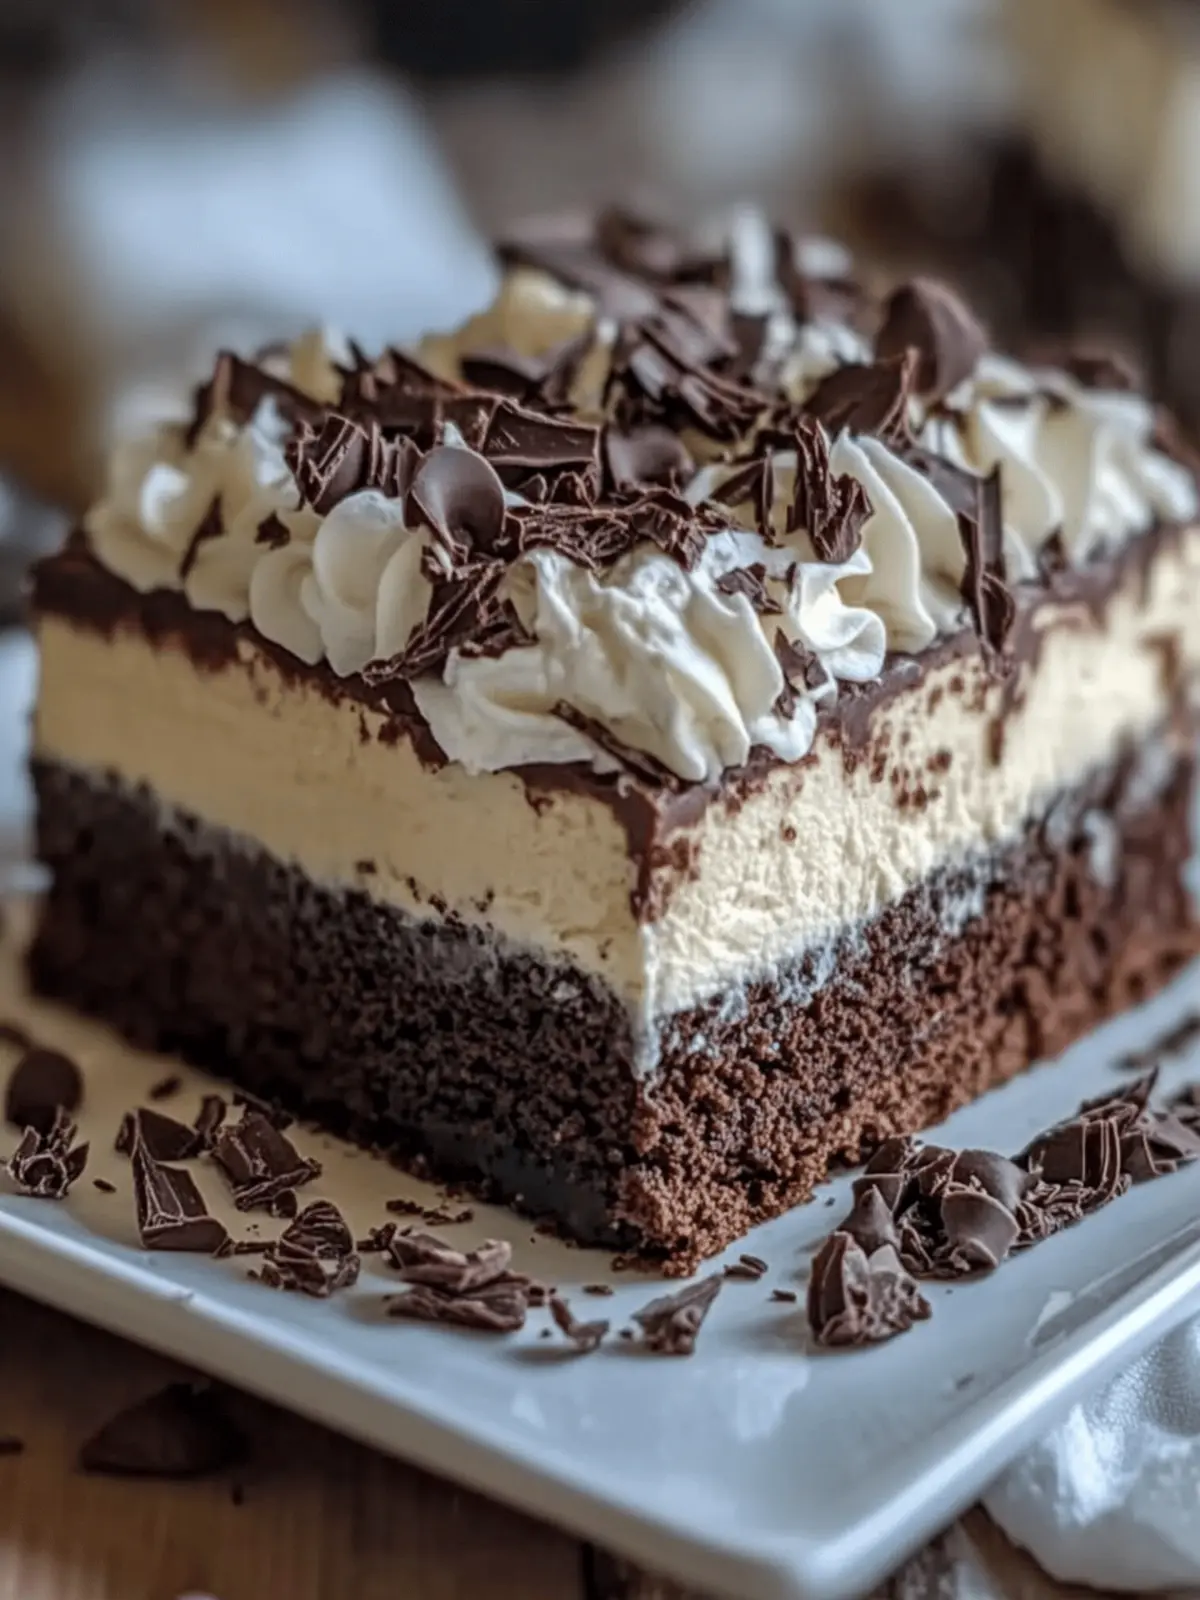
There’s a special kind of joy that fills a kitchen when the weather warms up; the idea of bringing everyone together for sweet treats often excites me. That’s when I discovered an absolute crowd-pleaser: the No-Bake Brownie Refrigerator Cake. Combining fudgy brownie layers with silky, rich pudding and a fluffy whipped topping, this dessert is a heavenly tribute to indulgence, all without the need for an oven.
Imagine inviting friends over for a casual gathering, then unveiling this decadent surprise from the fridge—its layers glistening and ready to be sliced. Not only is this recipe incredibly easy to throw together ahead of time, but it is also entirely customizable. Whether you’re feeding a group with dietary restrictions or simply craving a unique twist, options abound. So, grab your ingredients and let’s dive into creating this delightful masterpiece that charms the taste buds and cools the summer heat!

Why is Brownie Refrigerator Cake a must-try?
Decadent Layers: The combination of fudgy brownies and creamy pudding creates an experience that is delightfully indulgent.
No Bake Simplicity: Say goodbye to turning on the oven—this no-bake recipe is perfect for hot days and simplifies the cooking process.
Customizable: Easily adapt this recipe for gluten-free or dairy-free diets, ensuring everyone can enjoy a slice.
Make-Ahead Delight: Prepare in advance and let it chill in the fridge, saving you time and stress for gatherings.
Showstopper Presentation: Impress your guests with stunning layers, making it perfect for parties or family get-togethers.
Whether you’re craving something sweet or entertaining guests, this Brownie Refrigerator Cake will surely please everyone!
Brownie Refrigerator Cake Ingredients
For the Brownie Base
• Brownie Mix – A framework of fudginess; swap for a gluten-free option if needed.
• Eggs – Essential for binding; you can add an extra egg for a sturdier texture.
For the Creamy Layer
• Cream Cheese – Offers a delightful tang; choose dairy-free cream cheese for vegan adaptability.
• Chocolate Pudding Mix – Provides that luscious filling; butterscotch or caramel pudding can add a unique twist.
For the Fluffy Topping
• Whipped Topping – Lightens the dessert beautifully; coconut-based whipped topping works well for a dairy-free version.
Optional Toppings
• Ice Cream – Vanilla is a classic choice that pairs wonderfully with the cake.
• Fresh Berries – Strawberries or raspberries add a fresh zing; they contrast beautifully with the rich layers.
• Caramel Sauce – A drizzle enhances the indulgence and adds gourmet flair.
This Brownie Refrigerator Cake is not just easy to make, but it also allows for creativity to shine!
How to Make Brownie Refrigerator Cake
-
Prepare Brownies: Bake the brownies according to package instructions, then let them cool completely for at least 1 hour. This step is crucial to ensure the layers do not mix when assembled.
-
Make Cream Cheese Layer: Beat the softened cream cheese in a bowl until smooth. Gradually add the prepared chocolate pudding and stir until well combined, creating a luscious filling.
-
Layering: Once the brownies are cool, evenly spread the cream cheese mixture over the brownie base, making sure to cover every edge for a balanced flavor.
-
Add Whipped Topping: Gently smooth a layer of whipped topping over the cream cheese mixture. This creates a light and airy finish that balances the dense brownie layers.
-
Chill: Cover the dessert and refrigerate it for at least 2 hours, or overnight if possible, allowing all the flavors to meld beautifully together.
-
Serve: Using a sharp knife, slice the cake into squares. For a clean presentation, wipe the knife between each cut.
Optional: Garnish with freshly sliced berries or a drizzle of caramel sauce for that extra touch of elegance.
Exact quantities are listed in the recipe card below.
Make Ahead Options
These Brownie Refrigerator Cakes are a dream for meal prep enthusiasts! You can easily prepare the brownie base up to 24 hours in advance, allowing it to cool completely (this helps maintain the structure for layering). The creamy filling can also be made ahead; just combine the cream cheese and pudding mixture, then refrigerate it for up to 3 days. When you’re ready to assemble, simply spread the cream cheese layer over the brownies, add the whipped topping, and chill the entire cake for at least 2 hours, preferably overnight. This way, the flavors meld together beautifully, ensuring your dessert is just as delicious and fresh as if made the same day!
Expert Tips for Brownie Refrigerator Cake
-
Cool Brownies Properly: Allow brownies to cool for at least 1 hour to maintain layer integrity; skipping this can lead to messy layers when assembled.
-
Mix Pudding Just Right: Avoid overwhisking the pudding mix to prevent a runny texture; blend until combined for the best creamy filling.
-
Thaw Whipped Topping: Let whipped topping thaw completely for smoother spreading; partially frozen topping can be difficult to work with.
-
Chill for Best Results: Refrigerate for a minimum of 2 hours, preferably overnight, to allow flavors to meld and the Brownie Refrigerator Cake to set properly.
-
Neat Slicing Technique: Use a sharp knife and clean it between cuts for a tidy presentation; this enhances the overall appeal of your dessert.
How to Store and Freeze Brownie Refrigerator Cake
-
Fridge: Store leftovers in an airtight container in the refrigerator for up to 3 days. This keeps the Brownie Refrigerator Cake fresh and flavorful.
-
Freezer: For longer storage, wrap individual slices tightly in plastic wrap, then place them in a freezer-safe bag. Enjoy them within 2 months for optimal taste.
-
Thawing: Thaw slices overnight in the fridge before serving, allowing the flavors to come back to life while retaining their creamy texture.
-
Serving after Storage: Reassemble the cake with fresh toppings or a drizzle of warm caramel sauce to elevate its presentation and taste.
What to Serve with Brownie Refrigerator Cake?
Imagine a cozy gathering, where delightful flavors and textures dance on your palate, perfectly complementing your no-bake masterpiece.
- Vanilla Ice Cream: A classic pairing that adds creaminess and balances the rich chocolate layers with a refreshing contrast.
- Fresh Berries: Strawberries or raspberries provide a tart burst of flavor that cuts through the sweetness and adds a beautiful pop of color.
- Caramel Sauce: Drizzle over the top for a gourmet touch that enhances the decadent experience with added sweetness and richness.
The combination of these elements creates a harmonious dessert experience. Each bite of the Brownie Refrigerator Cake becomes even more irresistible when accompanied by a scoop of vanilla ice cream alongside a splash of fresh fruit. Consider serving this delightful ensemble at your next gathering!
- Espresso or Coffee: A rich cup of coffee enhances the dessert’s flavors, balancing its sweetness and making for an elegant after-dinner treat.
- Chocolate Sauce: Drizzle more chocolate for the chocoholic! It adds extra indulgence and pairs excellently with the existing brownie layers.
- Nuts: Whether crushed walnuts or pecans, a sprinkle on top adds delightful crunch and depth of flavor that complements the soft textures.
- Whipped Cream: A dollop of whipped cream can elevate the dessert, adding airy sweetness that lightens the heaviness of the cake.
- Coconut Flakes: Toasted coconut brings a tropical flair to the mix, enhancing the richness while offering a surprising texture contrast.
- Mint Leaves: A fresh mint garnish not only adds vibrant color but also provides a refreshing aroma, brightening every slice.
Brownie Refrigerator Cake Variations
Customize your Brownie Refrigerator Cake to match your tastes and dietary needs—it’s all about making this dessert work for you!
-
Gluten-Free: Substitute the brownie mix with a gluten-free version to cater to those with gluten sensitivities. This ensures everyone gets to indulge without compromise.
-
Dairy-Free Delight: Use dairy-free cream cheese and a coconut whipped topping for a vegan-friendly twist. The flavors remain rich and creamy, perfect for enjoying a classic dessert guilt-free.
-
Pudding Flavor Boost: Experiment with different pudding flavors like vanilla, butterscotch, or even coconut for a unique twist on your cake. Each flavor adds its own charm and can surprise your taste buds!
-
Fruity Layers: Add a layer of fresh berries, such as strawberries or raspberries, before the whipped topping. The tartness beautifully complements the sweetness, creating an exciting flavor contrast.
-
Chocolate Lovers’ Dream: Mix in chocolate chips or chunks into the cream cheese layer for added chocolate goodness. It creates a fudgier experience and gives you that extra chocolate punch.
-
Nutty Crunch: Include chopped nuts like pecans or walnuts in between layers to introduce a delightful crunch. This creates a fantastic texture contrast and adds an unexpected surprise with every bite.
-
Spicy Kick: For those who like a little heat, sprinkle in a pinch of cayenne or chili powder into the brownie mix. It will elevate the flavor profile and leave lingering warmth that dances on your palate.
-
Caramel Infusion: Drizzle caramel sauce between the layers for a luxurious touch. This adds a sweet, gooey layer that perfectly complements the rich brownie base.
Embrace the creative possibilities with your Brownie Refrigerator Cake—it’s bound to be a hit no matter how you customize it!
Brownie Refrigerator Cake Recipe FAQs
How do I select the best brownie mix for my Brownie Refrigerator Cake?
Absolutely! Look for a brownie mix that promises rich, fudgy brownies as the base—this is key for the desired texture. If you’re aiming for gluten-free, many brands offer great mixes. Check the ingredient list for what aligns with your dietary needs. Also, if you can, consider picking a mix with no artificial additives for a more wholesome treat.
What’s the best way to store leftovers from my Brownie Refrigerator Cake?
Very simple! Store any leftover slices in an airtight container in the refrigerator, where they’ll stay fresh for up to 3 days. Make sure the cake is well covered to prevent it from absorbing any odors from the fridge. To keep it in top shape, it’s best not to slice it until you’re ready to serve.
Can I freeze my Brownie Refrigerator Cake?
Of course! To freeze, wrap each slice tightly in plastic wrap, then place them in a freezer-safe bag. This will help preserve the flavors and texture. You can freeze it for up to 2 months. When you’re ready to enjoy, simply thaw the slices overnight in the fridge—this keeps them creamy and delicious.
How can I troubleshoot if my layers are not holding together?
If your layers are separating when you cut into the cake, it’s likely due to under-chilling. Ensure the cake is refrigerated for at least 2 hours, but overnight is even better for achieving that perfect set. For super neat slices, always use a sharp knife and clean it between cuts—this helps maintain the integrity of those beautiful layers!
Can I make this recipe dairy-free or gluten-free?
Absolutely! This Brownie Refrigerator Cake is incredibly customizable. For a dairy-free option, opt for dairy-free cream cheese and coconut-based whipped topping. If you need it gluten-free, simply swap in a gluten-free brownie mix. You can still achieve that luscious, creamy texture and satisfy your sweet tooth without compromise.
Is this dessert pet-friendly?
It’s best to keep this Brownie Refrigerator Cake away from pets, especially due to ingredients like chocolate and certain dairy components that can be harmful. Always ensure that any given treats align with pet dietary needs, as safety first is a must in every kitchen!
Irresistible Brownie Refrigerator Cake for Effortless Indulgence
Ingredients
Equipment
Method
- Prepare Brownies: Bake the brownies according to package instructions, then let them cool completely for at least 1 hour.
- Make Cream Cheese Layer: Beat the softened cream cheese in a bowl until smooth. Gradually add the prepared chocolate pudding and stir until well combined.
- Layering: Once the brownies are cool, evenly spread the cream cheese mixture over the brownie base.
- Add Whipped Topping: Gently smooth a layer of whipped topping over the cream cheese mixture.
- Chill: Cover the dessert and refrigerate it for at least 2 hours, or overnight if possible.
- Serve: Slice the cake into squares using a sharp knife.