There’s nothing quite like the playful burst of flavors that comes with a well-made Dahi Vada. I remember the first time I ventured into the joyous chaos of Indian street food, and this delectable dish immediately caught my attention. Imagine crispy urad dal fritters that soak up creamy yogurt, enveloped by a vibrant medley of tangy tamarind and fresh green chutney. It’s a festival of textures and tastes!
Whether you’re hosting a festive gathering or simply seeking a delightful weekend snack, Dahi Vada embodies versatility and charm. This vegetarian, gluten-free treat can easily be adapted to your dietary needs, allowing you to enjoy the essence of Indian cuisine right from your kitchen. Plus, the best part is that you can even bake or air-fry the vadas if you prefer a lighter option! So, let’s dive into this delightful recipe that’s sure to impress your friends and family while satisfying your cravings for homemade goodness.

Why is Dahi Vada a Must-Try Recipe?
Irresistible flavor fusion: The combination of creamy yogurt and tangy chutneys creates an explosion of taste that delights the palate.
Simple preparation: With basic baking skills, you can master this dish in no time.
Versatility: Whether served at parties or enjoyed as a snack, it’s perfect for any occasion.
Crowd pleaser: Impress your guests with a restaurant-quality dish made right at home.
Healthy indulgence: Rich in protein and probiotics, this recipe is both delicious and nutritious, especially when you opt for the gluten-free version.
Customizable: Feel free to experiment with toppings or choose to bake or air-fry for a lighter twist!
Dahi Vada Ingredients
For the Vadas
• White Urad Dal – Provides a light and fluffy texture. Use soaked split skinned black gram lentils for authenticity.
• Green Chilli (Optional) – Adds heat to the batter; omit for a milder flavor.
• Ginger – Enhances flavor with a warming spice note; freshly grated ginger is best for this recipe.
• Cumin Seeds – Contributes earthy flavor and aroma; toast lightly for a stronger taste in your vadas.
• Asafoetida – Instantly enhances savory flavor; skip for a gluten-free option.
• Black Salt – Adds a unique taste; you can substitute with regular salt if unavailable.
• Salt – Essential for overall flavor enhancement; adjust according to your taste preferences.
• Oil – For deep frying; ensure it’s suitable for frying (e.g., vegetable or canola oil).
For the Yogurt Topping
• Thick Plain Yogurt – Forms the creamy base for serving; full-fat is recommended for richness and taste.
For the Chutneys
• Date and Tamarind Chutney – Sweet-tangy topping that uses dates and tamarind paste for a complex flavor profile.
• Spicy Green Chutney – Made from fresh coriander, mint, and chili which adds zest and contrast to the dish.
For Garnish
• Roasted Cumin Powder, Red Chili Powder, Chaat Masala – Essential spices for finishing touches; adjust according to your preferred spice level.
• Sev (Optional) – Garnish to add crunch and texture; can be omitted for a gluten-free option.
Now, you’re equipped with the ingredients to create this delightful Dahi Vada! Dive in and let the flavors take you on a culinary adventure.
How to Make Dahi Vada
-
Rinse and Soak
Rinse the white urad dal thoroughly until the water runs clear. Soak the dal overnight or in hot water for 4–5 hours to soften it, which helps achieve the perfect texture for your vadas. -
Blend the Batter
Drain the soaked dal and transfer it to a blender. Add ginger and green chili (if using) and blend with minimal water until you achieve a thick batter. Ensure it’s smooth for fluffy vadas. -
Whip for Airiness
Whip the batter vigorously for about 5 minutes. This step is crucial as it incorporates air, giving your vadas a light, fluffy texture. Mix in cumin seeds, asafoetida, black salt, and regular salt to bring all the flavors together. -
Fry the Vadas
Heat oil in a deep pan over medium heat. Once the oil is hot, use a spoon or your hands to drop small scoops of the batter into the oil. Fry until golden brown and crispy. -
Soak and Squeeze
After frying, soak the vadas in warm water for 15-20 minutes. This allows them to soften further. After soaking, gently squeeze each vada to remove excess water, preparing them for the yogurt topping. -
Prepare the Yogurt
In a bowl, whisk the thick plain yogurt with a pinch of salt. For a hint of sweetness, you can add sugar. Coat the squeezed vadas generously in the yogurt, ensuring they are well-covered. -
Chill and Serve
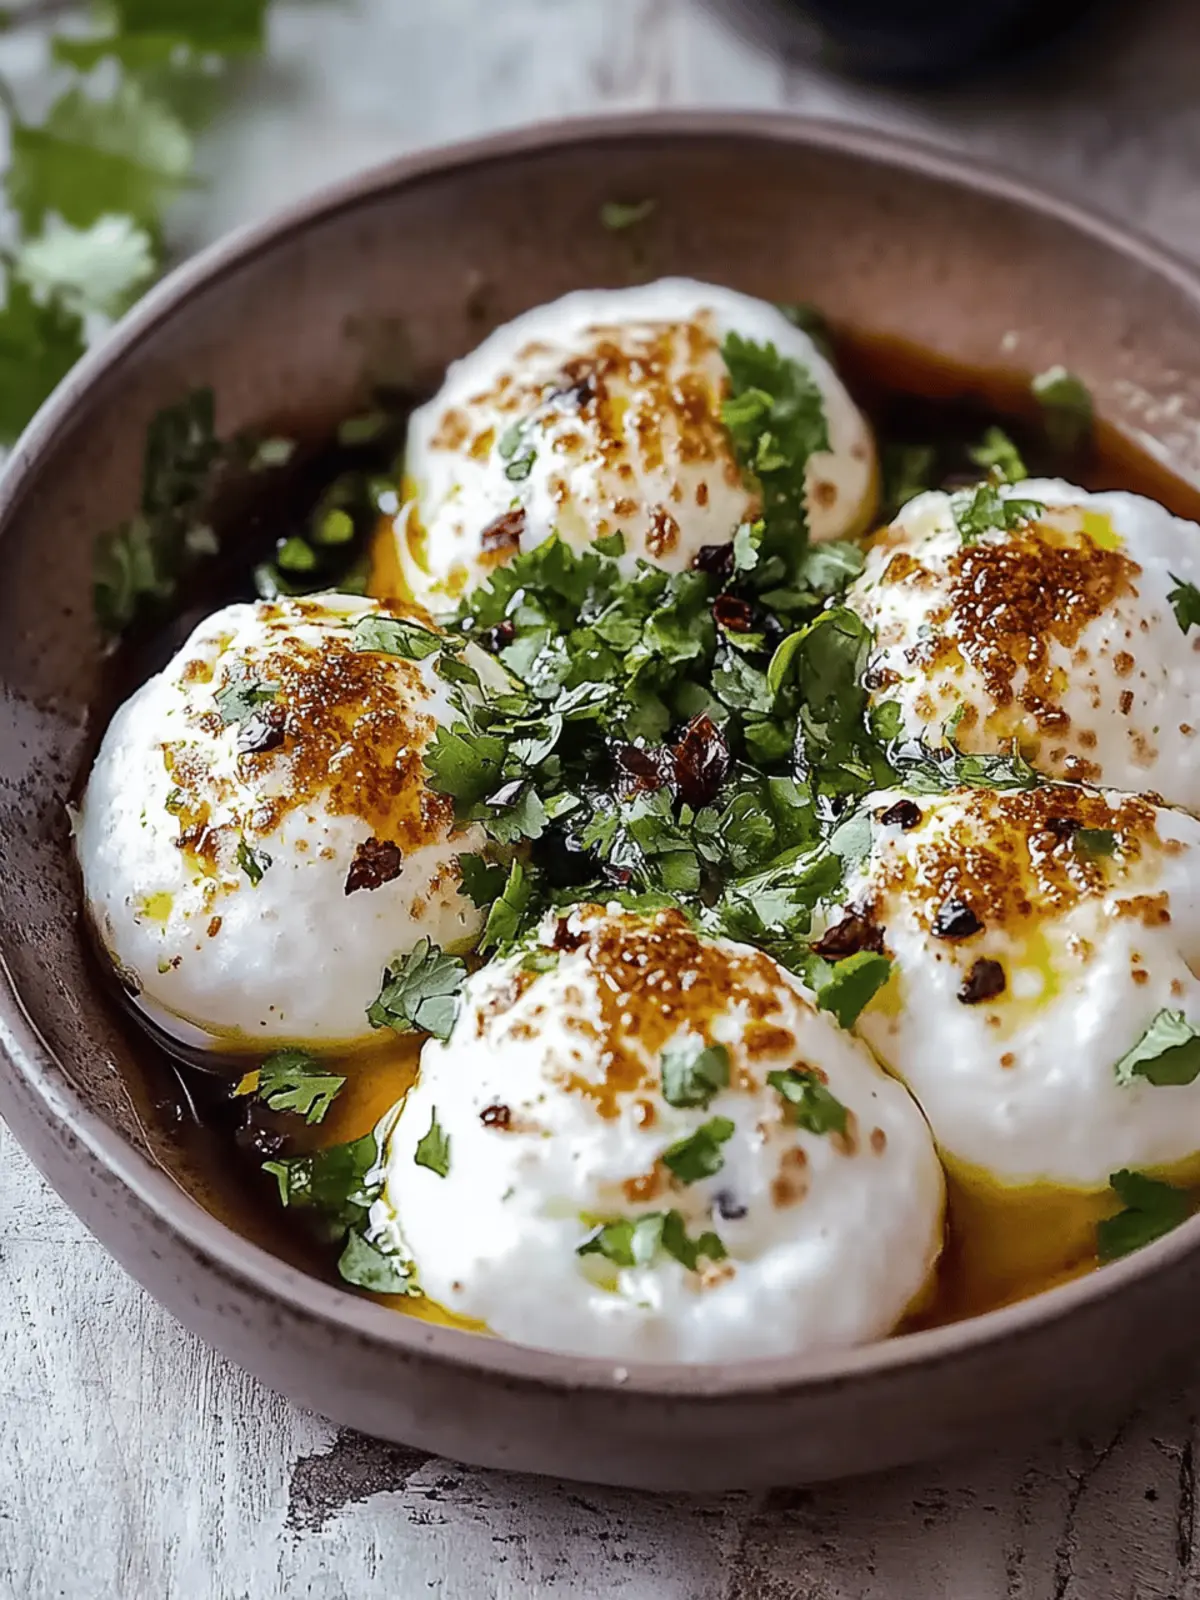
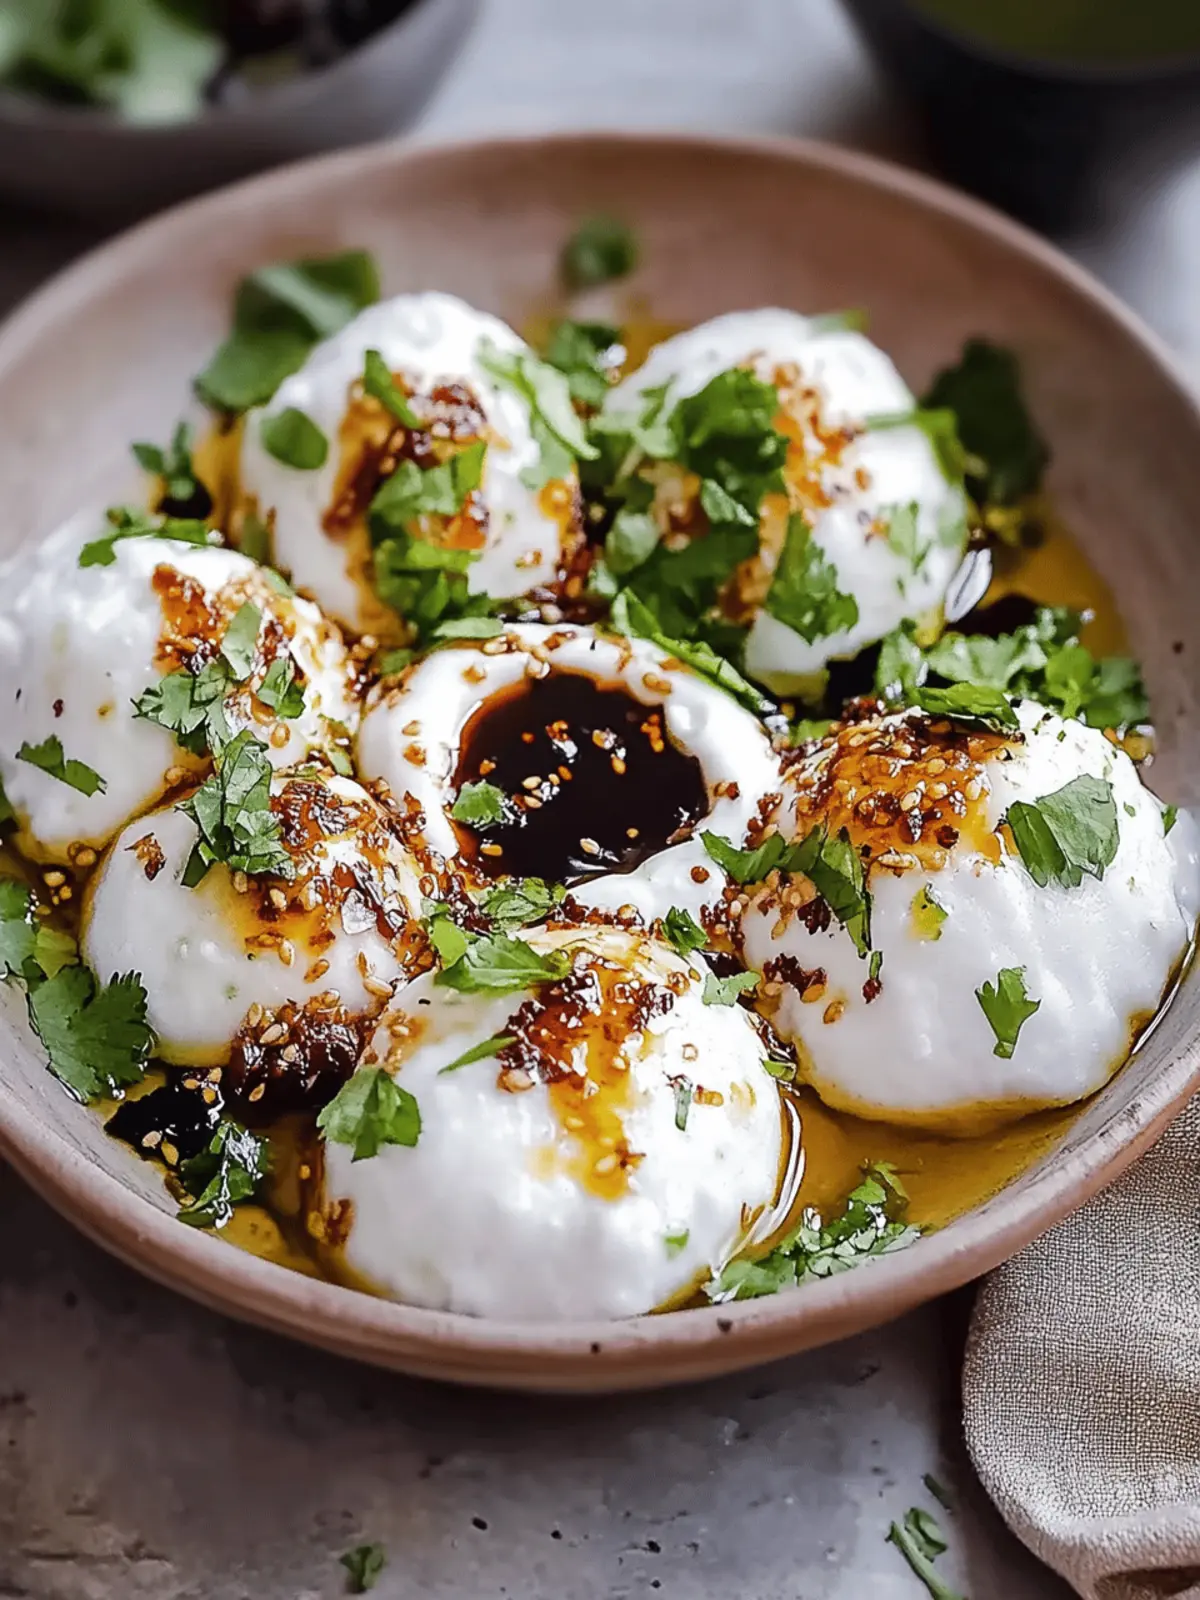
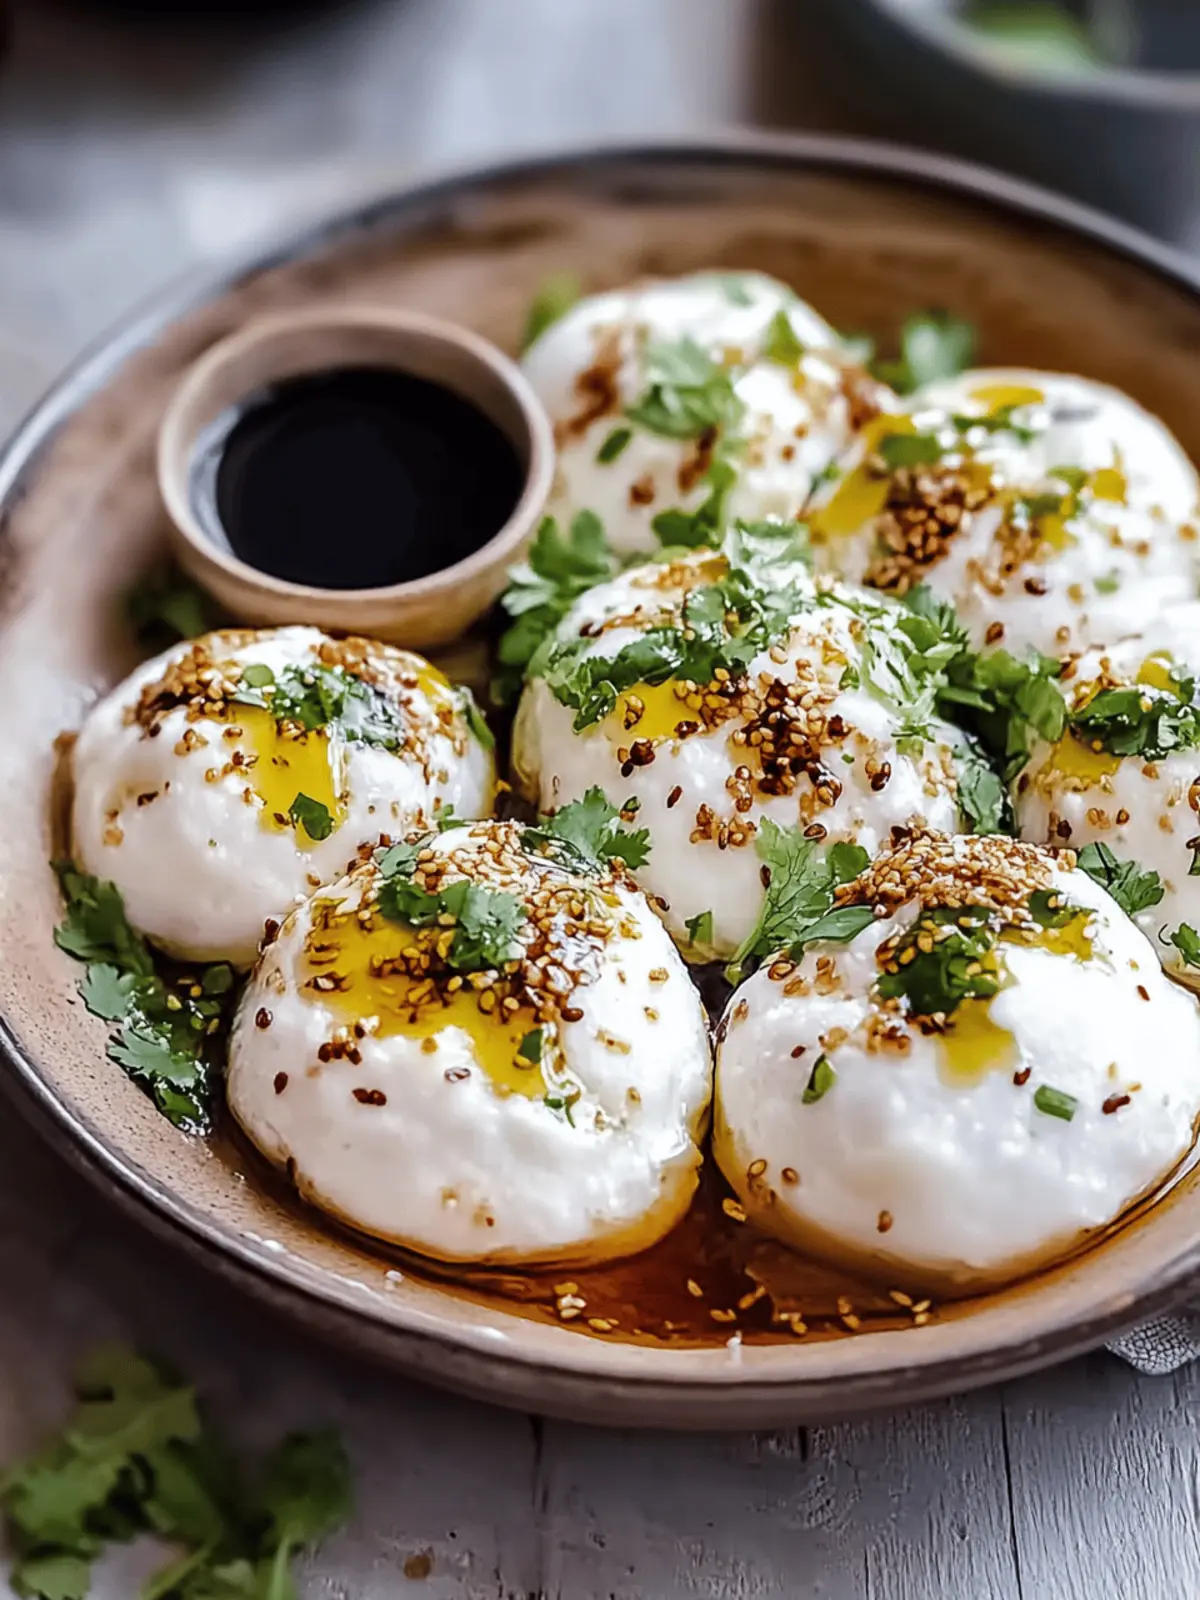
Chill the assembled Dahi Vada in the refrigerator for 1-2 hours to allow the flavors to meld. Serve topped with additional yogurt, drizzles of date and tamarind chutney, and spicy green chutney for a flavor-packed experience!
Optional: Garnish with a sprinkle of roasted cumin powder, red chili powder, and sev for added crunch.
Exact quantities are listed in the recipe card below.
What to Serve with Dahi Vada?
Complementing the flavorful experience of Dahi Vada can elevate your meal to new heights.
-
Crispy Papadum: A light and crunchy side offering a delightful contrast to the creamy Dahi Vada, perfect for snacking!
-
Chickpea Salad: This refreshing salad, with its tangy dressing and crunchy veggies, balances the richness of the vadas beautifully.
-
Mint Raita: Cooling and refreshing, this yogurt dish enhances flavors and offers a creamy element between bites of vada.
-
Seekh Kebabs: For a heartier plate, these spiced meat skewers add a savory note that contrasts wonderfully with the tangy yogurt.
-
Vegetable Biryani: A fragrant spiced rice dish that creates a satisfying, aromatic backdrop for the delightful Dahi Vada.
-
Sweet Lassi: This creamy yogurt drink, with its subtle sweetness, offers a cooling contrast to the spices of Dahi Vada, making it a perfect pairing.
Embrace the joy of creating a vibrant feast, bringing together flavors and textures that invite both conversation and satisfaction at your table.
Dahi Vada Variations & Substitutions
Feel free to get creative and customize your Dahi Vada experience with these delicious variations!
-
Chana Dal: Substitute urad dal with chana dal for a nuttier flavor and slightly different texture.
-
Baked Option: Try baking the vadas instead of frying for a lighter version that’s equally satisfying and crispy.
-
Air-Fried Twist: Use an air fryer to cook your vadas, allowing you to enjoy the crunch with less oil.
-
Herbed Delight: Add fresh herbs like chopped mint or coriander into the batter for an aromatic twist that will brighten each bite.
-
Nutty Crunch: Top with chopped nuts such as almonds or pistachios instead of sev for a delightful crunch and added nutrition.
-
Spicy Kick: Increase the heat by mixing more green chilies into the batter or adding a sprinkle of crushed red pepper on top.
-
Fruit Fusion: Enhance your savory dish by adding diced pomegranate seeds on top for a sweet burst and vibrant color.
-
Tangy Yogurt: Mix in flavors like mint yogurt or flavored yogurt for a unique spin that complements the traditional recipes beautifully.
Expert Tips for Dahi Vada
• Batter Consistency: Ensure your batter is thick yet smooth. A batter that’s too runny will produce soggy vadas instead of fluffy ones.
• Frying Temperature: Maintain medium heat when frying the vadas. Too hot, and they’ll brown quickly without cooking through; too cool, and they’ll absorb excess oil.
• Soaking Time: Don’t skip soaking the fried vadas in warm water. This step is key to achieving the delightful softness that complements the creamy yogurt.
• Yogurt Quality: Use full-fat yogurt for a richer and creamier coating. Whisk it well to ensure there are no lumps before dipping your vadas.
• Serve Immediately: For the best taste and texture, assemble the Dahi Vada shortly before serving. This prevents the vadas from getting too soggy.
• Chutney Balance: Adjust the flavors of your chutneys to personal preference. A bit more tamarind can enhance sweetness or more green chili can kick up the heat in your Dahi Vada.
How to Store and Freeze Dahi Vada
Fridge: Store leftover Dahi Vada in an airtight container in the fridge for up to 3 days. Keep the yogurt and chutneys separate until ready to serve to maintain their texture.
Freezer: For freezing, let the vadas cool completely, then place them in a single layer on a baking sheet. Freeze for 1-2 hours, then transfer to a freezer-safe bag. They can be stored for up to 2 months.
Reheating: Reheat frozen Dahi Vada by placing them in a preheated oven at 350°F (175°C) for about 10-15 minutes. Serve with freshly whipped yogurt and chutneys for the best flavor.
Make-Ahead Tip: You can prepare the vadas a day ahead and refrigerate them. Assemble with yogurt and chutneys just before serving to preserve the delightful freshness of Dahi Vada.
Make Ahead Options
Dahi Vada is a fantastic dish for meal prepping that can save you time on busy weekdays! You can prepare the vadas up to 24 hours in advance by following the full frying process and then storing them in an airtight container in the refrigerator. When you’re ready to serve, soak the vadas in warm water for about 15-20 minutes to soften, gently squeezing out excess water before coating them with yogurt. To keep everything fresh, I recommend waiting to add the chutneys until just before serving. This way, your Dahi Vada will remain just as delicious and vibrant as if you made them that day, providing a delightful treat for you and your family!
Dahi Vada Recipe FAQs
How do I choose ripe ingredients for Dahi Vada?
Absolutely! For the best results, choose high-quality white urad dal. Look for lentils that are clean and free of debris. The dal should be whole, without dark spots or damage. If using chilies, opt for fresh, vibrant green ones to add that perfect kick.
What is the best way to store leftover Dahi Vada?
After enjoying your Dahi Vada, store any leftovers in an airtight container in the fridge for up to 3 days. To keep the yogurt from slipping off the vadas, I’d recommend keeping the yogurt and chutneys separate until you’re ready to serve.
Can I freeze Dahi Vada?
Yes, you can freeze Dahi Vada! Once they are completely cooled, lay them flat on a baking sheet and freeze for about 1-2 hours. Once frozen, transfer them to a freezer-safe bag. They will stay good for up to 2 months. When ready to eat, simply reheat them in a preheated oven at 350°F (175°C) for 10-15 minutes. Serve them with whipped yogurt and chutneys.
My Vadas turned out soggy. What went wrong?
Very! If your vadas are soggy, it might be due to too much water being retained after soaking. Remember to soak the fried vadas for only 15-20 minutes and squeeze out excess water before coating them in yogurt. Also, ensure your oil is hot enough while frying. A proper oil temperature (medium heat) will give them that crispy texture.
Are Dahi Vadas suitable for people with gluten allergies?
Yes! Dahi Vada can definitely be made gluten-free by simply skipping the asafoetida. Ensure to use gluten-free ingredients for the chutneys and any additional garnishes. This delightful recipe can be enjoyed safely by those with gluten sensitivities.
How long should I let the assembled Dahi Vada chill before serving?
For the best flavor experience, chill the assembled Dahi Vada in the refrigerator for 1-2 hours before serving. This will help the flavors meld beautifully and enhance the creaminess of the yogurt coating.
Irresistible Dahi Vada: A Festive Flavor Adventure at Home
Ingredients
Equipment
Method
- Rinse the white urad dal thoroughly until the water runs clear. Soak the dal overnight or in hot water for 4–5 hours.
- Drain the soaked dal and transfer it to a blender. Add ginger and green chili (if using) and blend with minimal water until you achieve a thick batter.
- Whip the batter vigorously for about 5 minutes. Mix in cumin seeds, asafoetida, black salt, and regular salt.
- Heat oil in a deep pan over medium heat. Drop small scoops of the batter into the oil and fry until golden brown.
- Soak the vadas in warm water for 15-20 minutes. Gently squeeze each vada to remove excess water.
- Whisk the thick plain yogurt with a pinch of salt. Coat the squeezed vadas generously in the yogurt.
- Chill the assembled Dahi Vada in the refrigerator for 1-2 hours before serving.