Picture this: the warm scent of ripe bananas and buttery pastry wafts through your kitchen as you prepare a batch of homemade Banana Pop Tarts. These delightful gluten-free treats aren’t just a breakfast; they’re a nostalgic nod to childhood mornings when indulgent pastries felt like a guilty pleasure. Little did I know that with just a few simple ingredients and a touch of creativity, I could recreate that joy while ensuring everyone in the family enjoys this gluten-free twist.
Whether you’re reaching for something sweet to kickstart your day or setting out a special snack for the kids, these Banana Pop Tarts are your answer. Imagine flaky, golden crusts cradling luscious banana filling, all drizzled with a creamy peanut butter frosting that makes each bite utterly irresistible. Best of all, they’re easy to whip up, satisfying both the craving for comfort food and the desire for healthier options that won’t send you running back to fast food. Join me in crafting these mini masterpieces that transform an everyday breakfast into a cherished moment!

Why are Banana Pop Tarts a must-try?
Nostalgic flavors are packed into each bite, bringing back the joy of childhood breakfasts. Easy toMake, this recipe takes just a few simple ingredients, making it perfect for a quick morning or snack time solution. Kid-friendly and catering to gluten-free diets, these tarts are a delightful treat for everyone in the family. Customizable for various tastes, feel free to add chocolate chips or experiment with different fillings. Want a complete breakfast? Serve them alongside fresh fruit or yogurt for a wholesome start to your day!
Banana Pop Tarts Ingredients
For the Pastry
- Gluten-Free Flour – An essential base for the pastry; almond flour adds a nutty twist.
- Ripe Bananas – These provide natural sweetness and moisture; the riper, the better!
- Butter – Adds rich flavor and a flaky texture; substitute coconut oil for a vegan option.
For the Frosting
- Peanut Butter – This creamy richness complements the tart; try almond butter for a different flavor.
- Powdered Sugar – Sweetens the frosting; adjust to taste preference for your Banana Pop Tarts.
- Vanilla Extract – Enhances flavor; opt for pure extract for the best results.
Optional Add-Ins
- Chocolate Chips – Add optional sweetness inside the tarts or on top of the frosting.
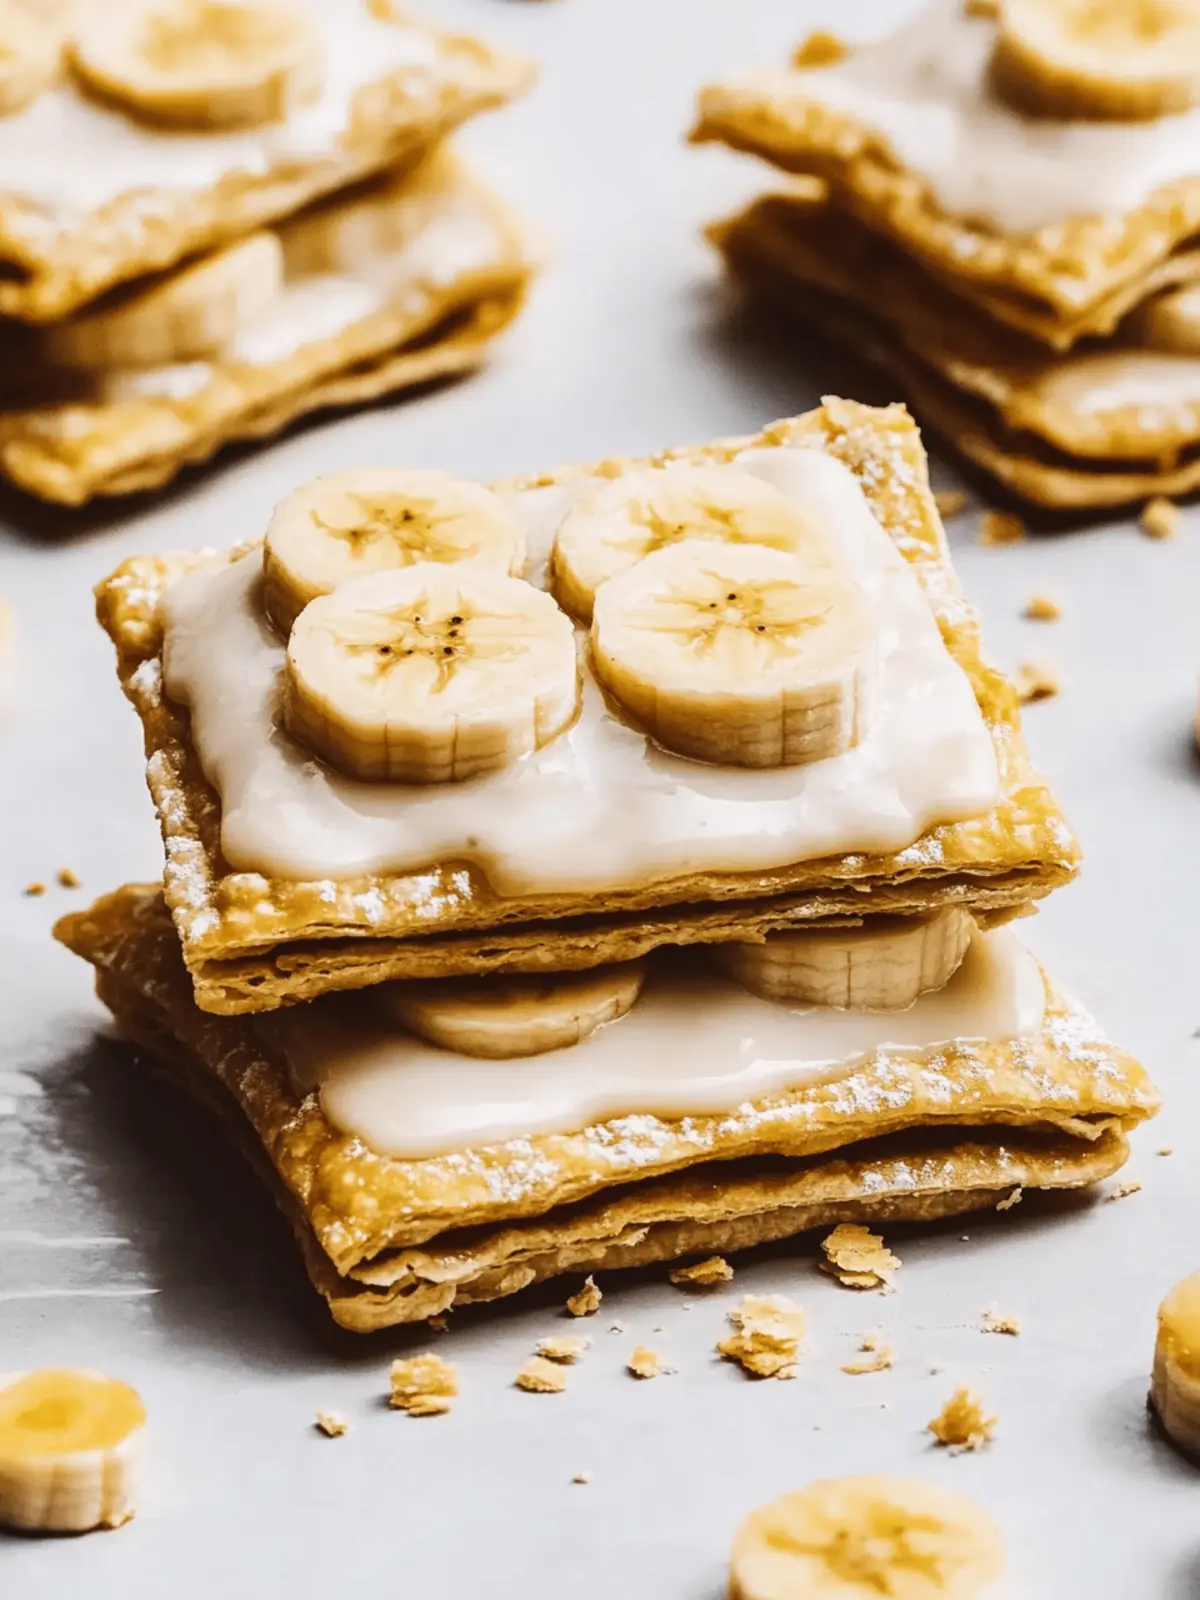
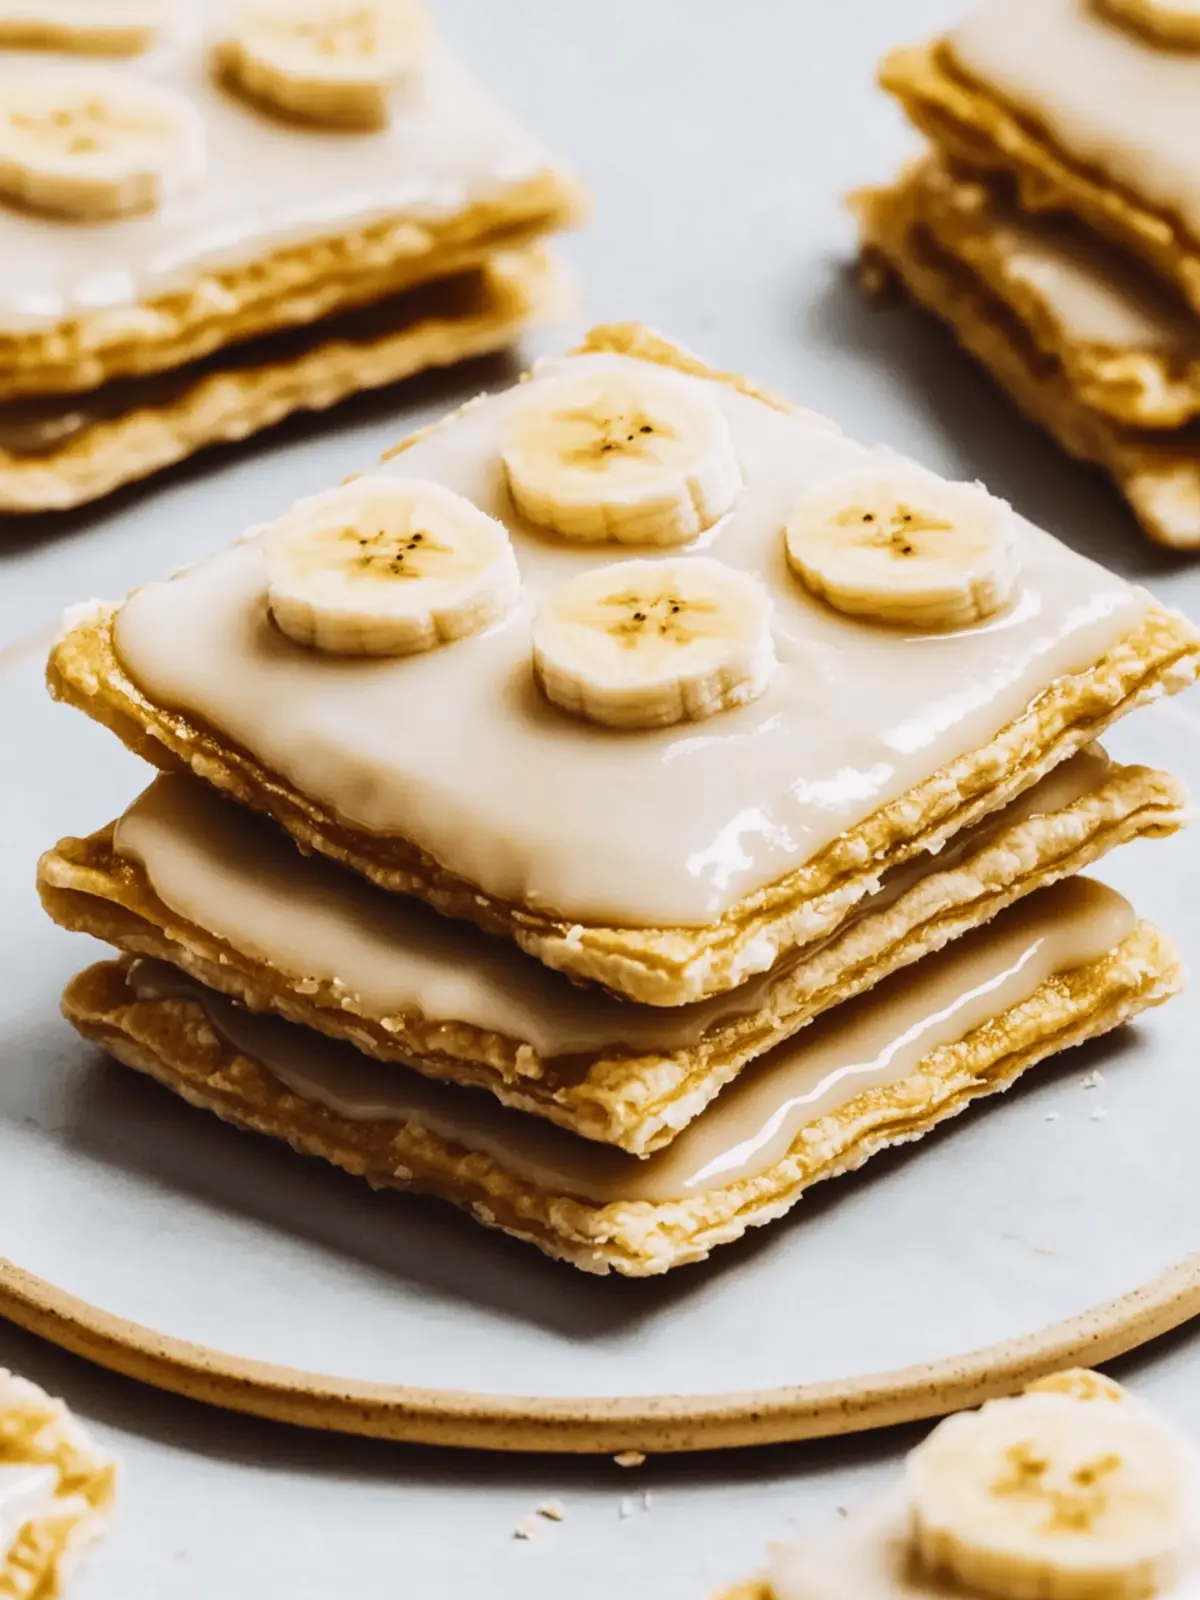
- Sliced Bananas – Fresh banana slices bring extra flavor and make a lovely decoration.
How to Make Banana Pop Tarts
-
Prepare Dough: In a large bowl, mix gluten-free flour, mashed ripe bananas, and softened butter until cohesive—about 3-5 minutes will do. You’re looking for a nice dough that holds together.
-
Chill: Wrap the dough in plastic wrap and refrigerate for about 30 minutes. This helps firm it up, making it easier to roll out.
-
Roll Out Dough: On a floured surface, roll out the dough to about 1/4 inch in thickness. Keep it even to ensure consistent baking.
-
Cut Shapes: Use a pastry cutter to slice the dough into rectangles of your desired pop tart size—think of the old school classic!
-
Bake: Place the cut shapes on a parchment-lined baking sheet and bake at 350°F (175°C) for 15-20 minutes until they appear lightly golden. The aroma will be irresistible!
-
Make Frosting: Whip together the peanut butter, powdered sugar, and vanilla until smooth—about 2-3 minutes. You want it creamy and easily spreadable.
-
Decorate: Once the tarts are completely cooled, spread or pipe the luscious frosting over the tops. Feel free to get creative with the decoration!
Optional: Sprinkle mini chocolate chips on top for an extra sweet touch.
Exact quantities are listed in the recipe card below.

Expert Tips for Banana Pop Tarts
-
Ripe Bananas: Ensure your bananas are very ripe for maximum sweetness and moisture. Overripe bananas will make your pop tarts irresistibly delicious!
-
Flour Matters: If the dough feels sticky, don’t hesitate to sprinkle more gluten-free flour on your work surface. This small adjustment can make a world of difference when rolling it out.
-
Chill the Dough: Don’t skip the chilling step! It helps to firm up the dough, making it easier to handle. If you find the dough too soft, an extra 10-15 minutes in the fridge can help.
-
Even Baking: Ensure uniform sizes when cutting shapes for consistent baking. This way, all your Banana Pop Tarts will come out golden brown and perfectly flaky at the same time.
-
Frosting Texture: Allow frostings to set slightly before serving to prevent any messy spots or smudging. This gives your Banana Pop Tarts a polished look!
-
Storage Tips: Keep any uneaten tarts in an airtight container. They’ll stay fresh at room temperature for up to 3 days, keeping your homemade treats irresistible!
How to Store and Freeze Banana Pop Tarts
- Room Temperature: Store the uneaten Banana Pop Tarts in an airtight container for up to 3 days to keep them fresh and delicious.
- Fridge: For extended freshness, refrigerate the pop tarts in an airtight container for up to 5 days. This will help maintain their flavor and texture.
- Freezer: Freeze individual tarts wrapped in plastic wrap and then in foil or a freezer-safe bag for up to 2 months. Thaw overnight in the fridge before enjoying.
- Reheating: To enjoy them warm, pop the tarts in a toaster or oven at 350°F (175°C) for about 5-10 minutes to restore their flaky goodness.
Banana Pop Tarts Variations
Feel free to unleash your creativity and make these Banana Pop Tarts your own with these delightful twists!
- Nut-Free: Replace peanut butter with sunflower seed butter for a nut-free option that doesn’t compromise on creaminess.
- Chocolate Lover’s Delight: Mix in chocolate chips into the filling for that extra layer of sweetness and decadence—every bite becomes a little party!
- Berry Bliss: Swap bananas for fresh strawberries or blueberries to create a delightful fruit filling that bursts with flavor.
- Cinnamon Spice: Add a sprinkle of cinnamon to the dough or filling for a warm, cozy flavor that pairs beautifully with bananas.
- Savory Twist: Experiment by adding a hint of bacon or crumbled sausage in the filling for a unique sweet and savory breakfast treat.
- Fruity Frosting: Create a fruity frosting by mixing in berry puree or a touch of lemon zest to the peanut butter frosting for a refreshing change.
- Crunchy Toppings: Sprinkle crushed nuts, granola, or coconut flakes on top of the frosting for an added crunchy texture and nutritional boost.
- Spicy Kick: Add a pinch of cayenne or chili powder to the filling for a surprising heat that dances beautifully with the sweetness of bananas.
Enjoy crafting these delicious variations and make each batch unique!
Make Ahead Options
These delightful Banana Pop Tarts are perfect for meal prep enthusiasts! You can prepare the dough up to 24 hours in advance by mixing together the gluten-free flour, mashed bananas, and butter, then wrapping it in plastic wrap and refrigerating. Additionally, you can bake the pop tarts one day ahead and store them in an airtight container at room temperature for up to 3 days. When you’re ready to serve, simply frost them with the peanut butter frosting and let them sit for a few minutes to allow the frosting to set. With these make ahead options, you’ll have fresh, homemade treats that are just as delicious, saving you precious time on busy mornings!
What to Serve with Banana Pop Tarts?
These delightful treats not only tickle your sweet tooth but can also be part of a complete meal that ignites your senses.
-
Fresh Fruit Salad: Juicy berries and crisp apples add freshness to your breakfast, balancing the sweetness of the pop tarts perfectly.
-
Creamy Greek Yogurt: A dollop of yogurt complements the pop tarts’ sweetness while providing a protein boost—flavorful and satisfying!
-
Nutty Granola: A sprinkle of granola offers a crunchy texture to contrast the soft pastry, making each bite exciting and full of flavor.
-
Steaming Cup of Coffee: Pairing these tarts with a rich, aromatic coffee elevates your breakfast experience, turning it into a cozy morning ritual.
-
Hot Chocolate: For a sweeter touch, a mug of hot chocolate creates a comforting atmosphere, especially on chilly mornings, enveloping you in warmth.
-
Coconut Milk Smoothie: A refreshing coconut milk smoothie infused with tropical fruits delivers hydration, striking the right balance to the richness of the pop tarts.
-
Chocolate Dipped Strawberries: Marrying sweet with indulgence, these berries add a luxurious touch to your spread, perfect for special occasions or weekend treats.
-
Caramel Drizzle: A light caramel drizzle over your pop tarts can elevate the flavors, making them even more decadent while enhancing their visual appeal.
Banana Pop Tarts Recipe FAQs
How do I know if my bananas are ripe enough?
Absolutely! For the best flavor in your Banana Pop Tarts, look for bananas with dark yellow skins, and ideally, some brown spots. The more ripe they are, the sweeter and moister they will be, making your pastry deliciously enhanced!
What’s the best way to store leftover Banana Pop Tarts?
Very simple! To keep your uneaten Banana Pop Tarts fresh, place them in an airtight container at room temperature for up to 3 days. If you want them to last a bit longer, you can refrigerate them for up to 5 days. Don’t forget to let them come to room temperature before enjoying their delightful texture!
Can I freeze Banana Pop Tarts?
Absolutely! Here’s how: wrap each cooled pop tart individually in plastic wrap, then place them in a freezer-safe bag. They will stay fresh for up to 2 months in the freezer! When you’re ready to enjoy them, simply thaw overnight in the fridge and reheat them in the oven at 350°F (175°C) for about 5-10 minutes.
What if my dough is too sticky?
If you find your dough a bit sticky while rolling it out, don’t worry! Just sprinkle a little more gluten-free flour on your work surface. Alternatively, you can chill your dough for an extra 10-15 minutes—it helps firm it up and makes it easier to handle.
Are these Banana Pop Tarts safe for those with nut allergies?
Certainly! You can easily substitute the peanut butter in the frosting with sunflower seed butter, making it safe for those with nut allergies. It offers a similar texture and taste, ensuring everyone can enjoy these delightful pop tarts!
Can I add different fillings to my Banana Pop Tarts?
Very much so! Feel free to get creative with fillings. You can incorporate chocolate chips for an extra sweet touch, or even other fruits like strawberries or apples, which can be a fun change from the classic banana. Enjoy personalizing it to your family’s taste!
Homemade Banana Pop Tarts with Creamy Peanut Butter Bliss
Ingredients
Equipment
Method
- Prepare Dough: In a large bowl, mix gluten-free flour, mashed ripe bananas, and softened butter until cohesive—about 3-5 minutes will do.
- Chill: Wrap the dough in plastic wrap and refrigerate for about 30 minutes.
- Roll Out Dough: On a floured surface, roll out the dough to about 1/4 inch in thickness.
- Cut Shapes: Use a pastry cutter to slice the dough into rectangles of your desired pop tart size.
- Bake: Place the cut shapes on a parchment-lined baking sheet and bake at 350°F (175°C) for 15-20 minutes.
- Make Frosting: Whip together the peanut butter, powdered sugar, and vanilla until smooth.
- Decorate: Once the tarts are completely cooled, spread or pipe the frosting over the tops.