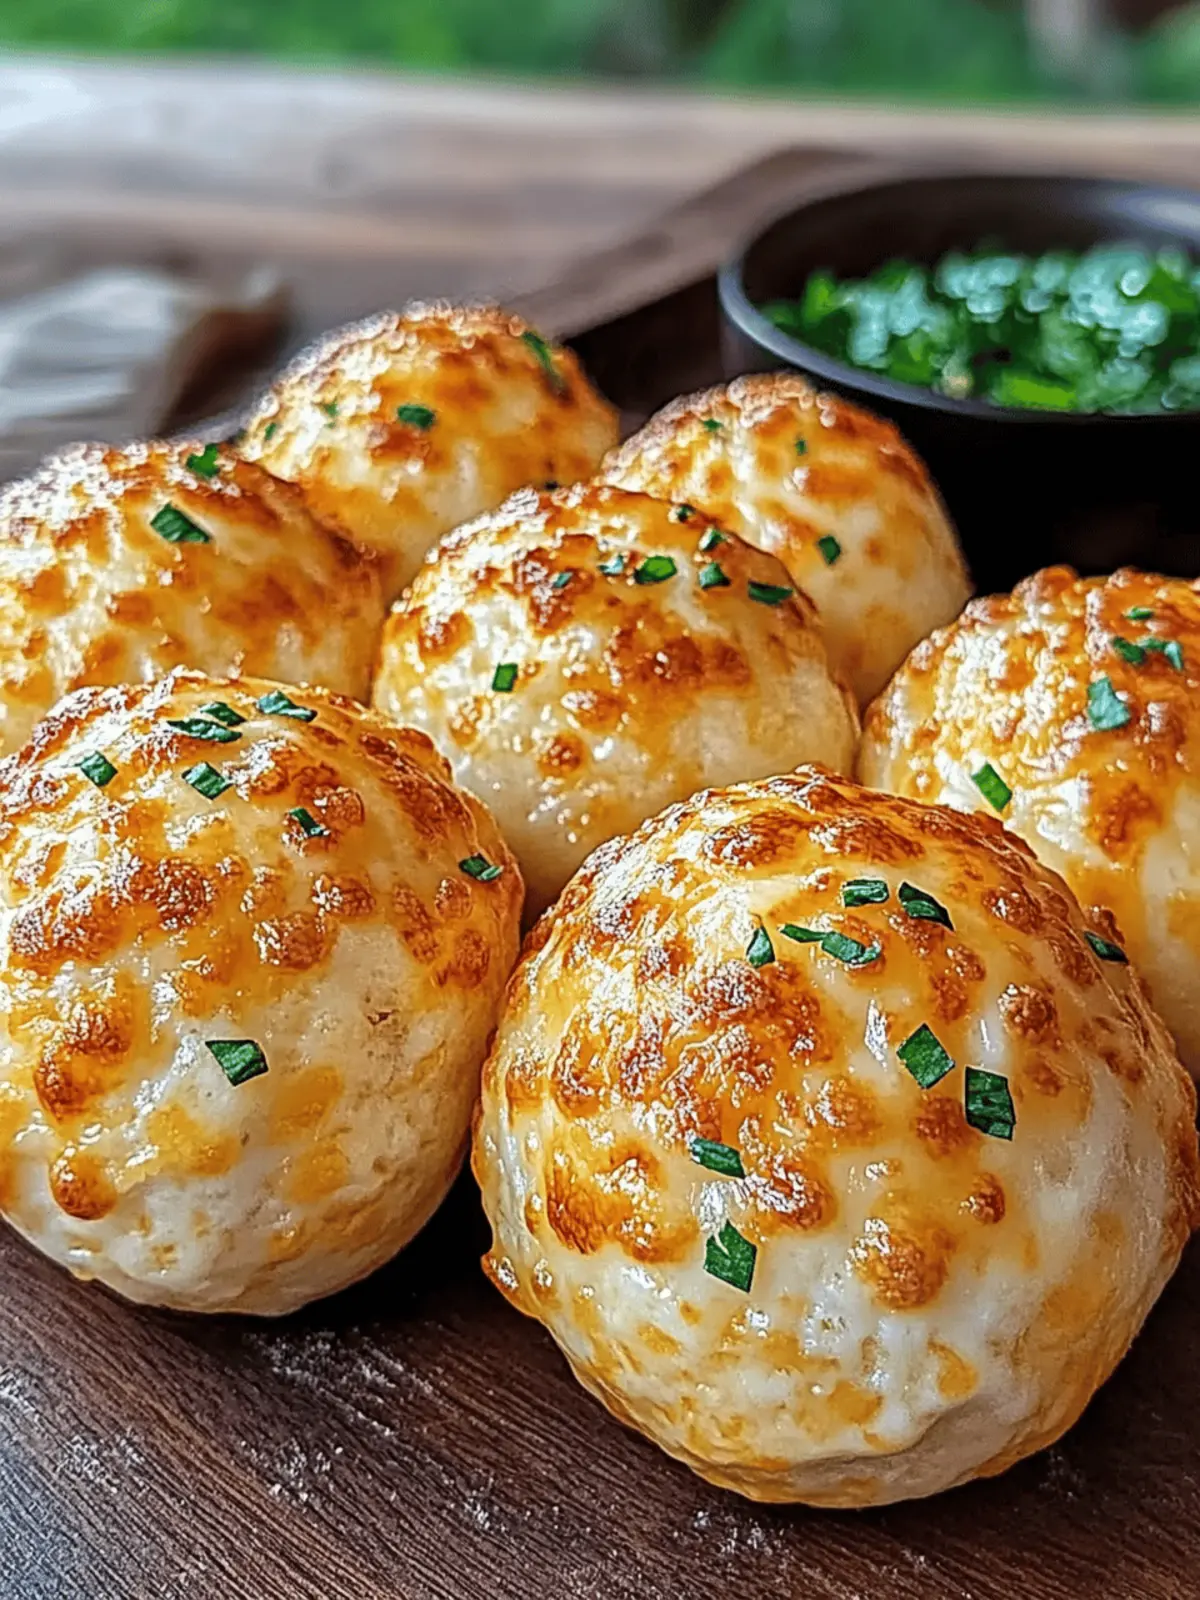
There’s something irresistibly comforting about the aroma of warm bread fresh out of the oven, especially when that bread is packed with gooey cheese and the rich essence of garlic. As the first bite pulls apart, revealing the cheesy goodness inside, I can’t help but smile—these Cheesy Garlic Bombs are simply a delight! Perfect for sharing at gatherings or enjoying on a cozy night in, they offer an explosion of flavor that will have everyone begging for the recipe. Whether you’re a cheese lover looking for a comforting snack or someone seeking a vegan alternative, I’ve got you covered with delicious adaptations. Ready to dive into this scrumptious adventure? Let’s get baking!

Why are Cheesy Garlic Bombs a Must-Try?
Irresistible aroma: The moment they bake, your kitchen fills with a tantalizing garlic fragrance that beckons everyone to gather around.
Gooey goodness: Each bite reveals a delightful blend of mozzarella and ricotta that melts in your mouth, satisfying your cheese cravings.
Versatile options: Whether you’re craving traditional flavors or want to explore vegan versions, there’s a delicious option for everyone.
Easy to make: With simple ingredients and straightforward steps, you can whip these up in no time, making them perfect for any occasion.
Total crowd-pleaser: Serve them as a snack or an appetizer, and watch how quickly they disappear, leaving your guests asking for more.
For even more flavor ideas, check out my Experiment with filling section!
Cheesy Garlic Bombs Ingredients
• For the Dough
- All-purpose flour – Forms the base for the dough; swap it with gluten-free flour for a gluten-free option.
- Baking powder – Essential for the dough to rise and achieve that fluffy texture.
- Salt – Enhances flavor; can be reduced for those watching their sodium intake.
- Milk – Keeps the dough soft and moist; almond milk or oat milk are perfect dairy-free alternatives.
- Unsalted butter – Adds a richness to the dough; use coconut oil for a dairy-free version.
• For the Filling
- Mozzarella cheese – This is the star for gooey texture; vegan cheese can be used for dairy-free Cheesy Garlic Bombs.
- Ricotta cheese – Offers a creamy component; consider using dairy-free ricotta or blended silken tofu.
- Garlic (minced) – Provides a robust flavor; fresh garlic is ideal, but powdered can work in a pinch.
- Fresh parsley – Adds a pop of brightness; dried parsley can substitute, but fresh is best for flavor.
- Red pepper flakes (optional) – Introduces a spicy kick; feel free to omit if you prefer a milder taste.
• For the Topping
- Egg (beaten) – Gives the tops a beautiful golden finish; skip for vegan versions or use a flax egg.
- Olive oil – A light drizzle aids in browning; melted coconut oil can provide a unique flavor twist.
How to Make Cheesy Garlic Bombs
-
Preheat Oven: Begin by heating your oven to 400°F (200°C) and prepare a baking sheet by lining it with parchment paper.
-
Mix Dry Ingredients: In a large bowl, whisk together the all-purpose flour, baking powder, and salt until they are fully combined. This creates a solid foundation for your dough.
-
Combine Wet Ingredients: In a separate bowl, mix the milk and melted unsalted butter together. Gradually add this mixture to the dry ingredients, stirring until a dough begins to form.
-
Knead the Dough: Lightly flour a clean surface and transfer the dough onto it. Knead gently for about 2-3 minutes until you achieve a smooth and soft texture.
-
Prepare the Filling: In a bowl, mix the mozzarella, ricotta, minced garlic, chopped parsley, and red pepper flakes (if using) until everything is well combined and ready to go.
-
Form the Bombs: Divide the dough into 12 equal pieces. Flatten each piece, place a generous amount of the cheese mixture into the center, and carefully pinch the edges to seal the bombs.
-
Egg Wash: Before baking, brush the tops of each bomb with a beaten egg for that beautiful golden color. Drizzle olive oil over them for extra flavor and crispness.
-
Bake: Place the bombs in the oven and bake for 15-20 minutes, or until they turn golden brown and puff up nicely, creating that irresistible look.
-
Serve: Once baked, allow the bombs to cool slightly before serving warm. Enjoy this delightful treat!
Optional: Serve with marinara sauce or garlic aioli on the side for delicious dipping.
Exact quantities are listed in the recipe card below.

Make Ahead Options
These Cheesy Garlic Bombs are perfect for meal prep! You can prepare the dough and filling up to 24 hours in advance, allowing you to speed up the cooking process on busy days. Simply mix the dough and filling, then store them separately in airtight containers in the refrigerator. When you’re ready to bake, form the bombs and apply the egg wash before cooking. For the best quality, avoid assembling the bombs until just before baking to ensure they stay fresh and puffy. This way, you can enjoy delicious, warm Cheesy Garlic Bombs with minimal effort on hectic weeknights!
Expert Tips for Cheesy Garlic Bombs
-
Choose Fresh Ingredients: Using fresh garlic and herbs enhances the flavor of your Cheesy Garlic Bombs significantly—don’t skimp on quality!
-
Knead with Care: Knead the dough just enough to become smooth; over-kneading can lead to tough bombs. Aim for tenderness!
-
Fill Just Right: Be cautious not to overfill your bombs; too much filling can cause them to burst open during baking. Less is more!
-
Golden Finish: For that gorgeous golden color, brush the tops of your bombs with egg wash or a dairy-free alternative before baking.
-
Baking Surface: For optimal crispiness, bake on a hot baking stone if you have one; it helps create that desirable crunch on the outside.
What to Serve with Cheesy Garlic Bombs?
These delightful bites deserve a place on a full meal table, bringing warmth and flavor to every gathering.
- Marinara Sauce: The classic pairing; its tangy sweetness perfectly complements the savory, cheesy goodness of the bombs.
- Garlic Aioli: A creamy garlic dip that enhances the flavors and adds a rich texture, turning every bite into a gourmet experience.
- Fresh Garden Salad: A crisp salad of mixed greens, cucumbers, and tomatoes for a refreshing crunch to balance out the richness of the bombs.
- Roasted Vegetables: Caramelized veggies bring earthiness and sweetness, rounding out the meal with wholesome nutrition.
- Cheesy Spinach Dip: Keep the cheese theme going! This creamy dip adds another layer of cheesy goodness that pairs beautifully with the bombs.
- Sparkling Lemonade: A light, fizzy drink that brings brightness to your meal, cutting through the richness in the best possible way.
- Baked Potato Wedges: Crispy on the outside and fluffy inside, these make for a hearty side that’s perfect for dipping into sauces.
- Chocolate Fondue: For dessert, a gooey chocolate fondue offers a decadent contrast to the savory bombs; the perfect sweet ending!
Make your meal an inviting feast by pairing these delicious options with your Cheesy Garlic Bombs!
How to Store and Freeze Cheesy Garlic Bombs
-
Fridge: Store leftovers in an airtight container in the fridge for up to 3 days. This keeps your Cheesy Garlic Bombs fresh and ready for a quick snack!
-
Freezer: Wrap individual bombs tightly in plastic wrap, then place them in a freezer-safe bag for up to 3 months. This makes them perfect for enjoying later.
-
Reheating: To reheat, simply bake from frozen at 350°F (175°C) for 15-20 minutes or until warmed through. You’ll enjoy that fresh-out-of-the-oven taste!
Cheesy Garlic Bombs Variations
Feel free to unleash your creativity in the kitchen, customizing these delightful bites to suit your taste buds!
-
Gluten-Free: Use a 1:1 gluten-free flour blend instead of all-purpose flour, ensuring everyone can enjoy these yummy bombs.
-
Dairy-Free: Swap mozzarella and ricotta for vegan cheese alternatives for a plant-based treat bursting with cheesy goodness.
-
Spicy Kick: Add diced jalapeños or hot sauce to your cheese filling for those who love a fiery burst with every bite.
-
Herbed Heaven: Mix in fresh herbs like basil or thyme into the cheese mixture for an aromatic twist that elevates the flavor profile.
-
Veggie Boost: Incorporate cooked spinach or artichokes into the filling to add nutrition and color, making them a wholesome snack.
-
Sweet Surprise: For a unique dessert twist, replace the savory filling with a mixture of cream cheese and chocolate chips for a sweet bomb!
-
Smoky Flavor: Add smoked paprika or finely chopped sun-dried tomatoes to the filling for a hint of smokiness that will surprise your taste buds.
-
Nutty Texture: Toss in some pine nuts or crushed walnuts for an added crunch, creating a delightful contrast with the gooey cheese.
Cheesy Garlic Bombs Recipe FAQs
How do I choose the best garlic for my Cheesy Garlic Bombs?
Absolutely! For the best flavor, opt for fresh garlic—look for cloves that are firm and plump without any sprouting or dark spots. Fresh garlic delivers a more robust taste than powdered garlic, enhancing the overall flavor of your cheesy filling.
What’s the best way to store leftover Cheesy Garlic Bombs?
Very! Store any leftovers in an airtight container in the fridge for up to 3 days. If you don’t think you’ll finish them within that timeframe, freezing is a great option!
How can I freeze Cheesy Garlic Bombs for later?
Certainly! Wrap each bomb tightly in plastic wrap and place them in a freezer-safe bag. This will keep them fresh for up to 3 months. When you’re ready to enjoy them, just bake from frozen at 350°F (175°C) for about 15-20 minutes until heated through.
What can I do if my dough is too sticky?
No worries! If your dough feels too sticky, you can gradually add a little more flour, about a tablespoon at a time, until it reaches a manageable consistency. Be careful not to add too much at once, as this can make the dough tough.
Can I make Cheesy Garlic Bombs vegan or gluten-free?
Absolutely! To make a vegan version, substitute the mozzarella and ricotta cheese with vegan cheese and use almond or oat milk instead of regular milk. For gluten-free, swap the all-purpose flour with a gluten-free flour blend—both options provide delicious alternatives without losing flavor!
Can I add extra fillings to my Cheesy Garlic Bombs?
Of course! Feel free to get creative! You can add spinach, sun-dried tomatoes, sliced jalapeños, or even fresh herbs like basil or thyme. Just be cautious not to overfill, as that can lead to leaks while baking. Enjoy experimenting!

Melt-In-Your-Mouth Cheesy Garlic Bombs for Cozy Nights
Ingredients
Equipment
Method
- Preheat Oven: Begin by heating your oven to 400°F (200°C) and prepare a baking sheet by lining it with parchment paper.
- Mix Dry Ingredients: In a large bowl, whisk together the all-purpose flour, baking powder, and salt until fully combined.
- Combine Wet Ingredients: In a separate bowl, mix the milk and melted unsalted butter together, then add this mixture to the dry ingredients.
- Knead the Dough: Lightly flour a clean surface, transfer the dough onto it, and knead gently for 2-3 minutes.
- Prepare the Filling: In a bowl, mix mozzarella, ricotta, minced garlic, chopped parsley, and optional red pepper flakes.
- Form the Bombs: Divide the dough into 12 equal pieces, flatten each, place filling in the center, and pinch to seal.
- Egg Wash: Brush the tops with a beaten egg and drizzle with olive oil.
- Bake: Place in the oven and bake for 15-20 minutes until golden brown.
- Serve: Allow to cool slightly before serving warm.